

There’s something undeniably magical about biting into a warm, freshly made donut, and when it’s a homemade Krispy Kreme, it’s a whole new level of indulgence. With their soft, airy texture, golden exterior, and the signature sweet glaze that melts in your mouth, these donuts are a delightful treat for any time of the day. Whether you’re planning to enjoy them for breakfast or as an afternoon snack, homemade Krispy Kremes bring that familiar, comforting flavor straight to your kitchen.
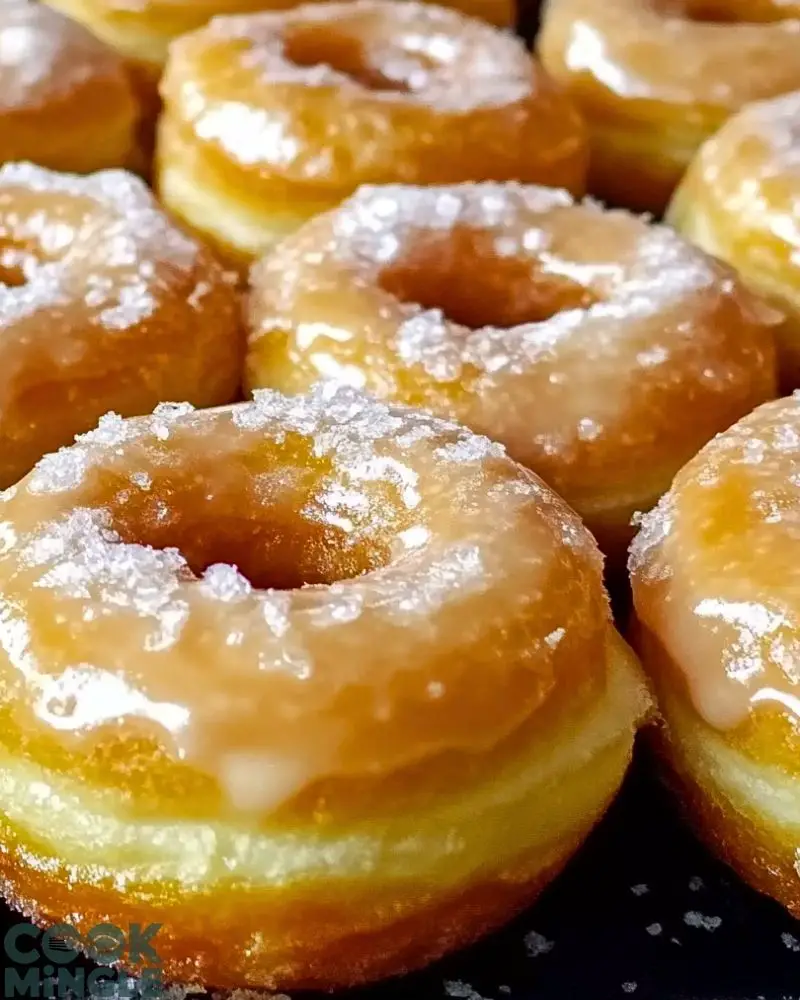
What makes these donuts even more special is the simple process of making them at home. You can recreate the same delightful taste without any fancy equipment or ingredients. The beauty of homemade Krispy Kremes is in their ability to transform any morning into a special occasion. With just a few steps, you’ll be sinking your teeth into that light, pillowy texture and sweet glaze – an experience that’s both nostalgic and completely irresistible.
Why You’ll Love This Homemade Krispy Kremes
Making Krispy Kremes at home means you can enjoy the classic donut experience without leaving the comfort of your kitchen. The process is surprisingly simple, and the results are absolutely worth it. With the perfect balance of crispiness on the outside and a soft, fluffy interior, these donuts are a crowd-pleaser. Whether you’re a donut enthusiast or just looking for a fun baking project, these homemade Krispy Kremes offer a treat that’s hard to beat. Plus, the warm glaze gives them that signature sweetness that everyone loves.
Preparation Phase & Tools to Use
Essential Tools and Equipment + Importance of Each Tool
Making homemade Krispy Kremes requires a few essential tools to ensure the process goes smoothly and your donuts turn out perfectly. Here’s a breakdown of what you’ll need:
- Stand Mixer or Hand Mixer: A stand mixer is ideal for kneading the dough, but a hand mixer will also work. The key is to make sure the dough is smooth and elastic, which is essential for achieving that perfect texture.
- Large Mixing Bowls: For combining the ingredients and letting the dough rise, a couple of large mixing bowls will be necessary. The dough needs enough space to expand as it rises.
- Rolling Pin: A rolling pin is essential for flattening the dough to the perfect thickness for cutting out the donuts.
- Donut Cutter or Round Cookie Cutters: For shaping the donuts, a donut cutter is ideal, but if you don’t have one, round cookie cutters of different sizes will work just as well.
- Deep Fryer or Heavy Pot: To achieve the perfect golden color and crispness, frying your donuts in a deep fryer or a large, heavy pot with oil is essential.
- Thermometer: A thermometer is important to monitor the oil temperature. You want to fry your donuts at around 350°F to get that crisp outer layer without burning them.
- Cooling Rack: After frying, a cooling rack is necessary for draining any excess oil and keeping the donuts crispy.
- Pastry Brush: A pastry brush is helpful for glazing the donuts, ensuring an even coat of sweetness.
Preparation Tips
- Let the Dough Rise Properly: The dough needs to rise for about 1 hour until it doubles in size. Make sure the environment is warm, as this will speed up the rise. If you’re in a cooler environment, you can place the bowl in an oven with just the light on to create a warm space for the dough to rise.
- Don’t Overwork the Dough: When kneading the dough, avoid overworking it. The dough should be smooth and elastic, but too much handling can cause the donuts to become dense instead of light and fluffy.
- Maintain Proper Oil Temperature: It’s important to keep the oil at the right temperature for frying. If it’s too hot, the donuts will burn on the outside without cooking through, and if it’s too cold, they’ll absorb too much oil and become greasy. Use a thermometer to ensure the oil stays around 350°F.
- Glaze While Warm: The donuts are best when glazed while still warm. The glaze will melt slightly and adhere better to the surface, giving you that perfect sugary finish.
- Avoid Crowding the Fryer: Don’t overcrowd the donuts in the fryer. Fry them in batches, ensuring there’s enough space between them to cook evenly and get a crispy golden texture.
Ingredients for Homemade Krispy Kremes
To make the perfect homemade Krispy Kremes, you’ll need these simple ingredients that come together to create the soft, fluffy donuts we all love:
For the Donuts:
- 2 ½ teaspoons active dry yeast
- 1 cup warm whole milk (about 110°F)
- ¼ cup granulated sugar
- 1/2 cup unsalted butter, melted
- 2 large eggs
- 4 cups all-purpose flour, plus extra for dusting
- 1 teaspoon salt
- ½ teaspoon vanilla extract
- Vegetable oil (for frying)
For the Glaze:
- 2 cups powdered sugar
- 2 tablespoons whole milk
- 1 teaspoon vanilla extract
- Pinch of salt
These ingredients come together to make a soft, pillowy donut with a deliciously sweet glaze. The yeast helps the dough rise, while the sugar and butter contribute to the flavor and texture. The glaze adds the finishing touch that makes Krispy Kremes so irresistible.
Step 1: Activate the Yeast
In a small bowl, combine the warm milk, sugar, and yeast. Stir gently until the yeast dissolves. Let it sit for about 5 minutes until the mixture becomes frothy, indicating that the yeast is activated and ready for use.
Step 2: Mix the Dough
In a large mixing bowl or the bowl of a stand mixer, combine the flour and salt. Add the activated yeast mixture, melted butter, eggs, and vanilla extract. Mix everything together on low speed using the stand mixer or with a wooden spoon until a dough begins to form.
Step 3: Knead the Dough
Once the dough starts to come together, switch to medium speed and knead the dough for about 5-7 minutes using the stand mixer with the dough hook attachment or by hand until the dough is smooth and elastic. If kneading by hand, you may need to sprinkle a little extra flour to prevent sticking, but be careful not to add too much.
Step 4: Let the Dough Rise
Form the dough into a ball and place it in a lightly greased bowl. Cover the bowl with a clean kitchen towel or plastic wrap and place it in a warm spot to rise for about 1 hour, or until the dough has doubled in size.
Step 5: Roll and Shape the Donuts
Once the dough has risen, turn it out onto a floured surface. Roll it out to about ½ inch thickness. Use a donut cutter or two round cookie cutters (one larger and one smaller) to cut out the donut shapes. Gather any dough scraps and reroll them to cut out more donuts.
Step 6: Heat the Oil
In a deep fryer or large heavy pot, heat the vegetable oil to 350°F. You can use a thermometer to monitor the temperature. Ensure that the oil is deep enough to submerge the donuts fully.
Step 7: Fry the Donuts
Carefully lower a few donuts into the hot oil, being careful not to overcrowd the pot. Fry them for about 1-2 minutes on each side until they’re golden brown. Use tongs or a slotted spoon to flip them and remove them from the oil.
Step 8: Drain the Donuts
Once fried, transfer the donuts to a cooling rack lined with paper towels to drain any excess oil. Let them cool slightly before glazing.
Step 9: Glaze the Donuts
In a separate bowl, whisk together the powdered sugar, milk, vanilla extract, and a pinch of salt until the glaze is smooth and lump-free. Dip each warm donut into the glaze, coating it evenly, and let the excess drip off. Allow the glaze to set for a few minutes before serving.
Notes
- Dough Resting Time: If you’re short on time, you can let the dough rise overnight in the refrigerator. Just punch it down before shaping and allow it to come to room temperature before frying. This will enhance the flavor and make the dough even fluffier.
- Donut Consistency: If the dough feels too sticky during kneading, add small amounts of flour, a tablespoon at a time. However, be careful not to add too much flour as it could make the donuts dense.
- Glaze Thickness: You can adjust the thickness of the glaze by adding more or less milk. For a thicker glaze, use less milk, and for a more delicate, thinner glaze, add a little extra milk.
Watch Out for These Mistakes While Cooking
- Overheating the Oil: It’s crucial to keep the oil temperature at 350°F. If the oil gets too hot, the donuts may burn on the outside before cooking fully inside. If it’s too cold, the donuts may absorb excess oil and become greasy.
- Overworking the Dough: Kneading the dough for too long or too vigorously can lead to dense donuts. Aim for a smooth and slightly tacky dough, but avoid overworking it.
- Not Letting the Dough Rise Enough: Don’t rush the dough’s rise. If it doesn’t double in size, your donuts may turn out heavy rather than light and fluffy. Ensure the dough gets enough time to rise properly before frying.
- Frying Too Many Donuts at Once: Crowding the pot can lower the temperature of the oil, causing uneven frying. Fry in small batches, allowing space for the donuts to float and cook evenly.
- Skipping the Cooling Rack: After frying, it’s essential to place the donuts on a cooling rack to drain excess oil. Using paper towels may leave them soggy, which will affect the texture.
What to Serve With Homemade Krispy Kremes?
These homemade Krispy Kremes are delicious on their own, but they can be paired with a variety of drinks and side dishes to make a full, indulgent experience. Here are a few ideas for what to serve alongside your freshly made donuts:
1. Freshly Brewed Coffee
A classic pairing for donuts, the rich, bold flavor of coffee complements the sweetness of Krispy Kremes. Whether you prefer a dark roast or a lighter brew, the combination is always a crowd-pleaser.
2. Iced Coffee
For warmer days, iced coffee offers a refreshing and slightly creamy contrast to the warm, sugary donuts. Try adding a splash of milk or cream for an extra indulgent touch.
3. Hot Chocolate
For a sweeter, more decadent option, hot chocolate pairs wonderfully with Krispy Kremes, especially during the colder months. Its creamy texture and chocolaty flavor are perfect with the soft donuts.
4. Milk
The timeless combination of donuts and milk is always a hit. Whether it’s whole milk, almond milk, or any milk of your choice, the creaminess balances the sweetness of the glaze perfectly.
5. Fresh Fruit Salad
Add some freshness and balance with a vibrant fruit salad. The tangy fruits like berries and citrus offer a nice contrast to the rich donuts, making for a light and refreshing pairing.
6. Scrambled Eggs
For a more substantial breakfast or brunch, serve your Krispy Kremes alongside scrambled eggs. The savory eggs provide a nice contrast to the sweetness of the donuts.
7. Bacon or Sausage
If you’re looking for a sweet and savory breakfast, a side of crispy bacon or sausage will complement the donuts beautifully, adding a salty balance to the sweetness.
8. Fruit Juice
Pair your Krispy Kremes with a refreshing glass of fruit juice, such as orange juice or apple juice. The citrusy flavors cut through the sweetness of the donuts, refreshing your palate with every bite.
These pairings will elevate your donut experience, whether you’re enjoying them as a snack, breakfast, or part of a special meal.
Storage Instructions
To keep your homemade Krispy Kremes fresh, follow these storage tips:
- Room Temperature: If you plan to eat the donuts within 1-2 days, store them in an airtight container at room temperature. This will maintain their softness, but be mindful not to keep them for too long, as they can lose their freshness.
- Freezing: Krispy Kremes can be frozen for longer storage. Let the donuts cool completely before placing them in a single layer on a baking sheet. Once frozen, transfer them to an airtight container or freezer bag. They can be stored in the freezer for up to 2 months. When you’re ready to eat them, thaw at room temperature for a few hours or heat them in the microwave for about 10-15 seconds to bring back their softness.
- Refrigeration: If you prefer to refrigerate your donuts, place them in an airtight container. While refrigeration is not ideal for maintaining the texture of the donuts, it can extend their freshness for a few days. Reheat them slightly before serving to bring back their warmth and softness.
Estimated Nutrition
Homemade Krispy Kremes are a treat, so it’s important to enjoy them in moderation. Here’s an approximate breakdown of the nutritional information for one donut (depending on the size and glaze):
- Calories: 220-250 calories per donut
- Fat: 10-12g
- Saturated Fat: 4-6g
- Carbohydrates: 30-35g
- Sugars: 15-20g
- Protein: 3g
- Fiber: 1g
- Sodium: 40-50mg
Keep in mind, these values can vary depending on the size of the donuts and how much glaze you use.
Frequently Asked Questions
1. Can I use a different type of flour for these Krispy Kremes?
You can experiment with different flours, but all-purpose flour gives the best results for these donuts. Using bread flour can create a chewier texture, while cake flour may result in a lighter donut. Stick with all-purpose for the classic Krispy Kreme texture.
2. How long can I store these donuts?
At room temperature, they are best eaten within 1-2 days. For longer storage, freezing is the best option. They will keep in the freezer for up to 2 months and can be reheated for a freshly made feel.
3. Can I make the dough in advance?
Yes! You can make the dough the night before and let it rise in the fridge overnight. Just punch the dough down, bring it to room temperature before rolling and frying.
4. Can I bake Krispy Kremes instead of frying them?
While frying is key to getting the signature crispy texture, you can try baking the donuts at 375°F for about 12-15 minutes. However, the result won’t be exactly the same as fried donuts, and the texture may be denser.
5. What if I don’t have a donut cutter?
No problem! You can use two round cookie cutters—one large and one small—to cut out the donut shapes. If you don’t have any cutters, you can even shape the dough by hand into rounds.
6. Can I use a different type of glaze?
Absolutely! You can experiment with different glazes like chocolate, maple, or even a simple powdered sugar glaze with a touch of lemon for a different twist.
7. Do I need to let the donuts cool before glazing them?
It’s best to glaze the donuts while they’re still warm. The glaze will melt and stick better, creating a perfect sugary coating. Don’t let them cool completely before glazing.
8. Can I double the recipe?
Yes, you can easily double the recipe if you’re making a larger batch. Just make sure to use a large enough bowl for the dough and fry in batches to avoid overcrowding the pot.
Conclusion
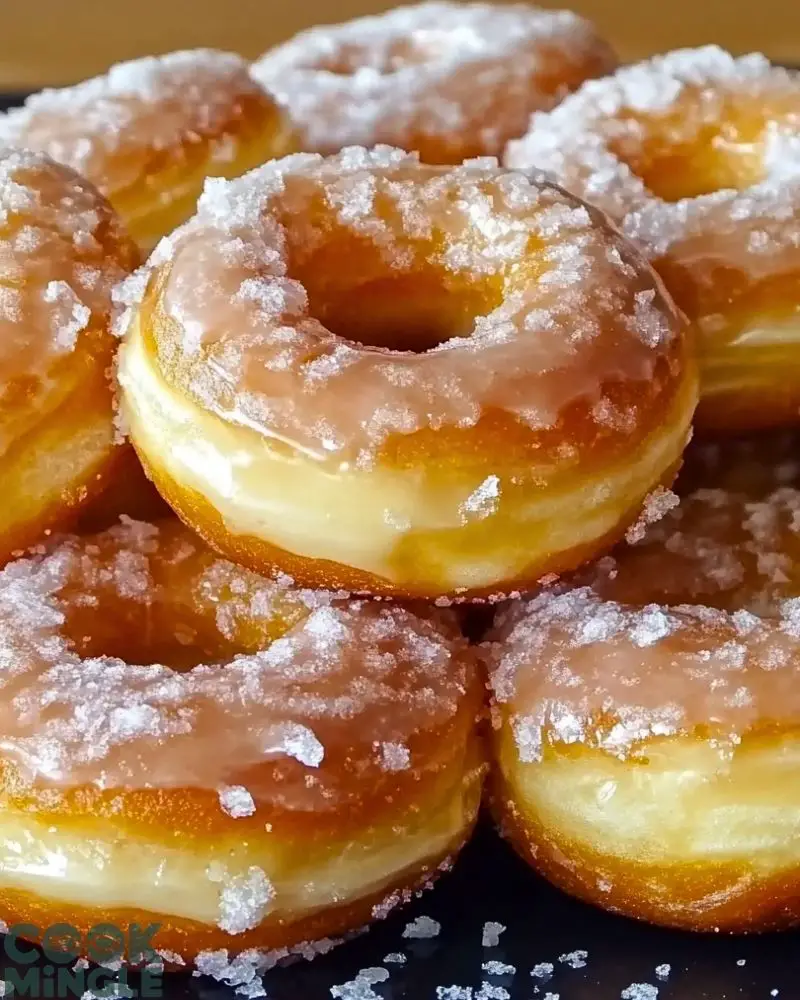
Homemade Krispy Kremes are a delightful treat that brings the iconic taste of fresh donuts right into your kitchen. The process is straightforward, and the result is incredibly rewarding. Whether you enjoy them with a cup of coffee, a glass of milk, or a side of fresh fruit, these donuts will quickly become a favorite in your household. With their light, fluffy texture and sweet glaze, they are perfect for breakfast, a snack, or even a special occasion. Enjoy the process and the delicious end result—you’ll be making these again and again!

Homemade Krispy Kremes
- Total Time: 50 minutes
- Yield: 12-15 donuts
Description
These Homemade Krispy Kremes are the perfect treat for any occasion. With their soft, fluffy texture and sweet glaze, these donuts bring the iconic taste of Krispy Kreme right to your kitchen. Whether you’re making them for a special breakfast or just to enjoy with a cup of coffee, this recipe will have you savoring every bite!
Ingredients
For the Donuts:
- 2 ½ teaspoons active dry yeast
- 1 cup warm whole milk (about 110°F)
- ¼ cup granulated sugar
- ½ cup unsalted butter, melted
- 2 large eggs
- 4 cups all-purpose flour, plus extra for dusting
- 1 teaspoon salt
- ½ teaspoon vanilla extract
- Vegetable oil (for frying)
For the Glaze:
- 2 cups powdered sugar
- 2 tablespoons whole milk
- 1 teaspoon vanilla extract
- Pinch of salt
Instructions
- Activate the Yeast: In a small bowl, combine the warm milk, sugar, and yeast. Let sit for 5 minutes until frothy.
- Mix the Dough: In a large mixing bowl, combine flour and salt. Add the yeast mixture, melted butter, eggs, and vanilla extract. Mix until the dough forms.
- Knead the Dough: Knead the dough for 5-7 minutes until smooth and elastic.
- Let the Dough Rise: Place the dough in a greased bowl, cover, and let rise in a warm place for 1 hour until doubled in size.
- Shape the Donuts: Roll out the dough to about ½ inch thickness. Use a donut cutter or two round cookie cutters to cut out the donuts.
- Heat the Oil: Heat vegetable oil in a deep fryer or large pot to 350°F.
- Fry the Donuts: Carefully lower the donuts into the hot oil, frying for 1-2 minutes per side until golden brown. Remove and drain on a cooling rack.
- Glaze the Donuts: Whisk together powdered sugar, milk, vanilla, and salt for the glaze. Dip the warm donuts into the glaze and let excess drip off.
- Prep Time: 30 minutes
- Cook Time: 20 minutes