
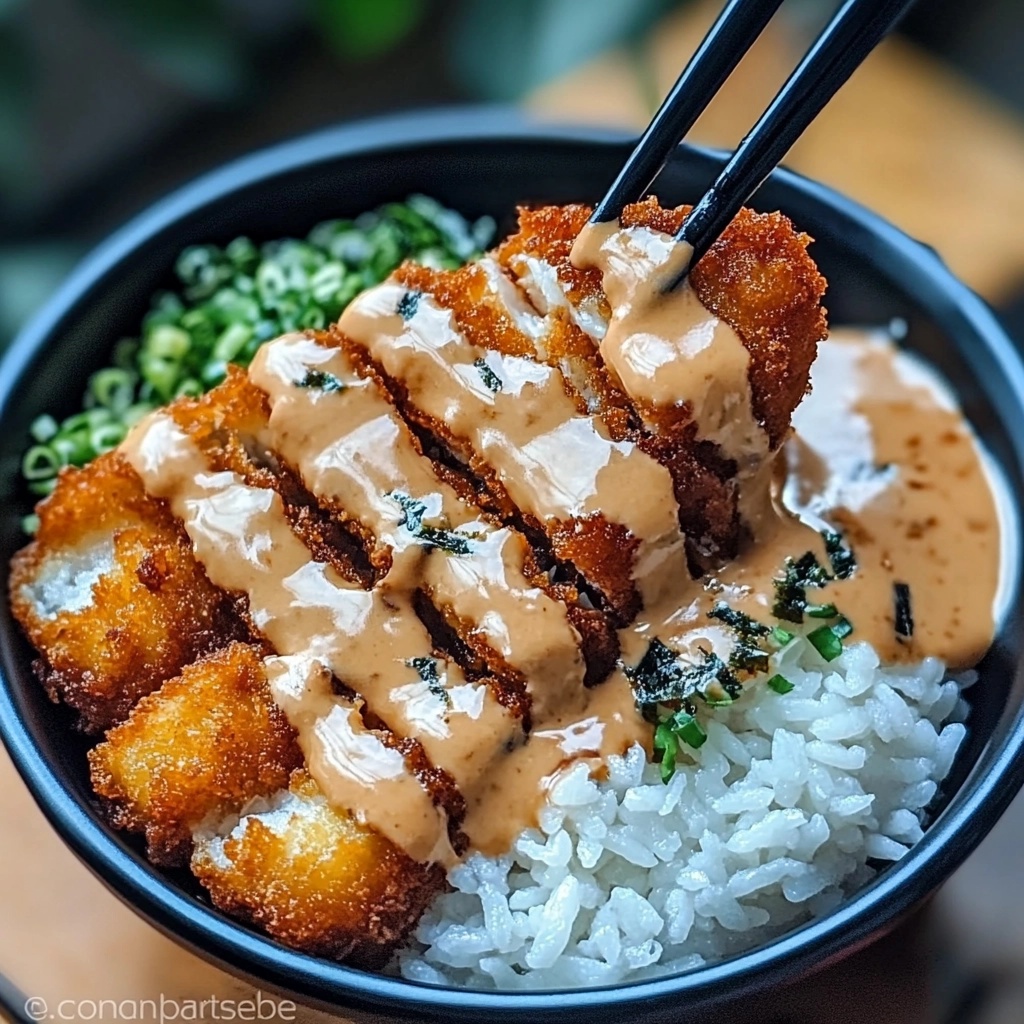
There’s something incredibly satisfying about a crispy, golden-brown katsu served over a bed of fluffy rice, drizzled with rich, tangy tonkatsu sauce. This Japanese classic is a comfort food favorite that I love making at home. The contrast of textures—the crunch of the breaded cutlet against the soft, warm rice—makes every bite a delight.
What makes this dish even better is how simple it is to prepare. Whether you’re using chicken, pork, or even a plant-based alternative, katsu is always a crowd-pleaser. Paired with homemade tonkatsu sauce and a drizzle of creamy mayo, this bowl is the ultimate fusion of sweet, savory, and umami flavors.
Why You’ll Love This Japanese Katsu Bowl
- Crispy, Crunchy Goodness – The panko-breaded cutlet is fried to golden perfection, giving it that signature crunch.
- Easy to Make at Home – You don’t need fancy ingredients to create an authentic katsu experience.
- Perfect Balance of Flavors – The tangy tonkatsu sauce complements the savory katsu and the subtle sweetness of the rice.
- Customizable – You can use pork, chicken, or tofu to suit your preference.
- Great for Meal Prep – Make extra cutlets and store them for quick meals throughout the week.
What Cut of Meat is Best for Katsu?
When making Japanese katsu, the choice of meat plays a big role in the final texture and flavor. Traditionally, pork loin (tonkatsu) or chicken breast (chicken katsu) are the most common choices. Pork loin gives you a tender, juicy bite with a slightly richer taste, while chicken breast provides a leaner, slightly firmer texture. If you prefer something even juicier, pork tenderloin is an excellent alternative.
For a plant-based version, tofu or seitan can be used, coated in the same crispy panko breading for that signature crunch.
Options for Substitutions
Meat Alternatives
- Chicken Thighs – A juicier, more flavorful option compared to chicken breast.
- Beef Cutlet – A less common but delicious twist on katsu.
- Tofu – Use firm or extra-firm tofu, pressed and coated for a crispy texture.
- Seitan – A great high-protein vegan alternative with a chewy, meaty texture.
Breadcrumb Substitutes
- Regular Breadcrumbs – If you don’t have panko, regular breadcrumbs will work, though the texture will be less crispy.
- Crushed Cornflakes – A fun alternative that adds an extra crunch.
- Almond Flour – A low-carb option that works well for gluten-free katsu.
Sauce Variations
- BBQ Sauce + Worcestershire – A quick homemade tonkatsu sauce alternative.
- Teriyaki Sauce – A sweeter and slightly different take on the traditional flavor.
- Sriracha Mayo – For a spicy kick with creamy richness.
Ingredients for This Japanese Katsu Bowl
For the Katsu Cutlet
- Pork loin or chicken breast – The star of the dish, providing a juicy, tender base for the crispy coating.
- Salt and pepper – Essential for seasoning the meat before breading.
- Flour – Helps the egg stick to the meat, creating a solid foundation for the breading.
- Eggs – Acts as the glue to hold the crispy panko coating in place.
- Panko breadcrumbs – The key to that signature light and crispy texture.
- Oil for frying – Use a neutral oil like vegetable, canola, or peanut oil for the perfect deep-fried crunch.
For the Tonkatsu Sauce
- Ketchup – Adds sweetness and a rich tomato base.
- Worcestershire sauce – Brings deep umami and tangy complexity.
- Soy sauce – Enhances the savory depth of the sauce.
- Sugar – Balances out the acidity for a well-rounded flavor.
- Dijon mustard – Adds a mild tang and subtle heat.
For the Bowl
- Steamed white rice – The fluffy base that soaks up all the flavors.
- Japanese mayonnaise – A creamy, slightly tangy drizzle that enhances the dish.
- Fresh parsley or green onions – For garnish, adding a pop of color and freshness.
Step 1: Prepare the Meat
Start by trimming any excess fat from the pork loin or chicken breast. If using pork, lightly pound it to an even thickness of about ½ inch to ensure even cooking. Season both sides with salt and pepper.
Step 2: Set Up the Breading Station
Prepare three shallow dishes: one with flour, one with beaten eggs, and one with panko breadcrumbs. Dip each cutlet into the flour, coating it evenly. Next, dip it into the egg wash, ensuring full coverage. Finally, coat it generously with panko breadcrumbs, pressing gently to help the crumbs stick.
Step 3: Fry the Katsu
In a deep skillet or frying pan, heat about 1 inch of oil to 350°F (175°C). Carefully place the breaded cutlet into the hot oil and fry for 3–4 minutes per side, or until golden brown and crispy. Transfer to a wire rack or paper towel-lined plate to drain excess oil.
Step 4: Make the Tonkatsu Sauce
In a small bowl, mix ketchup, Worcestershire sauce, soy sauce, sugar, and Dijon mustard until smooth. Adjust the flavors to your liking by adding more sugar for sweetness or soy sauce for extra depth.
Step 5: Assemble the Katsu Bowl
Scoop a generous serving of steamed rice into a bowl. Slice the katsu into strips and place it on top of the rice. Drizzle with tonkatsu sauce and a bit of Japanese mayo. Garnish with chopped parsley or green onions for extra freshness.
How Long to Cook the Japanese Katsu Bowl
The cooking time for katsu depends on the type of meat you use:
- Pork loin or chicken breast – About 3–4 minutes per side in 350°F (175°C) oil.
- Chicken thighs – May take slightly longer, around 4–5 minutes per side due to the extra fat.
- Tofu or plant-based alternatives – Around 2–3 minutes per side, just enough to crisp up the coating.
The internal temperature should reach 145°F (63°C) for pork and 165°F (74°C) for chicken for safe consumption.
Tips for Perfect Japanese Katsu Bowl
- Use panko breadcrumbs – Regular breadcrumbs won’t give you the same airy crispiness.
- Keep the oil temperature steady – Too hot, and the katsu burns; too cool, and it becomes greasy.
- Let the breaded cutlet rest before frying – This helps the coating stick better.
- Use a wire rack instead of paper towels – This keeps the katsu crispy rather than soggy.
- Slice before serving – Cutting the katsu into strips makes it easier to eat and soak up the sauce.
- Double-fry for extra crispiness – If you want ultra-crispy katsu, fry it once, let it rest, then fry again for 30–60 seconds.
Watch Out for These Mistakes While Cooking
- Skipping the resting time after breading – Letting the breaded cutlet sit for a few minutes before frying helps the coating stay intact.
- Frying at the wrong temperature – If the oil is too hot, the outside will burn before the inside is fully cooked. If it’s too cold, the katsu will be greasy. Aim for 350°F (175°C).
- Overcrowding the pan – Frying too many pieces at once lowers the oil temperature, leading to soggy katsu.
- Using regular breadcrumbs instead of panko – Panko is essential for that signature light, crispy texture.
- Skipping the wire rack – Draining the katsu on paper towels can make it soggy; use a wire rack instead.
- Not checking the internal temperature – Ensure pork reaches 145°F (63°C) and chicken reaches 165°F (74°C) for safe eating.
- Pouring too much sauce – A drizzle of tonkatsu sauce is enough; too much can make the katsu lose its crunch.
- Not slicing before serving – Cutting the katsu into strips makes it easier to eat and soak up the sauce.
What to Serve With Japanese Katsu Bowl?
Miso Soup
A warm, umami-rich miso soup pairs perfectly with the crispy katsu.
Japanese Cabbage Salad
A simple shredded cabbage salad with sesame dressing balances the richness of the katsu.
Pickled Vegetables (Tsukemono)
Adds a refreshing crunch and slight acidity to cleanse the palate.
Ramen or Udon Noodles
A side of noodles makes this meal even heartier.
Steamed Edamame
A light and protein-packed appetizer to enjoy before the katsu.
Japanese Onigiri
Rice balls filled with seaweed, salmon, or umeboshi (pickled plum) make a great side.
Cucumber Sunomono (Japanese Vinegar Salad)
A tangy, refreshing cucumber salad that cuts through the richness of the katsu.
Green Tea or Sake
A soothing green tea or a light sake enhances the overall experience.
Storage Instructions
Refrigerating Leftovers
If you have leftover katsu, let it cool completely before storing. Place it in an airtight container and refrigerate for up to 3 days. Keep the rice and sauce separate to maintain the best texture.
Freezing for Later
For longer storage, freeze the cooked katsu cutlets:
- Let them cool completely.
- Wrap each cutlet tightly in plastic wrap, then place them in a freezer-safe bag.
- Store for up to 2 months.
To reheat, bake at 375°F (190°C) for about 10–12 minutes, or air-fry at 350°F (175°C) for 5–7 minutes to restore crispiness.
Reheating Instructions
- Oven/Air Fryer – Best for keeping the katsu crispy. Reheat at 350°F (175°C) until warm.
- Stovetop – Heat in a dry pan over medium heat for a few minutes on each side.
- Microwave – Works in a pinch but will make the katsu soft rather than crispy.
Estimated Nutrition (Per Serving)
- Calories: ~600-700 kcal
- Protein: ~35g
- Carbohydrates: ~80g
- Fat: ~20g
- Sodium: ~900mg
- Fiber: ~2g
Note: Nutrition values may vary based on portion size and ingredient substitutions.
Frequently Asked Questions
Can I bake or air-fry the katsu instead of frying?
Yes! For baking, place the breaded cutlets on a wire rack over a baking sheet and bake at 400°F (200°C) for 20–25 minutes, flipping halfway. For air-frying, cook at 375°F (190°C) for 12–15 minutes, flipping once.
Can I use chicken thighs instead of chicken breast?
Absolutely! Chicken thighs have more fat, making them juicier and more flavorful. Adjust frying time slightly, as thighs take a little longer to cook through.
What type of rice works best for katsu bowls?
Short-grain Japanese rice is ideal because it has a slightly sticky texture that holds up well under the katsu and sauce. If you don’t have it, jasmine or basmati rice can work, though they have a fluffier texture.
Can I make the tonkatsu sauce ahead of time?
Yes! Tonkatsu sauce stores well in the fridge for up to 2 weeks in an airtight container. The flavors deepen over time, making it even better.
How can I make this recipe vegetarian?
Swap the meat for tofu or seitan, and use the same breading and frying process. Ensure the tonkatsu sauce ingredients are vegetarian-friendly (some Worcestershire sauces contain anchovies).
How do I keep the katsu crispy after frying?
Let it rest on a wire rack instead of paper towels, which can trap moisture. If needed, reheat in an oven or air fryer at 350°F (175°C) for a few minutes.
Can I make katsu in advance for meal prep?
Yes! Fry the katsu, let it cool, then store in the fridge or freezer. Reheat in an air fryer or oven for the best crispiness. Keep rice and sauce separate until serving.
What other sauces can I use instead of tonkatsu sauce?
Try teriyaki sauce, ponzu, miso glaze, or spicy mayo for a different flavor twist!
Conclusion
If you love crispy, juicy katsu with rich tonkatsu sauce, this Japanese Katsu Bowl is a must-try! It’s easy to make, incredibly satisfying, and perfect for meal prep. Save this recipe to Pinterest, and don’t forget to share it with family and friends!