

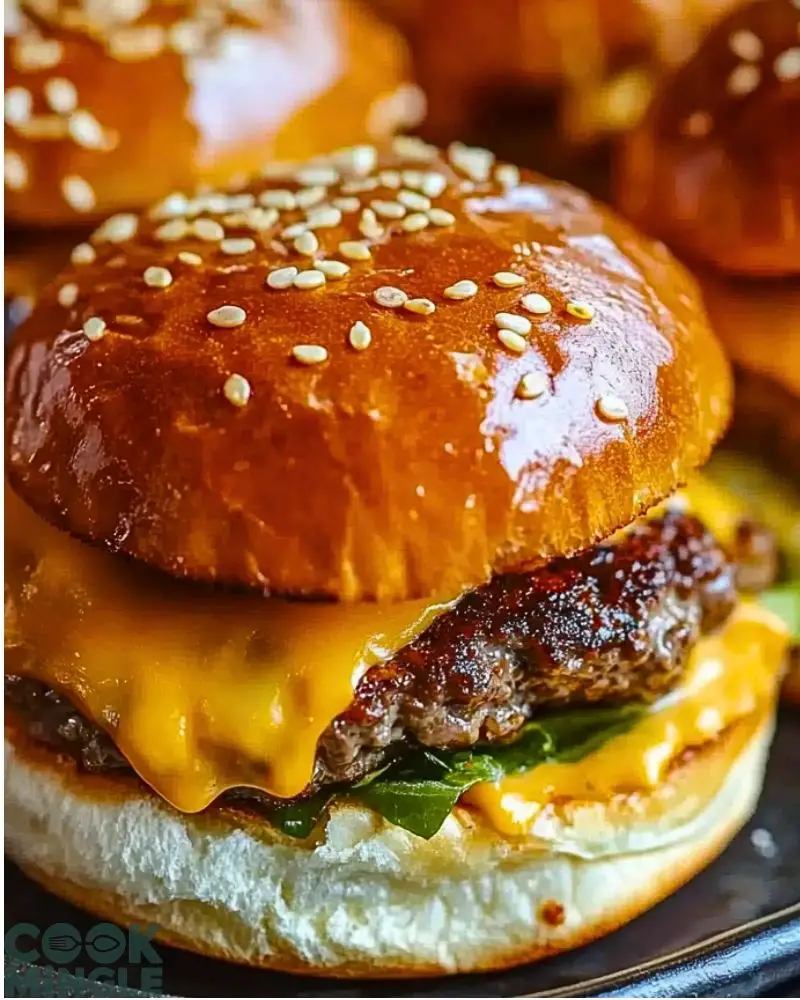
Golden, glistening buns with sesame sprinkles, a juicy grilled patty that’s crusted to perfection, and a cascade of melted cheddar cheese—cheeseburger sliders are the ultimate party food that’s both adorable and addictive. These little bites of joy are packed with bold, savory flavor, and deliver the satisfying mouthfeel of a full-sized burger—only better because you can eat more than one without guilt.
Perfect for game nights, backyard BBQs, family dinners, or midnight cravings, these sliders bring all the richness and comfort of a cheeseburger into a compact form. With their buttery buns and oozy cheese, they hit all the right notes of indulgence and convenience. Whether you’re whipping up a quick snack or feeding a crowd, cheeseburger sliders are a guaranteed crowd-pleaser.
Why You’ll Love This Cheeseburger Sliders Recipe
- Bite-Sized Perfection: These sliders are fun-sized but packed with full-sized flavor.
- Party-Ready: They’re a hit at gatherings and super easy to serve.
- Quick & Customizable: Ready in under 30 minutes and easy to tweak with your favorite toppings.
- Kid-Friendly: A surefire favorite among kids (and adults who act like kids around burgers).
- No Fancy Ingredients: Simple, pantry-friendly components.
Preparation Phase & Tools to Use
To make cheeseburger sliders that are juicy, flavorful, and perfectly seared, having the right tools on hand is essential. Here’s what you’ll need and why each one matters:
- Cast Iron Skillet or Griddle: This is key for getting that crispy, caramelized sear on the patties thanks to even heat distribution. A non-stick pan works, but cast iron takes it up a notch.
- Spatula (Preferably Metal): You’ll need a sturdy spatula to press and flip the patties without losing precious meat juices.
- Mixing Bowl: For combining the ground beef with seasonings evenly.
- Burger Press or Your Hands: To shape the sliders into uniform patties—important for even cooking.
- Baking Sheet (Optional): If you’re finishing the sliders in the oven or toasting the buns, this will come in handy.
- Sharp Knife or Bread Cutter: For slicing slider buns cleanly—no squishing.
- Small Saucepan: If you plan to melt butter or toast the buns for that golden finish.
Having these tools prepped ahead of time makes the process smoother and ensures the end result is restaurant-quality.
Preparation Tips
- Keep the Beef Cold: Warm beef falls apart and cooks unevenly. Handle it quickly and keep it chilled until it’s time to cook.
- Don’t Overmix the Meat: Mix just enough to combine seasoning—overmixing can make the patties tough.
- Make a Small Dimple: Press your thumb into the center of each patty before cooking to prevent it from puffing up.
- Toast the Buns: A quick toast in butter enhances flavor and gives structure so they don’t get soggy.
- Use Fresh Ingredients: Freshly ground beef and crisp lettuce elevate the taste tremendously.
- Prep Toppings First: Have your cheese, lettuce, pickles, and sauces ready so you can build the sliders quickly while the patties are hot.
Ingredients for This Cheeseburger Sliders Recipe
For the Beef Patties:
- 1 lb (450g) ground beef (80/20 fat ratio for juiciness)
- 1 tsp salt
- ½ tsp black pepper
- ½ tsp garlic powder
- ½ tsp onion powder
- 1 tsp Worcestershire sauce (optional, for deeper umami flavor)
For Assembling the Sliders:
- 6–8 slider buns (soft brioche or sesame-topped mini buns)
- 6–8 cheddar cheese slices (or American cheese for a classic melt)
- Lettuce leaves, torn to fit the slider size
- Pickles, sliced (optional)
- Ketchup and mustard, to taste
- Butter, for toasting buns
Optional Add-ons:
- Caramelized onions
- Tomato slices
- Mayonnaise or burger sauce
- Bacon strips

Step 1: Prepare the Patties
In a mixing bowl, combine the ground beef, salt, pepper, garlic powder, onion powder, and Worcestershire sauce (if using). Mix gently with your hands or a spatula until just combined—don’t overwork the meat.
Divide the mixture into 6–8 equal portions, depending on how many sliders you’re making. Shape each portion into a small, flat patty slightly wider than your buns (they’ll shrink a bit when cooked). Use your thumb to press a slight dimple in the center of each.
Step 2: Toast the Buns
In a skillet or on a griddle over medium heat, melt a tablespoon of butter. Place the buns cut side down and toast until golden brown. Set aside on a plate, ready for assembly.
Step 3: Cook the Patties
Heat your skillet or griddle over medium-high heat. Once it’s hot, add the patties (no need for oil if your meat has enough fat). Sear for about 2–3 minutes per side, or until a deep crust forms.
When you flip the patties, immediately place a slice of cheese on top of each one so it melts as the second side cooks. Covering the skillet for the last minute helps the cheese melt faster.
Step 4: Assemble the Sliders
Start with the toasted bottom buns, then layer in this order:
- Lettuce or greens
- Hot cheesy patty
- Pickles or tomatoes (optional)
- Drizzle of ketchup, mustard, or special sauce
- Top bun
Serve immediately while hot and melty.
Notes
- Meat Matters: Use 80/20 ground beef for best results. Too lean and your patties will dry out; too fatty and they’ll fall apart.
- Cheese Choice: Classic cheddar or American cheese gives you that gooey melt. For a twist, try pepper jack or Swiss.
- Toasting Buns: Don’t skip this! A buttery, golden bun adds texture and keeps things from getting soggy.
- Make-Ahead Option: Patties can be shaped and refrigerated a few hours ahead—just bring them to room temp before cooking.
- Double Stack It: For extra indulgence, double up the patties and add more toppings.
- Want Smoky Flavor? Add a few drops of liquid smoke to the meat mix or grill the patties instead of pan-searing.
Watch Out for These Mistakes While Cooking
- Overmixing the Beef: This leads to dense, rubbery sliders. Mix gently, just enough to distribute the seasoning.
- Undertoasting or Overtoasting Buns: A pale bun is sad, and a burnt one is bitter. Aim for golden brown.
- Using Cold Patties on the Pan: Let the meat sit out for a few minutes before cooking, or it may cook unevenly.
- Pressing Down on Patties While Cooking: It squeezes out the juices—resist the urge!
- Overcrowding the Pan: Cook in batches if needed. Crowding drops the heat and causes steaming instead of searing.
- Adding Cheese Too Late: Place cheese right after flipping to get that dreamy, melted finish.
- Forgetting the Dimple Trick: Without it, the patties puff up and lose their ideal shape.
- Skipping the Rest Time: Let the patties rest for a minute or two before building the sliders so the juices settle in.
What to Serve With Cheeseburger Sliders?
Cheeseburger sliders are hearty little bites on their own, but pairing them with the right sides turns a simple snack into a satisfying meal or a full-blown party platter. Whether you’re going classic or creative, here are perfect partners for your sliders.
8 Tasty Recommendations:
1. Crispy French Fries
A classic duo! Whether they’re shoestring, crinkle-cut, or air-fried, fries and sliders are a match made in heaven.
2. Sweet Potato Fries
For a slightly healthier (and sweet-savory) alternative, sweet potato fries bring a caramelized flavor that balances the richness of the sliders.
3. Coleslaw
A refreshing, tangy coleslaw adds crunch and helps cleanse the palate between bites of cheesy, beefy goodness.
4. Pickle Chips or Spears
The acidity and snap of pickles cut through the fat and add brightness to every bite.
5. Macaroni and Cheese
Go full comfort-food mode with a creamy, cheesy mac—sliders + mac = childhood dream come true.
6. Mini Onion Rings
Crispy, golden, and a little sweet—onion rings bring texture and flavor contrast, especially if you’re into dipping sauces.
7. Baked Beans
Smoky, slightly sweet baked beans complement the beefy flavor and give a BBQ-inspired twist to your plate.
8. Side Salad
For a lighter touch, a crisp green salad with a tangy vinaigrette helps balance out the meal while adding freshness.
Refrigeration:
- Unassembled Components: Store patties, buns, and toppings separately for up to 3 days in airtight containers.
- Fully Assembled Sliders: Wrap them individually in foil or place in an airtight container. Refrigerate for up to 2 days to maintain texture.
Reheating Tips:
- Oven: Preheat to 350°F (175°C). Wrap sliders in foil and heat for 10–12 minutes.
- Microwave: Use for speed, but be aware it may soften the buns. Reheat on medium power for 30–45 seconds.
- Skillet: Reheat patties separately in a pan over medium heat for a crispy outer edge, then reassemble.
Freezing:
- Cooked patties can be frozen for up to 2 months. Wrap them individually and store in a freezer bag.
- Thaw overnight in the fridge before reheating.
Estimated Nutrition (Per Slider)
Here’s a general nutritional estimate per slider, depending on the exact ingredients used:
- Calories: 320–380 kcal
- Protein: 18g
- Fat: 23g
- Carbohydrates: 20g
- Fiber: 1g
- Sugar: 3g
- Sodium: 550mg
Note: Values will vary with toppings and condiments. Using lean beef or low-fat cheese can reduce the calorie count.
Frequently Asked Questions
1. Can I make cheeseburger sliders ahead of time?
Absolutely! You can shape the patties and prep all your toppings a day ahead. Just cook the patties fresh when you’re ready to serve for the best texture and flavor.
2. What’s the best type of cheese for sliders?
Cheddar and American cheese are classics for their perfect melt. However, feel free to experiment with pepper jack, Swiss, or smoked gouda for a gourmet touch.
3. Can I grill the patties instead of pan-searing them?
Yes! Grilling adds a smoky flavor and is great for summer cookouts. Just make sure your patties are chilled and firm so they hold together well on the grill.
4. What’s the ideal size for slider patties?
Each patty should be around 2.5 to 3 inches in diameter—just slightly larger than your buns to account for shrinkage while cooking.
5. Can I use other meats instead of beef?
Definitely! Ground turkey, chicken, or even plant-based options like Beyond or Impossible meat work well. Just adjust cooking times as needed.
6. How do I keep sliders warm for a party?
After cooking, place the sliders in a warm oven (around 200°F/93°C) covered with foil to keep them hot without drying out.
7. Can I use store-bought burger buns?
Yes, but if you can find soft brioche or Hawaiian rolls, they elevate the flavor and texture. Homemade buns? Even better.
8. Why do my slider patties puff up in the middle?
That’s common, but preventable. Use your thumb to press a small dimple in the center of each patty before cooking—this keeps them flat and evenly cooked.
Conclusion
Cheeseburger sliders are everything you love about a classic burger—savory, juicy, cheesy—wrapped up in an adorable, handheld package. They’re perfect for entertaining, snacking, or simply switching up your dinner routine with something fun and satisfying. With the right tools, fresh ingredients, and a little bit of love, you’ll be serving up sliders that steal the show.
Whether you’re hosting a game day party, packing lunch for the kids, or just treating yourself, these sliders promise to be a hit every single time.

Cheeseburger Sliders
- Total Time: 22 minutes
- Yield: 6-8 servings
Description
Craving something bold, cheesy, and perfectly bite-sized? These Cheeseburger Sliders deliver everything you love about a juicy, classic burger—melted cheddar, seasoned beef, buttery toasted buns—in a mini format that’s ideal for quick dinners, party snacks, or kid-friendly meals. Whether you’re hunting for easy dinner ideas, fun food ideas for gatherings, or a quick lunch recipe, this dish has you covered. Each slider bursts with rich flavor and satisfying texture, making them one of the best easy recipes for family nights or game-day spreads. The smell of sizzling patties, the sight of melted cheese cascading over the edges, and the first delicious bite? Simply irresistible.
Ingredients
For the Patties:
- 1 lb (450g) ground beef (80/20)
- 1 tsp salt
- ½ tsp black pepper
- ½ tsp garlic powder
- ½ tsp onion powder
- 1 tsp Worcestershire sauce (optional)
For Assembly:
- 6–8 slider buns (brioche or sesame)
- 6–8 cheddar cheese slices
- Lettuce leaves
- Pickles (optional)
- Ketchup and mustard
- Butter for toasting
Optional Add-ons:
- Tomato slices
- Caramelized onions
- Bacon
- Burger sauce
Instructions
- In a bowl, mix the beef, salt, pepper, garlic powder, onion powder, and Worcestershire sauce gently.
- Divide and shape into 6–8 flat patties, slightly wider than your buns. Dimple the center of each.
- Toast buns cut side down in butter on a skillet until golden. Set aside.
- Heat skillet or griddle over medium-high. Sear patties for 2–3 minutes per side.
- After flipping, place cheese on each patty. Cover to melt the cheese while the second side finishes cooking.
- Layer toasted buns with lettuce, patty, pickles, sauces, and top bun.
- Serve hot and enjoy!
- Prep Time: 10 minutes
- Cook Time: 12 minutes