

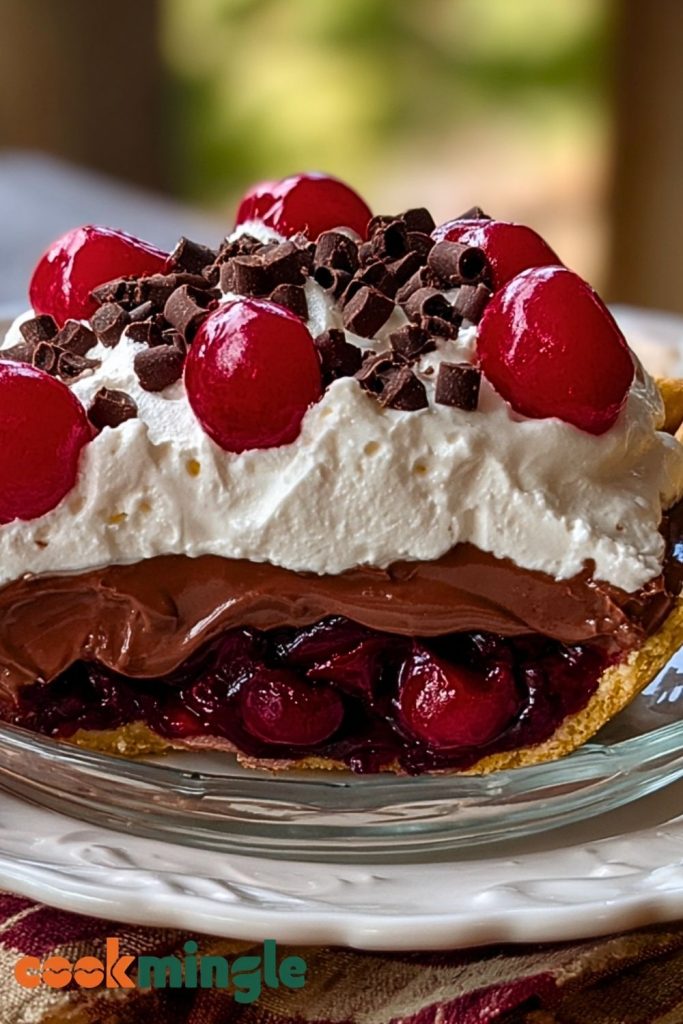
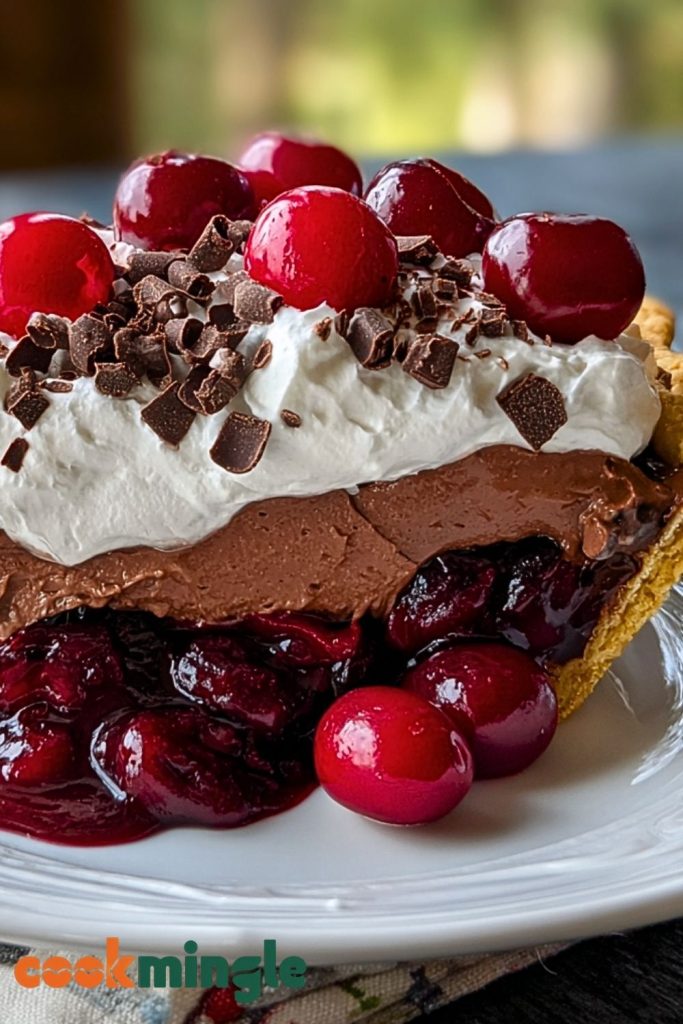
This Chocolate Cherry Cream Pie is the kind of dessert that turns heads and stops conversations—if only for a moment while everyone takes their first bite. From its flaky, buttery crust to the layered symphony of rich chocolate cream, tart cherry filling, and pillowy whipped topping, this pie is the ultimate celebration of flavor and texture. Each forkful delivers a dreamy blend of bittersweet cocoa and bright cherry notes, while the chocolate chips and juicy cherries on top give it a stunning visual and textural contrast.
Perfect for holidays, birthdays, or just to indulge your sweet tooth on a random Wednesday, this pie comes together with simple ingredients but creates an experience that feels anything but ordinary. Whether you’re serving a crowd or sneaking a slice for yourself with a late-night coffee, the Chocolate Cherry Cream Pie is pure joy on a plate.
Why You’ll Love This Chocolate Cherry Cream Pie
- No-bake creamy chocolate layer that tastes like chocolate mousse.
- Vibrant cherry filling with a balance of sweet and tart flavors.
- Crisp pie crust that holds everything together without getting soggy.
- Light whipped topping that cuts through the richness beautifully.
- Chocolate chips and cherries on top for that perfect finishing touch.
- Ideal for make-ahead desserts—it chills well and slices beautifully.
- It’s a crowd-pleaser for all ages with both fruity and chocolaty layers.
- Easily adaptable to be gluten-free or dairy-free if needed.
Preparation Phase & Tools to Use (Essential Tools and the Importance of Each)
Getting this Chocolate Cherry Cream Pie just right starts with being prepared. The pie is easy to assemble, but layering and texture are everything—so the right tools matter.
- 9-inch Pie Plate – This is your pie’s foundation. A glass or ceramic dish works best to evenly support the crust and showcase those beautiful layers.
- Mixing Bowls (At Least 2) – One for the chocolate cream mixture and one for the whipped topping. You’ll want enough space to fold and stir without spilling.
- Hand Mixer or Stand Mixer – To whip up that airy chocolate layer and blend it perfectly. This tool ensures a smooth, fluffy texture.
- Spatula – Ideal for gentle folding and scraping down the sides of your bowls without deflating the whipped ingredients.
- Measuring Cups and Spoons – Precision matters, especially when balancing the sweetness of cherries with the richness of chocolate.
- Saucepan – Needed if you’re making your own cherry filling (optional, if not using canned).
- Plastic Wrap or Pie Carrier – Helps keep your pie fresh and intact while chilling in the fridge.
Preparation Tips
- Chill your mixing bowl and beaters before whipping the cream or chocolate layer. Cold equipment helps achieve better volume and structure.
- If making your own cherry filling, allow it to cool completely before assembling the pie. Hot filling will melt the layers and ruin the texture.
- Use full-fat cream cheese and whipped topping for the richest flavor and stability. Light versions may not hold up as well.
- When layering, spread gently and evenly to keep layers distinct and visually appealing.
- Let the pie chill for at least 4 hours, preferably overnight. This helps everything set beautifully and makes slicing clean and easy.
Ingredients for this Chocolate Cherry Cream Pie
Here’s everything you’ll need to create this show-stopping dessert:
- 1 pre-baked 9-inch pie crust (homemade or store-bought)
- 1 can (21 oz) cherry pie filling
- 1 package (8 oz) cream cheese, softened
- 1 cup powdered sugar
- 1 ½ cups whipped topping (like Cool Whip, plus more for topping)
- 1 package (3.9 oz) instant chocolate pudding mix
- 1 ½ cups cold milk
- ½ cup semi-sweet chocolate chips
- 1 cup fresh cherries or maraschino cherries (for garnish)
- Optional: 1 tsp vanilla extract (for extra depth in the cream layer)
Each ingredient plays a key role—smoothness, sweetness, structure, and of course, that luscious chocolate-cherry flavor combo.
Step 1: Prepare the Crust
If you’re using a store-bought crust, make sure it’s pre-baked and fully cooled. For homemade crusts, bake according to your recipe, then allow it to cool completely before assembling.
Step 2: Layer the Cherry Filling
Spread the entire can of cherry pie filling evenly over the bottom of the cooled crust. Smooth it out with a spoon or spatula to create the first fruity layer.
Step 3: Make the Chocolate Cream Layer
In a mixing bowl, beat the softened cream cheese and powdered sugar until smooth and creamy. In a separate bowl, whisk together the instant pudding mix and cold milk for about 2 minutes until thickened. Gently fold the pudding into the cream cheese mixture, then fold in 1½ cups of whipped topping until fully incorporated and fluffy.
Step 4: Add the Chocolate Cream Layer
Spoon the chocolate cream mixture over the cherry filling, spreading it evenly all the way to the edges of the crust. Use a spatula to create a smooth, thick layer.
Step 5: Top with Whipped Topping
Spread an additional layer of whipped topping over the chocolate cream. This adds a light, airy finish that balances the richness of the chocolate.
Step 6: Garnish and Chill
Top with fresh or maraschino cherries and scatter chocolate chips across the whipped topping. Cover and refrigerate the pie for at least 4 hours, or overnight for best results.
Step 7: Slice and Serve
Once chilled and set, slice with a sharp knife dipped in warm water for clean edges. Serve cold and enjoy every layer of deliciousness.
Notes
- Layering is key: Make sure each layer is completely set or cool before adding the next to keep the pie visually distinct and structurally sound.
- Chill thoroughly: For the cleanest slices and best texture, let the pie rest in the fridge for at least 4 hours, preferably overnight.
- Make it ahead: This pie is ideal for prepping a day before your event. It holds its shape and flavor beautifully with time.
Watch Out for These Mistakes While Cooking
- Skipping the crust cooling phase – Adding filling to a warm crust can lead to a soggy bottom and melting layers.
- Overmixing the chocolate cream layer – Be gentle when folding whipped topping into the pudding-cream cheese mixture to keep it fluffy.
- Not chilling long enough – This is one pie that needs proper time to set. Rushing it could cause messy slices and uneven textures.
- Using low-fat substitutes – While lighter ingredients are tempting, they often don’t hold up as well and can affect both flavor and structure.
- Overloading with toppings – Stick to a light sprinkle of chocolate chips and a modest handful of cherries to keep the balance just right.
What to Serve With Chocolate Cherry Cream Pie?
The rich, fruity layers of this pie pair beautifully with a variety of drinks and side bites. Whether you’re rounding out a dinner party or creating a cozy dessert spread, these ideas will elevate your experience.
8 Recommendations
- Espresso or Coffee – The slight bitterness complements the sweetness of the pie and enhances the chocolate flavor.
- Vanilla Bean Ice Cream – A scoop on the side adds creaminess and turns the dessert into something even more indulgent.
- Sparkling Water with Lemon – Refreshing and light, this helps cleanse the palate between bites.
- Whipped Cream-topped Hot Chocolate – Especially comforting in colder months for a cocoa-on-cocoa experience.
- Fresh Berries – Serve a small bowl of raspberries or blackberries alongside for a tart contrast.
- Cherry or Chocolate Liqueur – A small glass of something like Kirsch or crème de cacao adds an elegant adult twist.
- Toasted Almonds or Pecans – A small sprinkle on the plate or in a side dish offers a welcome crunch and nutty aroma.
- Mini Cheese Board – Soft cheeses like brie or mascarpone with a few crackers can balance the pie’s sweetness nicely.
Storage Instructions
Chocolate Cherry Cream Pie stores wonderfully, making it perfect for make-ahead desserts or saving leftovers.
- Refrigerator: Cover the pie loosely with plastic wrap or store it in an airtight container. It will stay fresh in the fridge for up to 4 days.
- Freezer: You can freeze this pie for up to 1 month. Wrap it tightly in plastic wrap, then foil. Thaw in the refrigerator overnight before serving. Note: The texture of the whipped topping may slightly change after freezing.
Tip: If you plan to freeze it, skip adding fresh cherries on top until just before serving for the best appearance and flavor.
Estimated Nutrition (Per Slice – Based on 8 servings)
- Calories: 380
- Total Fat: 19g
- Saturated Fat: 10g
- Trans Fat: 0g
- Unsaturated Fat: 9g
- Cholesterol: 30mg
- Sodium: 260mg
- Carbohydrates: 50g
- Fiber: 2g
- Sugar: 35g
- Protein: 5g
- Serving Size: 1 slice (⅛ pie)
- Diet: Vegetarian
- Category: Dessert
- Method: No-Bake
Frequently Asked Questions
1. Can I make Chocolate Cherry Cream Pie ahead of time?
Absolutely! In fact, it’s best when made a day in advance so it has plenty of time to chill and set properly.
2. Can I use homemade cherry filling instead of canned?
Yes! A homemade cherry compote or pie filling works beautifully. Just make sure it’s cooled completely before layering it into the pie.
3. What kind of pie crust works best?
A classic buttery pastry crust is ideal, but graham cracker or chocolate cookie crusts are delicious alternatives for a twist.
4. How do I prevent the layers from mixing together?
Ensure each layer is cooled and set before adding the next. Be gentle when spreading and use a spatula for smooth, even coverage.
5. Can I use real whipped cream instead of whipped topping?
Yes, just make sure it’s whipped to stiff peaks and stabilized if you plan to store the pie for more than a day.
6. Is this pie gluten-free?
It can be! Just use a gluten-free crust and check that your pudding mix and whipped topping are certified gluten-free.
7. Can I make this pie dairy-free?
Yes, with a few swaps: use dairy-free cream cheese, coconut whipped topping, and a dairy-free pudding mix with plant-based milk.
8. Why did my chocolate layer turn out runny?
This usually happens when the pudding isn’t fully thickened before mixing or the whipped topping is too soft. Chill each component before combining and be sure to fold gently.
Conclusion
Chocolate Cherry Cream Pie is more than just a dessert—it’s a celebration of contrasting textures and flavors, all layered into a single slice of bliss. From the buttery crust to the fruity cherry base, airy chocolate cream, and cloudlike topping, it strikes a perfect balance between rich and refreshing. Whether you’re making it for a holiday table or simply to treat yourself, this pie is proof that effortless desserts can still deliver unforgettable results. Keep it chilled, slice it clean, and savor every bite!

Chocolate Cherry Cream Pie
- Total Time: 4 hours 20 minutes (with chilling)
- Yield: 8 slices
- Diet: Vegetarian
Description
This Chocolate Cherry Cream Pie is the ultimate easy dessert that brings together the bold flavors of rich chocolate, tart cherry, and velvety cream—all layered in a buttery crust. Perfect for holidays, parties, or even casual weeknight indulgence, it’s a no-bake pie that’s both simple to make and stunning to serve. Whether you’re hunting for a quick dessert idea, a crowd-pleasing dinner finale, or a fun weekend baking project, this easy recipe delivers the goods. With silky pudding, sweet cherry filling, and a cloud of whipped topping, it’s one of those dessert ideas that checks all the boxes: flavor, texture, and presentation. Great for those searching for quick desserts, no-bake pies, or chocolate-cherry combos. Your next favorite sweet treat starts here.
Ingredients
1 pre-baked 9-inch pie crust
1 can 21 oz cherry pie filling
1 package 8 oz cream cheese softened
1 cup powdered sugar
1 ½ cups whipped topping plus more for topping
1 package 3.9 oz instant chocolate pudding mix
1 ½ cups cold milk
½ cup semi-sweet chocolate chips
1 cup fresh cherries or maraschino cherries for garnish
1 teaspoon vanilla extract optional
Instructions
1. Ensure your pie crust is fully baked and cooled.
2. Spread the cherry pie filling evenly over the crust.
3. In a bowl, beat cream cheese and powdered sugar until smooth.
4. In a separate bowl, whisk pudding mix with cold milk until thickened.
5. Fold the pudding into the cream cheese mixture.
6. Fold in whipped topping gently to maintain airiness.
7. Spoon the chocolate cream layer over the cherry filling and spread evenly.
8. Add a layer of whipped topping over the chocolate cream.
9. Garnish with chocolate chips and cherries.
10. Refrigerate for at least 4 hours or overnight before slicing and serving.
Notes
Let each layer cool or set before adding the next to keep the texture and structure.
Use full-fat ingredients for best flavor and stability.
Chilling overnight will give the pie cleaner slices and better flavor.
- Prep Time: 20 minutes
- Cook Time: 0 minutes
- Category: Dessert
- Method: No-Bake
- Cuisine: American
Nutrition
- Serving Size: 1 slice
- Calories: 380
- Sugar: 35g
- Sodium: 260mg
- Fat: 19g
- Saturated Fat: 10g
- Unsaturated Fat: 9g
- Trans Fat: 0g
- Carbohydrates: 50g
- Fiber: 2g
- Protein: 5g
- Cholesterol: 30mg