

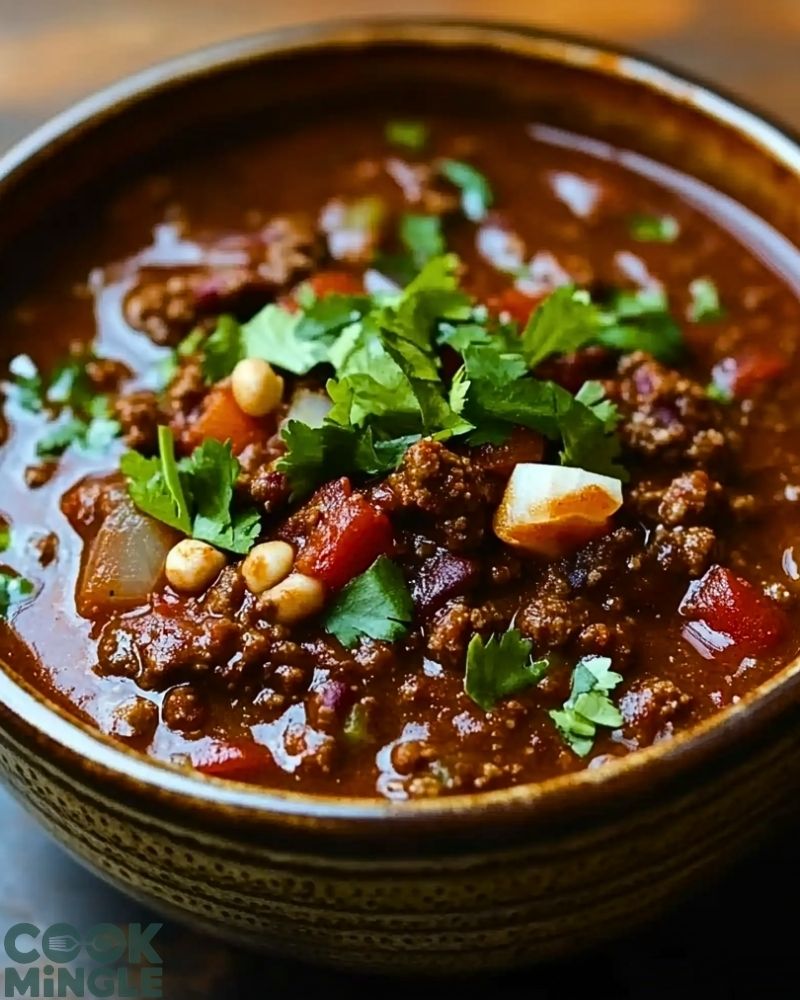
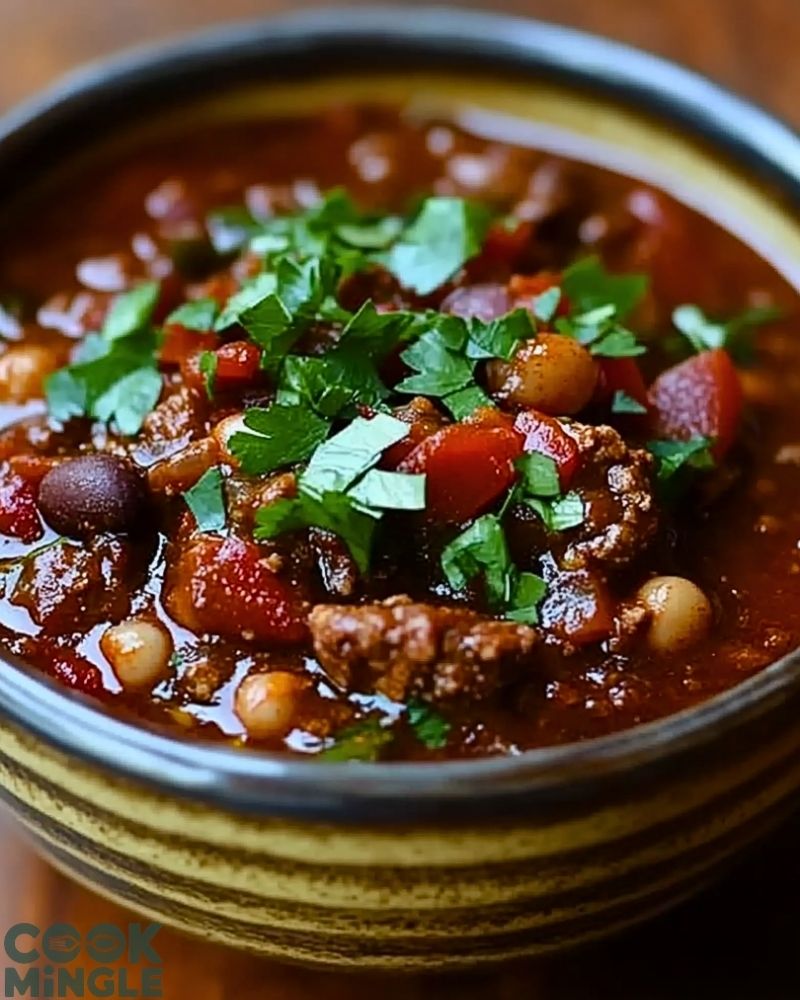
Texas-style chili isn’t just a meal—it’s a celebration of bold flavors and rich, slow-cooked comfort. This dish skips the beans in favor of chunks of tender beef simmered in a smoky, spicy, tomato-infused sauce. What sets it apart is its deep complexity and the way it warms your soul with every spoonful. It’s the kind of chili that demands attention, often served with pride at cook-offs and cherished during cozy nights at home.
Whether you’re gearing up for game day or planning a satisfying dinner, this Texas-style chili will steal the spotlight. With its thick, meaty consistency and unapologetic spice level, it doesn’t try to be everything for everyone—but for chili lovers, it’s pure perfection. Expect robust depth from a blend of dried chiles, subtle sweetness from slow caramelized onions, and a velvety texture that clings to every tender bite of beef.
Why You’ll Love This Texas-Style Chili Recipe
- Authentic Flavor: Made the traditional way—no beans, just beef, bold spices, and rich chili gravy.
- Incredible Texture: Chunky beef chuck gives this chili a hearty, stew-like body that’s far from your average bowl.
- Perfect for Batch Cooking: It gets better with time, making it ideal for leftovers or freezing.
- Customizable Heat: Adjust the spice level to suit your taste buds.
- Ideal for Gatherings: This crowd-pleaser is perfect for tailgates, family dinners, or chili cook-offs.
- One-Pot Comfort: Simmered in one pot, it’s rich and satisfying with minimal cleanup.
- Freezer-Friendly: Great for prepping ahead and storing for busy nights.
- A Flavor Journey: The combination of ancho, guajillo, and chipotle chiles delivers a complex, smoky, and slightly sweet heat.
Preparation Phase & Tools to Use for Texas-Style Chili
Creating authentic Texas-style chili starts with the right mindset and the right tools. While the ingredients carry the flavor, your equipment ensures everything comes together with ease and precision.
Essential Tools and Why They Matter
- Heavy-Bottomed Dutch Oven or Large Pot: A must-have for browning beef and slow simmering. Its heat-retaining properties ensure even cooking, while its depth accommodates hearty quantities without splatter.
- Sharp Chef’s Knife: Precision matters when cutting chuck roast into uniform chunks. A sharp knife speeds up prep and keeps your cuts clean.
- Cutting Board: Use a large, sturdy board—preferably with juice grooves—to manage meat and vegetables efficiently.
- Wooden Spoon or Heatproof Spatula: Perfect for stirring without scratching your pot, especially as you deglaze the browned bits for added flavor.
- Blender or Food Processor: Essential for pureeing soaked dried chiles into a silky base. This step is crucial for authentic chili flavor.
- Fine Mesh Strainer (optional): For those who prefer a smoother chile puree, straining helps remove bits of skin or seeds.
- Measuring Spoons and Cups: Accuracy is key with strong spices—measuring ensures consistency every time.
- Ladle: For easy serving and portioning without mess.
Preparation Tips
- Use Chuck Roast, Not Ground Beef: For that authentic, hearty texture, cut your own beef chunks. It stays juicy and holds up better during long cooking.
- Soak Dried Chiles in Hot Water: This softens them for blending and brings out their deep, earthy flavors. Let them soak at least 20–30 minutes.
- Sear in Batches: Overcrowding the pot will steam the meat instead of browning it. Browning adds a flavorful base for your chili.
- Deglaze the Pot: Don’t skip this step. Use beef broth or a splash of beer to lift those browned bits—it adds incredible depth.
- Simmer Low and Slow: After combining everything, let the chili simmer for at least 2 hours. This allows flavors to fully meld and the meat to tenderize.
- Adjust Salt Last: Flavors concentrate over time, so season gradually and taste toward the end.
- Let It Rest: Chili is even better the next day. Allow it to cool and sit in the fridge overnight for the best flavor.
Ingredients for This Texas-Style Chili Recipe
This recipe embraces bold, traditional flavors with a blend of dried chiles, tender beef, and rich aromatics. Every component plays a vital role in building the deep, smoky flavor Texas chili is famous for.
Meat & Fat
- 3 lbs beef chuck roast, trimmed and cut into 1-inch cubes
- 2 tbsp neutral oil (like canola or avocado oil), for searing
Dried Chiles (for the chili paste)
- 3 dried ancho chiles, stemmed and seeded
- 2 dried guajillo chiles, stemmed and seeded
- 1 dried chipotle chile (optional, for smoky heat)
- 2 cups hot water, for soaking the chiles
Aromatics & Base
- 1 large yellow onion, finely chopped
- 4 garlic cloves, minced
- 1 tbsp tomato paste
- 1 ½ tsp ground cumin
- 1 tsp smoked paprika
- ½ tsp Mexican oregano
- ½ tsp ground cinnamon (adds warmth and depth)
Liquids & Enhancers
- 2 cups beef broth
- 1 cup dark beer (like porter or stout, optional but adds richness)
- 1 tbsp apple cider vinegar
- 1 tsp unsweetened cocoa powder (adds a deep, earthy undertone)
- 1 tsp brown sugar (balances acidity and bitterness)
- Salt & freshly ground black pepper, to taste
Optional Garnishes
- Chopped white onion
- Fresh cilantro
- Sliced jalapeños
- Shredded cheddar
- Sour cream
- Cornbread or tortilla chips on the side
Step-by-Step Cooking Instructions for Texas-Style Chili
Step 1: Prepare the Dried Chiles
Place the dried ancho, guajillo, and chipotle chiles into a bowl. Cover them with 2 cups of hot water and let them soak for about 25–30 minutes until softened. Once rehydrated, blend them with a bit of the soaking liquid until smooth. Strain if you want a silky texture. Set aside the chile paste.
Step 2: Sear the Beef
Heat 1 tablespoon of oil in a large Dutch oven over medium-high heat. Working in batches, sear the beef chunks until browned on all sides, about 3–4 minutes per batch. Do not overcrowd the pan. Transfer browned beef to a bowl and repeat with remaining meat, adding more oil as needed.
Step 3: Sauté the Aromatics
In the same pot (don’t clean it—keep all that flavor!), lower the heat to medium. Add chopped onions and sauté until golden and softened, about 5–7 minutes. Stir in the minced garlic and cook for another 30 seconds until fragrant.
Step 4: Toast the Spices
Add tomato paste, cumin, paprika, oregano, and cinnamon to the onions. Stir continuously for about 2 minutes to toast the spices and caramelize the tomato paste—this deepens the flavor.
Step 5: Deglaze the Pot
Pour in the beer (or a bit of the beef broth if not using beer) to deglaze the pot. Scrape the bottom to lift up all the browned bits—these carry huge flavor.
Step 6: Build the Chili Base
Return the seared beef to the pot. Add the blended chile paste, beef broth, cocoa powder, brown sugar, and apple cider vinegar. Stir everything together well and bring it to a simmer.
Step 7: Slow Simmer for Flavor
Cover partially and reduce heat to low. Let the chili simmer gently for 2 to 2½ hours, stirring occasionally. The beef should become tender, and the chili should thicken to a rich, luscious consistency.
Step 8: Final Seasoning
Taste the chili near the end of cooking. Add salt and pepper to balance the flavors. If needed, adjust sweetness, acidity, or heat to suit your preference.
Step 9: Serve and Garnish
Ladle the chili into bowls and garnish as desired—with chopped onions, cilantro, jalapeños, or a dollop of sour cream. Serve alongside cornbread or tortilla chips for the ultimate comfort meal.
Notes
- Flavor Improves Overnight: Texas-style chili is even better the next day. Letting it rest in the fridge overnight deepens the chili’s complexity and harmonizes the spices.
- Customize the Heat: Want more kick? Add a diced jalapeño during the onion sauté or finish with a dash of cayenne. Prefer it mild? Stick with just the ancho and guajillo chiles.
- Use Quality Meat: Opt for well-marbled chuck roast. Lean cuts can turn tough during slow simmering, whereas fattier cuts break down beautifully.
- Chile Paste Shortcut: In a pinch, you can substitute store-bought chili paste, but nothing beats the flavor of homemade blended chiles.
- Low & Slow is Key: Rushing the simmering process will rob you of rich, layered flavors. Allow time for the meat to tenderize and the spices to bloom.
- Straining the Chile Paste: If you want an ultra-smooth chili base, use a fine mesh strainer after blending. It removes chile skins for a velvety consistency.
- Thickening Trick: If your chili is too thin, uncover the pot for the last 30 minutes of simmering or mash a few chunks of meat against the pot wall to add body.
- Make it Yours: Some purists avoid tomatoes altogether. If you’re one of them, reduce or skip the tomato paste and lean fully into chile-driven flavor.
Watch Out for These Mistakes While Cooking
- Overcrowding the Pan During Searing: If the beef doesn’t brown properly, you lose the essential flavor base. Always work in batches.
- Not Soaking Chiles Long Enough: Undersoaked chiles will blend poorly and give the chili an unpleasant, gritty texture.
- Skipping the Deglaze Step: Those browned bits at the bottom of the pot are liquid gold for flavor—don’t leave them behind.
- Rushing the Simmer: Don’t try to crank up the heat to speed up cooking. The low-and-slow method is non-negotiable for proper flavor development.
- Seasoning Too Early: Always taste and adjust salt at the end. Early seasoning can become too intense as the chili reduces.
- Using Pre-Ground Spices Only: Freshly toasted and ground cumin or spices elevate the taste significantly. If you can, toast whole spices and grind them just before use.
- Ignoring Meat Size: Uniform beef chunks ensure even cooking. Irregular pieces can leave you with tough bites or overcooked bits.
- Overloading with Toppings: While fun, excessive toppings can mask the chili’s complex flavor. Choose 1–2 garnishes to complement rather than overwhelm.
What to Serve With Texas-Style Chili?
Texas-style chili is bold, filling, and deeply satisfying, but pairing it with the right side dish or drink can elevate the whole experience. Whether you’re planning a casual gathering or a comforting weeknight dinner, these accompaniments will complement the chili’s smoky, beefy depth and balance out its heat.
8 Recommendations
- Cornbread (Classic or Jalapeño-Cheddar)
The mildly sweet and crumbly texture of cornbread contrasts beautifully with the rich spice of chili. Serve warm with a pat of butter for an unbeatable combo. - Tortilla Chips or Fritos
Crunchy, salty chips make for perfect scooping or topping. Frito pie is a popular Texas twist—serve chili over a bed of Fritos and top with cheese and onions. - Mexican Rice or Cilantro Lime Rice
A side of fluffy, zesty rice helps mellow out the chili’s spice and adds a light, aromatic contrast to the heaviness of the beef. - Pickled Red Onions or Jalapeños
Tangy and crisp, these toppings cut through the chili’s richness and add a vibrant pop of flavor to each bite. - Grilled or Roasted Vegetables
Add a healthful, colorful balance with grilled zucchini, bell peppers, or charred corn on the cob. - Coleslaw (Vinegar-Based)
Cool and crunchy coleslaw offers a refreshing texture and acidity to counterbalance the deep, smoky stew. - Avocado Slices or Guacamole
Creamy avocado brings a cooling effect to each spoonful, softening the chili’s bold heat and adding luscious mouthfeel. - Texas-Style Iced Tea or a Cold Beer
Wash it down with something cold! Unsweetened iced tea or a chilled dark beer like a porter or lager matches the chili’s intensity without overpowering it.
Storage Instructions
Texas-style chili stores exceptionally well, and in fact, many chili enthusiasts agree it tastes even better the next day. Here’s how to keep it fresh, safe, and ready for future meals:
Refrigeration
- Cool Completely First: Let the chili cool at room temperature (no longer than 2 hours) before refrigerating.
- Storage Time: Store in an airtight container in the refrigerator for up to 4–5 days.
- Reheating: Reheat on the stovetop over medium-low heat until warmed through, stirring occasionally. Add a splash of broth if it has thickened too much.
Freezing
- Best Freezing Method: Transfer fully cooled chili into freezer-safe bags or containers, leaving a little space for expansion.
- Storage Duration: Chili keeps well in the freezer for up to 3 months.
- Thawing & Reheating: Thaw overnight in the fridge, then reheat gently on the stove or microwave in intervals, stirring between each.
Meal Prep Tip
Freeze in single-portion containers for quick weekday lunches or last-minute dinners.
Estimated Nutrition (Per Serving — based on 6 servings)
Note: Values may vary depending on portion sizes and exact ingredients used.
- Calories: ~520 kcal
- Protein: ~40g
- Fat: ~32g
- Saturated Fat: ~12g
- Carbohydrates: ~15g
- Sugar: ~5g
- Fiber: ~4g
- Sodium: ~850mg
- Cholesterol: ~120mg
This chili is high in protein and low in carbohydrates, making it great for keto-friendly or low-carb diets. For a lighter option, you can trim more fat from the beef or reduce added oil and sugar.
Frequently Asked Questions
What cut of beef is best for Texas-style chili?
Beef chuck roast is ideal due to its marbling and tenderness after long simmering. Avoid lean cuts like sirloin, which can turn dry and chewy.
Can I make this chili in a slow cooker or Instant Pot?
Yes! For a slow cooker, sear the beef and sauté aromatics first, then transfer everything into the cooker and set on low for 6–8 hours. For the Instant Pot, use the sauté function for browning and pressure cook on high for about 35–40 minutes, followed by a natural release.
How spicy is this chili?
It has a medium kick, thanks to the blend of dried chiles. You can reduce the heat by skipping the chipotle chile or removing all chile seeds before soaking. Spice lovers can add cayenne or fresh jalapeños.
Can I use ground beef instead of chuck roast?
You can, but it will change the texture. Ground beef produces a looser, less stew-like chili. If you choose this route, opt for 80/20 ground beef and skip the long simmer.
Is this chili gluten-free?
Yes—as long as your beef broth and beer (if used) are gluten-free. Always double-check your labels to be safe.
Can I make this vegetarian or vegan?
Traditional Texas-style chili is meat-centric, but for a plant-based version, substitute the beef with mushrooms, lentils, or a meat alternative like jackfruit or textured vegetable protein, and use vegetable broth.
Why are there no beans in this recipe?
This is a traditional Texas-style chili, which purposely excludes beans to focus on bold, beefy flavor. If you prefer beans, feel free to add cooked kidney or pinto beans in the final 30 minutes.
How do I thicken chili without using flour or cornstarch?
Let it simmer uncovered for the last 30 minutes, or mash a few chunks of meat to create body. Adding a spoonful of masa harina (corn flour) is also a great thickening and flavor-boosting trick.
Conclusion
Texas-style chili is more than just a dish—it’s a rich culinary tradition packed with flavor, heartiness, and soul-warming satisfaction. With its slow-cooked beef, smoky chile paste, and bold spices, this chili captures everything great about comfort food while leaving plenty of room for personal flair. Whether you’re preparing it for a crowd, storing leftovers for busy nights, or entering it into a cook-off, this recipe delivers unforgettable taste in every bite.

Delicious Texas-Style Chili Recipe
- Total Time: 3 hours
- Yield: 6 servings
Description
Get ready to dive into the bold, smoky depths of this authentic Texas-style chili—a hearty, slow-simmered dish that’s all about rich flavor and tender chunks of beef. Perfect for cozy dinners, game day gatherings, or prepping meals for the week, this no-bean chili offers a perfect blend of ancho, guajillo, and chipotle chiles, simmered low and slow with savory aromatics and a hint of cocoa for deep complexity. It’s the kind of easy recipe that fills your kitchen with irresistible aroma and delivers a meaty, satisfying bowl every time. Whether you’re searching for a quick dinner idea, a food idea for a chilly night, or an impressive chili to wow your friends, this dish checks every box.
Ingredients
Meat & Fat:
- 3 lbs beef chuck roast, cut into 1-inch cubes
- 2 tbsp neutral oil
Dried Chiles:
- 3 dried ancho chiles
- 2 dried guajillo chiles
- 1 dried chipotle chile (optional)
- 2 cups hot water (for soaking)
Aromatics & Base:
- 1 large yellow onion, chopped
- 4 garlic cloves, minced
- 1 tbsp tomato paste
- 1 ½ tsp ground cumin
- 1 tsp smoked paprika
- ½ tsp Mexican oregano
- ½ tsp ground cinnamon
Liquids & Enhancers:
- 2 cups beef broth
- 1 cup dark beer (optional)
- 1 tbsp apple cider vinegar
- 1 tsp unsweetened cocoa powder
- 1 tsp brown sugar
- Salt and pepper to taste
Optional Garnishes:
- Chopped white onion
- Fresh cilantro
- Sliced jalapeños
- Shredded cheddar
- Sour cream
- Cornbread or tortilla chips
Instructions
- Soak dried chiles in hot water for 25–30 minutes. Blend until smooth and strain if desired.
- Heat oil in a Dutch oven and sear beef in batches until browned. Set aside.
- In the same pot, sauté onion until soft, then add garlic and cook 30 seconds.
- Stir in tomato paste, cumin, paprika, oregano, and cinnamon. Cook 2 minutes.
- Deglaze pot with beer or broth, scraping browned bits from the bottom.
- Return beef to pot. Add chile paste, broth, cocoa, sugar, and vinegar.
- Simmer uncovered on low for 2 to 2½ hours, stirring occasionally.
- Taste and adjust seasoning. Serve with garnishes of choice.
- Prep Time: 30 minutes
- Cook Time: 150 minutes