
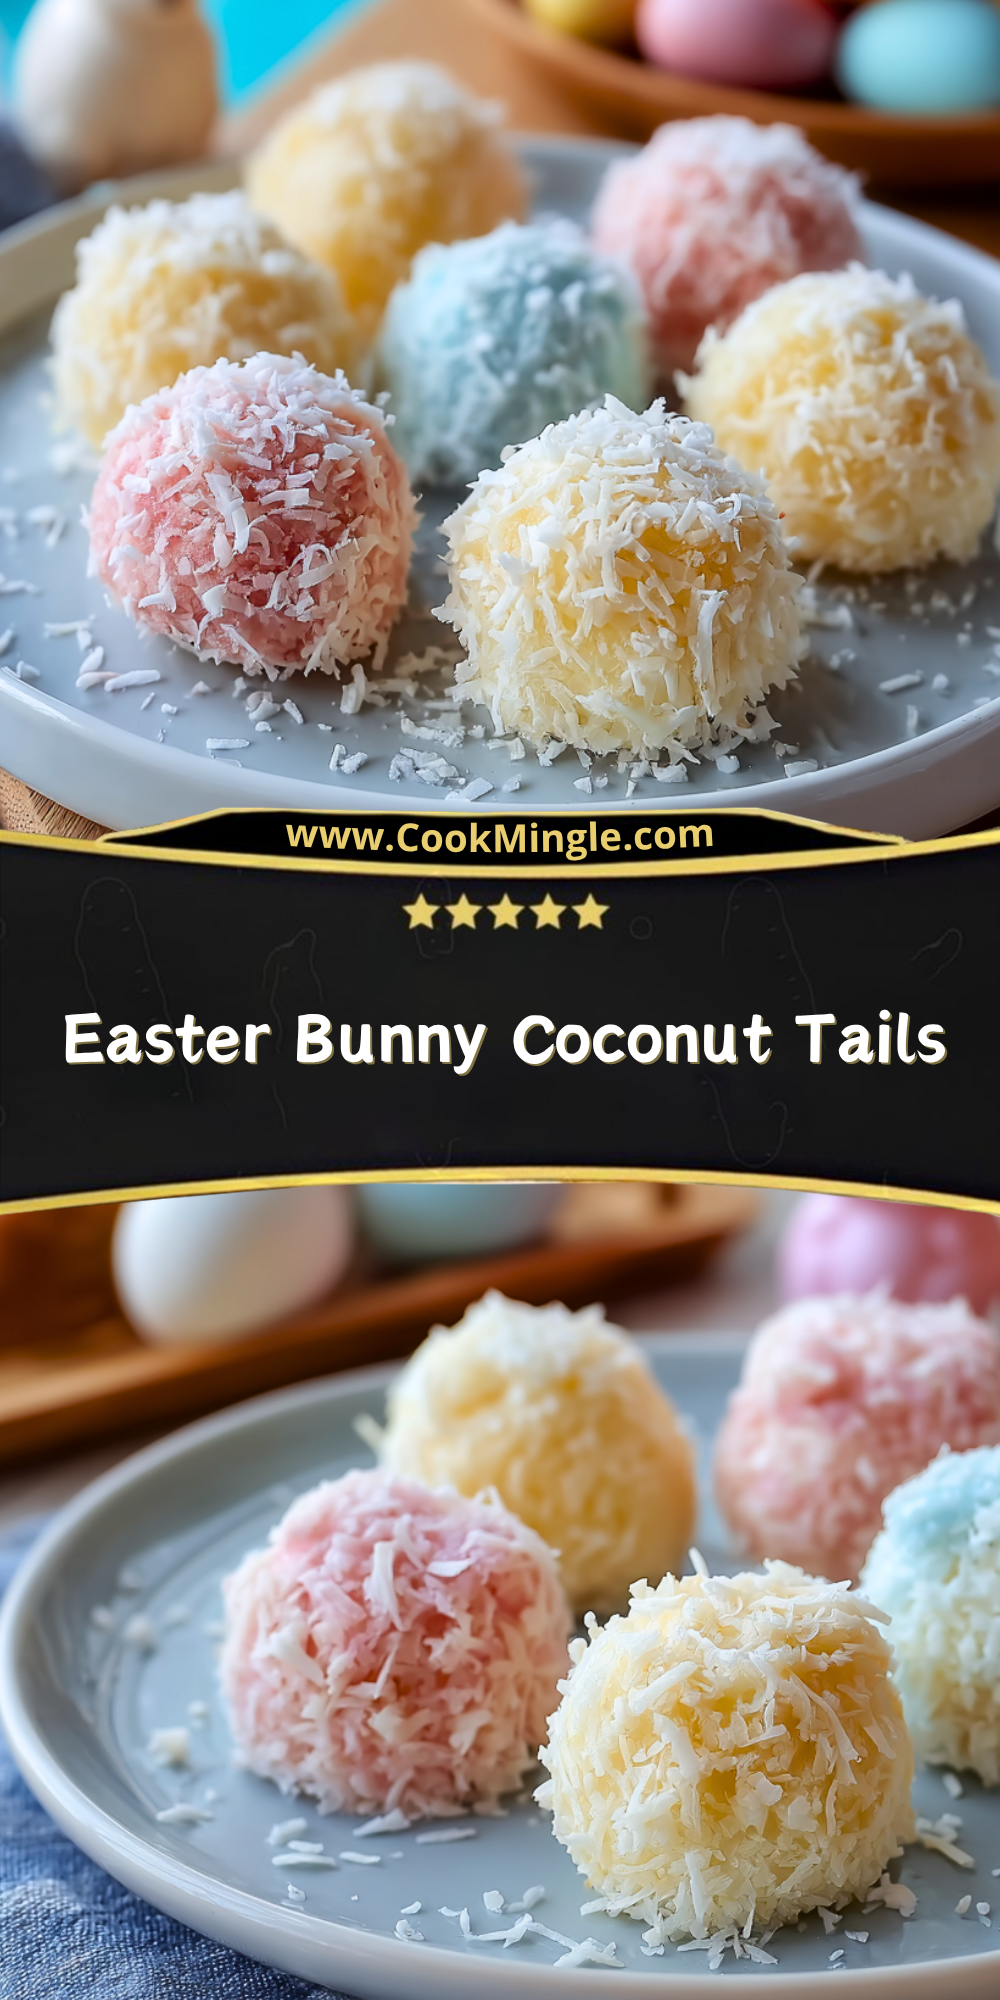
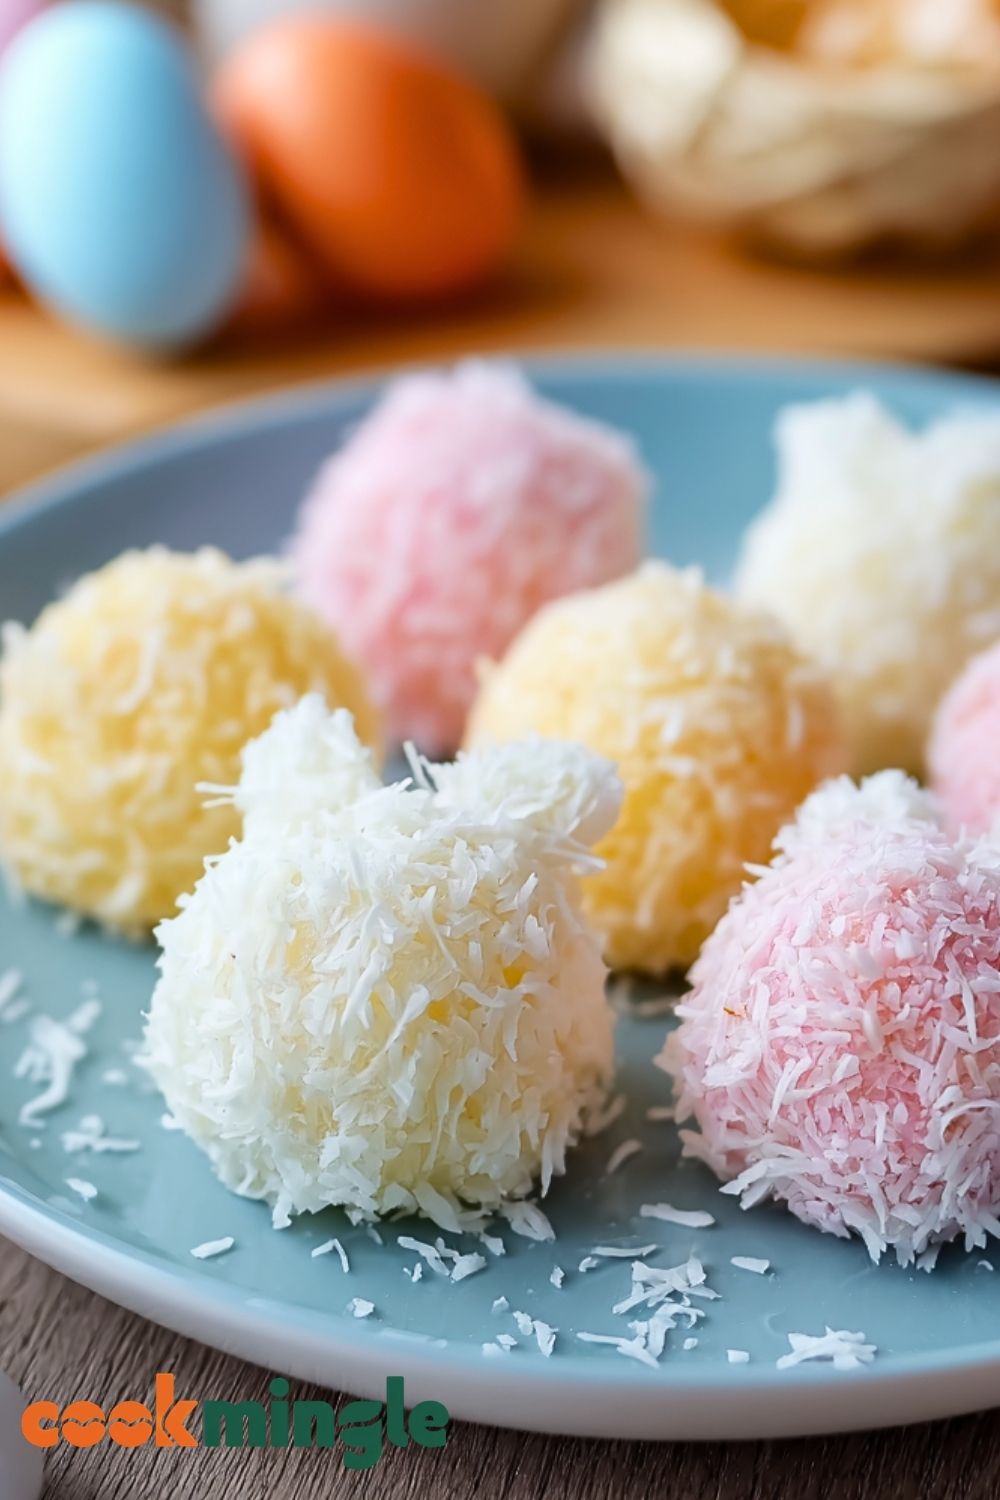
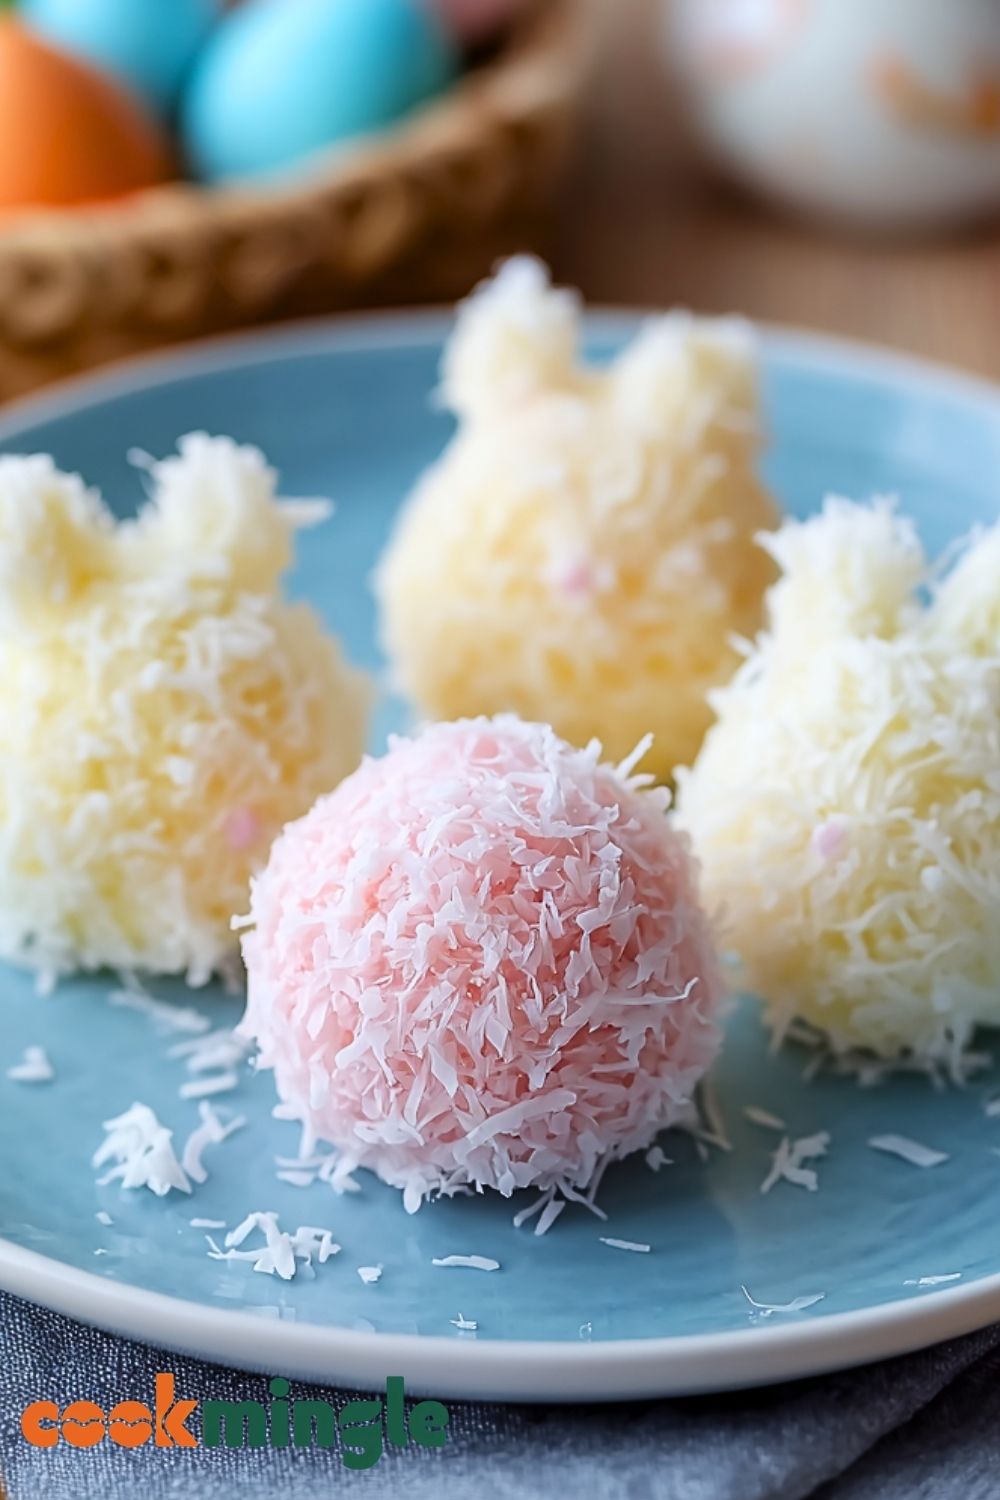
I’ve always had a soft spot for recipes that are as cute as they are delicious, and these Easter Bunny Coconut Tails hit the sweet spot perfectly. They’re light, fluffy, and bursting with coconut flavor—plus, they look like little pastel bunny tails, which makes them an absolute showstopper for any springtime gathering. Whether you’re hosting a festive brunch, putting together a dessert platter, or looking for a fun activity to do with the kids, this recipe never fails to bring smiles.
The best part? They require no baking at all, which means less fuss in the kitchen and more time enjoying the company of your loved ones. I love how easy it is to customize the colors to match the rest of your Easter decor, and the texture is just heavenly—soft on the inside, with a light coconut crunch on the outside. These are the kind of treats that disappear fast, so you might want to double the batch!
Why You’ll Love This Easter Bunny Coconut Tails Recipe
These coconut tails are not just visually adorable, they’re also incredibly easy to make. You only need a few basic ingredients, no oven, and minimal cleanup. They’re naturally gluten-free and can be adapted for various diets, making them great for a crowd. Best of all, they’re ready in under 30 minutes!
What Kind of Coconut Should I Use?
For the best texture, I recommend using finely shredded, unsweetened coconut. It sticks well and gives that “furry tail” look without overwhelming the sweetness. You can also use sweetened coconut flakes if you want a bit more indulgence, just be mindful of reducing the sweetness in the mixture itself.
Options for Substitutions
- Sweetened Condensed Milk: You can swap this with coconut condensed milk for a dairy-free version.
- Food Coloring: Prefer natural? Beetroot powder, turmeric, and spirulina make great alternatives.
- Butter: For a vegan-friendly recipe, use coconut oil or a plant-based butter.
- Vanilla Extract: Almond extract or coconut extract adds a fun twist to the flavor profile.
Ingredients for This Easter Bunny Coconut Tails Recipe
- Sweetened Condensed Milk – This is the glue that binds everything together. It gives the balls their rich, creamy sweetness and helps hold the shredded coconut in place.
- Unsweetened Shredded Coconut – You’ll need plenty of this to both mix into the dough and roll the tails in for that fluffy bunny look. It gives the treats their signature texture.
- Vanilla Extract – Just a splash enhances the coconut flavor and adds depth to the sweetness.
- Butter (Softened) – Adds richness and helps the mixture stay smooth and moldable.
- Powdered Sugar – Gives the dough a firmer consistency and balances the sweetness of the condensed milk.
- Food Coloring – To give the tails their pastel Easter charm. Gel food coloring works best, as it doesn’t water down the mixture.
Step 1: Prepare the Base Mixture
In a large mixing bowl, combine the sweetened condensed milk, softened butter, vanilla extract, and powdered sugar. Mix until smooth and well incorporated. This will be your creamy base.
Step 2: Add the Coconut
Fold in about 2 cups of shredded coconut to the mixture. Stir until the coconut is evenly distributed and the mixture holds together when pressed. If it feels too wet, add more coconut 1/4 cup at a time until you reach a soft dough-like texture.
Step 3: Divide and Color the Dough
Separate the coconut mixture into several small bowls (depending on how many colors you want). Add a small amount of food coloring to each bowl and mix thoroughly until the desired pastel shade is achieved.
Step 4: Shape into Balls
Using your hands or a small cookie scoop, roll the colored coconut mixture into bite-sized balls (about 1 inch in diameter). Place them on a lined tray or plate.
Step 5: Roll in Coconut Flakes
Roll each ball in a bowl of dry shredded coconut to coat the outside. This step gives them that fuzzy, bunny-tail texture and makes them less sticky to handle.
Step 6: Chill Before Serving
Place the finished coconut tails in the fridge for at least 30 minutes to firm up before serving. You can also keep them chilled until ready to serve. They taste even better cold!
How Long to Prepare the Easter Bunny Coconut Tails
Making these adorable coconut tails is surprisingly quick. The hands-on prep time is about 20 minutes, especially if you’re working with a few different colors. Mixing, shaping, and rolling can all be done in under half an hour.
The only additional time you’ll need is for chilling. Letting the coconut tails set in the refrigerator for at least 30 minutes helps them firm up nicely, making them easier to serve and enjoy. So in total, plan for about 50 minutes from start to finish—including chill time.
Tips for Perfect Easter Bunny Coconut Tails
- Use gel-based food coloring to achieve vibrant pastels without adding extra liquid.
- Wet your hands slightly before rolling the mixture into balls to prevent sticking.
- Chill the mixture before shaping if it feels too soft—it’ll be easier to handle.
- Use a cookie scoop for uniform sizes that look professional and cute.
- Roll in extra coconut right before serving if they’ve absorbed some of the flakes while chilling.
Watch Out for These Mistakes While Cooking
- Don’t skip chilling. If you serve them too soon, they’ll be too soft and sticky.
- Avoid over-coloring. A little food coloring goes a long way; too much can overpower the taste.
- Don’t use sweetened coconut in the dough unless you adjust the sugar—otherwise, it can be overly sweet.
- Skipping the powdered sugar can result in a runnier consistency that doesn’t hold its shape.
- Overmixing the dough can make it greasy, especially if your butter is too soft.
What to Serve With Easter Bunny Coconut Tails?
1. Lemon Bars
The tartness of lemon bars beautifully contrasts the sweet, creamy coconut.
2. Fresh Berry Salad
Add color and freshness to your dessert table with strawberries, blueberries, and mint.
3. Mini Carrot Cakes
A festive pairing that balances spice and sweetness.
4. Pastel-Colored Deviled Eggs
Savory and adorable, they enhance the Easter theme.
5. Iced Herbal Tea or Lemonade
A refreshing drink brings balance to the rich coconut texture.
Storage Instructions
Refrigerator: Store the coconut tails in an airtight container in the fridge for up to 1 week. Place parchment paper between layers to prevent sticking.
Freezer: These freeze well! Arrange in a single layer on a baking sheet to freeze individually, then transfer to a freezer-safe bag. They can be stored for up to 2 months. Thaw in the fridge before serving.
Room Temperature: Not ideal for long storage—these treats are best kept chilled due to the butter and condensed milk.
Estimated Nutrition (Per Serving – Approx. 1 Ball)
- Calories: 110
- Total Fat: 6g
- Saturated Fat: 5g
- Carbohydrates: 12g
- Sugar: 10g
- Protein: 1g
- Sodium: 25mg
- Fiber: 1g
Frequently Asked Questions
Can I make these coconut tails in advance?
Yes! They’re actually better when made a few hours ahead or even the night before, giving them time to firm up.
Are these safe for kids to help with?
Definitely. This is a kid-friendly, no-bake recipe that’s great for little hands to help shape and roll.
Can I use desiccated coconut instead?
You can, but the texture won’t be as soft and fluffy. Shredded coconut works best for the bunny-tail look.
How do I make these dairy-free?
Use coconut condensed milk and plant-based butter for a completely dairy-free version.
What if I don’t have food coloring?
You can leave them white (they’ll still be adorable) or use natural colorings like beet juice, turmeric, or spirulina powder.
Conclusion
Easter Bunny Coconut Tails are the kind of treat that checks every box: quick, festive, customizable, and downright delicious. Whether you’re making them with kids, prepping for a brunch, or just craving something sweet and nostalgic, these little coconut gems are sure to charm your guests and brighten your holiday table. With just a handful of ingredients and minimal effort, you can whip up something truly memorable this Easter season.
Easter Bunny Coconut Tails
- Total Time: 50 minutes
- Yield: 20 balls
Description
Looking for the cutest and easiest Easter treat? These Easter Bunny Coconut Tails are the perfect no-bake dessert! Soft, sweet, and bursting with coconut flavor, they come together in just minutes with simple ingredients and a pastel flair. Whether you’re preparing for a spring brunch, hunting for quick breakfast ideas, or adding to your healthy snack rotation, these coconut balls are a festive must. They’re gluten-free, kid-friendly, and freezer-friendly—ideal for all your Easter dessert and food ideas. A dreamy combo of quick prep and adorable results!
Ingredients
1 can (14 oz) sweetened condensed milk
2 cups unsweetened shredded coconut (plus more for rolling)
2 tablespoons butter, softened
1 teaspoon vanilla extract
1/2 cup powdered sugar
Food coloring of choice
Instructions
1. In a large bowl, mix together the sweetened condensed milk, softened butter, vanilla extract, and powdered sugar until smooth.
2. Fold in the shredded coconut and stir until the mixture holds together. Add more coconut if needed to reach a moldable consistency.
3. Divide the mixture into separate bowls and tint each batch with a different pastel food coloring.
4. Roll the mixture into 1-inch balls using your hands or a small cookie scoop.
5. Coat each ball in extra shredded coconut for a fuzzy bunny tail look.
6. Place the coconut tails on a tray and refrigerate for at least 30 minutes before serving.
Notes
For vibrant colors, use gel food coloring—it won’t dilute the texture.
If the mixture is too sticky, chill it for 10 minutes before rolling.
These can be frozen for up to 2 months and taste even better when served cold.
- Prep Time: 20 minutes
- Cook Time: 0 minutes
- Category: Dessert / Snack
- Method: No-bake
- Cuisine: American
Nutrition
- Serving Size: 1 ball
- Calories: 110
- Sugar: 10g
- Sodium: 25mg
- Fat: 6g
- Saturated Fat: 5g
- Unsaturated Fat: 1g
- Trans Fat: 0g
- Carbohydrates: 12g
- Fiber: 1g
- Protein: 1g
- Cholesterol: 5mg