
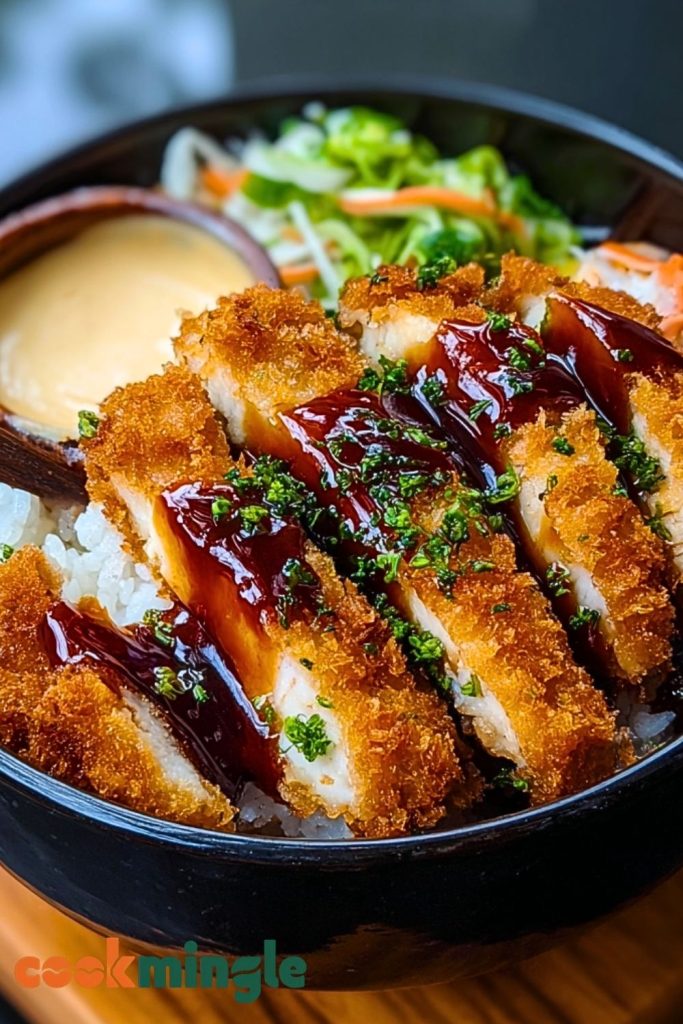
I’ve always had a soft spot for Japanese comfort food, and the Easy Japanese Katsu Bowl holds a special place in my heart. It’s that satisfying crunch of golden, breaded chicken paired with warm rice, creamy mayo sauce, and sweet-savory tonkatsu drizzle that makes every bite crave-worthy. It’s simple, yet it delivers bold flavor and texture that feels like a restaurant dish—only it comes together in your own kitchen with minimal fuss.
The beauty of this bowl is that it’s not only easy to prepare, but also incredibly adaptable. Whether I’m cooking for myself or trying to impress friends with something cozy and flavorful, this dish never fails to deliver. It’s comfort food, but with elegance. You’ll get that fried crunch without deep frying, and you can layer it exactly how you like—rice, katsu, sauce, herbs. Every element complements the next.
Why You’ll Love This Easy Japanese Katsu Bowl
- Crispy, golden perfection: The panko-coated chicken cutlet delivers that irresistible crunch.
- Fast and fuss-free: Perfect for busy weeknights but delicious enough for weekend indulgence.
- Balanced flavor: Creamy, tangy, and sweet sauces combine beautifully over rice.
- Customizable: Use your favorite protein or sauce—make it yours.
- Great for meal prep: Make components ahead and build your bowl when you’re ready to eat.
What Kind of Chicken Should I Use for a Katsu Bowl?
For the perfect katsu bowl, I recommend using boneless, skinless chicken thighs or chicken breasts—both work beautifully, depending on your preference. Chicken thighs offer a juicier, more flavorful bite and are slightly more forgiving when frying. If you prefer leaner meat, chicken breasts sliced in half lengthwise (to create thinner cutlets) will give you that classic katsu feel with a light and crisp finish.
Make sure to pound the chicken to an even thickness so it cooks evenly and crisps up without drying out. You want that ideal contrast: crunchy outside, tender and moist inside.
Options for Substitutions
Cooking should be flexible, and the katsu bowl is no exception. Here are some swaps if you want to mix things up:
- Protein alternatives: Swap chicken with pork cutlets (tonkatsu), tofu slices (for a vegetarian version), or even fish fillets like salmon or cod.
- Gluten-free option: Use gluten-free panko and tamari instead of soy sauce for the sauces.
- Rice base alternatives: Try it with brown rice, quinoa, or cauliflower rice if you’re watching carbs.
- Dairy-free: Use vegan mayo or a tahini-based sauce for the creamy topping.
- Sauce tweaks: No tonkatsu sauce? Mix ketchup, Worcestershire sauce, and a bit of soy sauce for a quick homemade version.
Ingredients for This Easy Japanese Katsu Bowl
- Chicken cutlets – The star of the bowl. Thin, tender pieces of chicken provide a juicy base with that crispy coating once fried.
- Salt & pepper – A simple seasoning that brings out the flavor of the chicken before breading.
- All-purpose flour – Used to help the egg stick to the chicken and create a barrier between meat and oil.
- Eggs – Acts as the binding agent to adhere the panko crumbs to the chicken.
- Panko breadcrumbs – Essential for that signature Japanese crunch. Light and airy, they fry up beautifully golden.
- Neutral oil (like canola or vegetable) – For shallow frying the cutlets without overpowering the flavor.
- Steamed white rice – The cozy, starchy base that soaks up all the delicious sauces.
- Tonkatsu sauce – A sweet, tangy Japanese sauce that pairs perfectly with the crispy chicken.
- Japanese mayo (or spicy mayo) – Adds richness and creaminess with a subtle tang that elevates the dish.
- Fresh parsley or green onion – For garnish and a bit of fresh contrast to the rich flavors.
Step 1: Prepare the Chicken
Start by patting your chicken cutlets dry with a paper towel. If you’re using chicken breasts, slice them in half lengthwise and pound gently to create even thickness. Season both sides with salt and pepper.
Step 2: Set Up a Breading Station
Grab three shallow bowls. Add flour to the first, beaten eggs to the second, and panko breadcrumbs to the third. Dredge each piece of chicken first in flour, then dip into the egg, and finally press firmly into the panko to ensure an even, crunchy coating.
Step 3: Fry the Chicken
Heat about ½ inch of neutral oil in a skillet over medium heat. Once hot, carefully add the breaded chicken and cook for 3–4 minutes per side until golden brown and cooked through. Transfer to a paper towel-lined plate to drain excess oil.
Step 4: Cook the Rice
While the chicken is frying, prepare your rice according to package instructions. Freshly steamed short-grain or sushi rice is ideal—it’s sticky, fluffy, and holds the bowl together.
Step 5: Slice and Build the Bowl
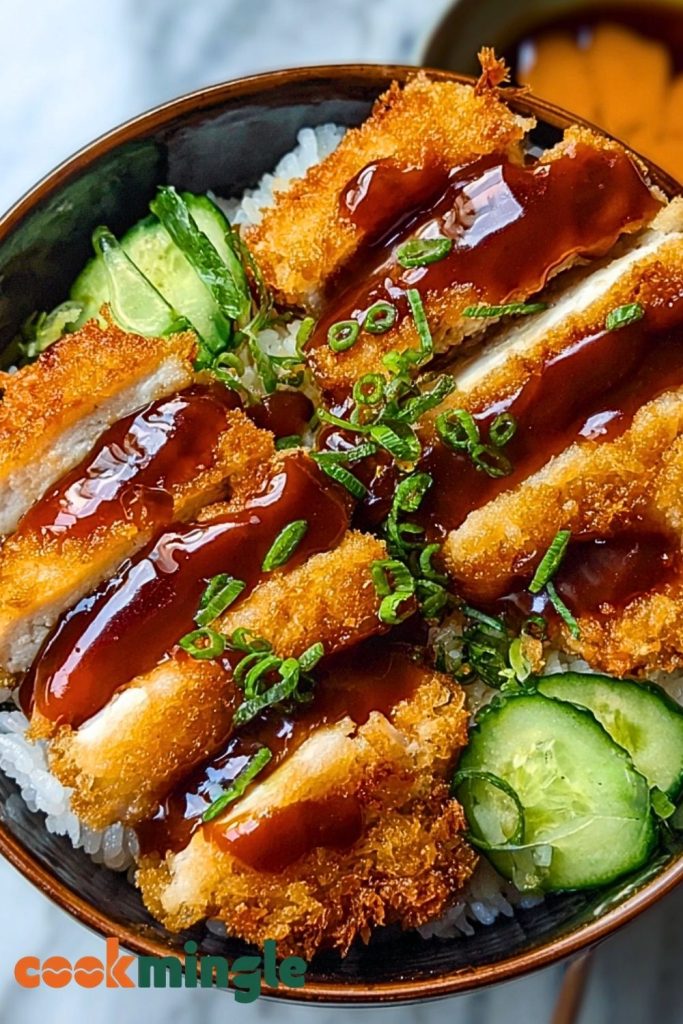
Once the chicken is slightly cooled, slice it into strips. Add a generous scoop of rice to each bowl, then lay the sliced katsu on top. Drizzle with tonkatsu sauce and spicy mayo. Sprinkle fresh parsley or green onion for garnish.
How Long to Cook the Easy Japanese Katsu Bowl
The actual cooking time is surprisingly short, making this a quick and satisfying meal. Here’s the breakdown:
- Chicken frying time: 3–4 minutes per side, about 8 minutes total.
- Rice cooking: Depending on the type, around 15–20 minutes.
- Prep and assembly: 10–15 minutes.
So in total, you’re looking at about 30–35 minutes from start to finish—perfect for a weeknight dinner that feels special.
Tips for Perfect Easy Japanese Katsu Bowl
- Even thickness matters: Pounding the chicken ensures it cooks evenly and prevents dry spots.
- Don’t overcrowd the pan: Fry the chicken in batches if needed to keep the oil temperature consistent and get that golden crisp.
- Let it rest: After frying, give the chicken a few minutes to rest before slicing—it keeps the juices in.
- Use good rice: Short-grain or sushi rice adds that authentic stickiness that holds up under the sauce.
- Sauce smart: Drizzle sauces just before serving to keep the breading crisp.
- Double fry if needed: For extra crunch, you can quickly refry the chicken for 30 seconds after it rests.
- Warm up the bowl: Pre-warm your bowl slightly if you want everything to stay hot while eating.
Watch Out for These Mistakes While Cooking
- Skipping the pounding step: Uneven chicken thickness means uneven cooking—thin it out to avoid raw centers or dry edges.
- Using cold oil: If the oil isn’t hot enough, your katsu will soak it up and turn greasy rather than crispy.
- Overcrowding the pan: This drops the oil temperature and causes soggy breading—always fry in batches if needed.
- Not seasoning the chicken: Don’t rely solely on sauce—season your chicken directly to layer in flavor.
- Slicing too early: Cutting the chicken right out of the oil releases juices and makes it dry. Let it rest for a few minutes.
- Heavy sauce hand: Drizzling is key! Too much sauce can drown the crunch and overpower the balance of flavors.
What to Serve With Easy Japanese Katsu Bowl?
Miso Soup
A warm, savory miso broth with tofu and seaweed adds a light, comforting touch next to the hearty bowl.
Cucumber Sunomono (Japanese Cucumber Salad)
Light, vinegary cucumber slices help refresh the palate and balance the richness of the fried katsu.
Edamame
Lightly salted and steamed, these protein-packed pods are a great side snack or appetizer.
Pickled Ginger or Daikon
Sharp and tangy—pickled elements add brightness and help cut through the fried texture of the chicken.
Steamed Broccoli
A super simple green side that adds nutrition and a bit of crunch without distracting from the bowl’s flavor.
Tamago (Japanese Sweet Omelet)
A soft, slightly sweet rolled omelet gives a different texture and flavor profile while keeping with Japanese tradition.
Seaweed Salad
Vibrant, slightly chewy seaweed tossed with sesame oil and vinegar adds a refreshing bite that pairs well.
Storage Instructions
If you’re lucky enough to have leftovers, storing this dish properly makes a big difference in maintaining its flavor and texture.
- Chicken Katsu: Store the cooked cutlets separately from the rice and sauces in an airtight container. They’ll stay crisp for about 2–3 days in the refrigerator.
- Rice: Keep it in a separate airtight container. Reheat with a splash of water and cover with a damp paper towel to bring back moisture—best used within 2 days.
- Sauces: Store tonkatsu and mayo-based sauces in small containers in the fridge. They’ll last up to a week.
- Reheating tip: Re-crisp chicken in an air fryer or oven at 375°F (190°C) for 5–7 minutes instead of microwaving.
Estimated Nutrition
Here’s a general estimate for one serving of this Easy Japanese Katsu Bowl (based on using chicken thigh, white rice, tonkatsu sauce, and spicy mayo):
- Calories: ~620 kcal
- Protein: 30–35g
- Carbohydrates: 50–55g
- Fat: 30–35g
- Saturated Fat: 6g
- Sugar: 8g
- Fiber: 2g
- Sodium: ~950mg
- Cholesterol: ~120mg
These values will vary based on your choice of protein, sauce, and portion size—but it’s a satisfying, well-rounded bowl that delivers on flavor and texture.
Frequently Asked Questions
What’s the difference between chicken katsu and tonkatsu?
Chicken katsu uses chicken cutlets, while tonkatsu is made with pork cutlets. Both are breaded with panko and fried, but the choice of meat changes the flavor and texture slightly.
Can I bake or air-fry the chicken instead?
Yes! Baking at 425°F (220°C) for about 20–25 minutes (flipping halfway) or air frying at 375°F (190°C) for 12–14 minutes yields great results—just spray lightly with oil for crispiness.
What kind of rice is best for a katsu bowl?
Short-grain or sushi rice works best—it’s sticky and holds everything together. Jasmine or medium-grain rice is okay if that’s what you have on hand.
Can I make this gluten-free?
Absolutely. Use gluten-free panko and substitute soy sauce with tamari. Make sure your tonkatsu sauce is also gluten-free or make your own with gluten-free ingredients.
Is Japanese mayo necessary?
It’s highly recommended for its rich, slightly sweet flavor. But if needed, you can substitute with regular mayo and a splash of rice vinegar and sugar to mimic the taste.
How do I keep the chicken crispy?
Let it rest on a wire rack (not paper towels) after frying, and add sauces only right before serving. Reheat in an oven or air fryer for best texture.
Can I meal prep this?
Yes! Cook the chicken and rice ahead of time, store separately, and assemble bowls as needed. Reheat before eating and add fresh sauce and garnish each time.
What can I do with leftovers?
Slice the leftover katsu and use it in sandwiches, wraps, or even on top of a salad for a crispy protein boost.
Conclusion
The Easy Japanese Katsu Bowl is one of those meals that checks all the boxes—crunchy, satisfying, flavorful, and fast. It brings a taste of Japan into your home kitchen without being fussy or complicated. Whether you’re craving comfort food or planning a simple yet special dinner, this bowl delivers every time. And the best part? You can tweak it to your taste and still get that perfect bite.
Easy Japanese Katsu Bowl Recipe
- Total Time: 35 minutes
- Yield: 2 servings
Description
If you’re craving something crunchy, satisfying, and packed with Japanese-inspired flavor, this Easy Japanese Katsu Bowl will hit the spot. Juicy breaded chicken cutlets fried to golden perfection are sliced and layered over fluffy white rice, drizzled with sweet-savory tonkatsu sauce and creamy spicy mayo. It’s a quick dinner, a comforting lunch, or a meal-prep favorite that feels like restaurant quality in your own kitchen. This dish fits right into any rotation of easy recipes, food ideas, and dinner ideas when you want a flavorful, stress-free meal that delivers every time.
Ingredients
2 boneless skinless chicken cutlets
0.5 teaspoon salt
0.25 teaspoon black pepper
0.5 cup all-purpose flour
2 large eggs, beaten
1 cup panko breadcrumbs
0.5 cup neutral oil (like canola or vegetable)
2 cups steamed white rice
3 tablespoons tonkatsu sauce
2 tablespoons Japanese mayo or spicy mayo
1 tablespoon chopped parsley or green onion
Instructions
1. Pat the chicken cutlets dry and pound to even thickness. Season both sides with salt and pepper.
2. Set up a breading station with flour in one bowl, beaten eggs in the second, and panko breadcrumbs in the third.
3. Dredge each chicken cutlet in flour, dip in egg, then press into panko to coat thoroughly.
4. Heat oil in a skillet over medium heat. Fry the chicken for 3–4 minutes per side until golden and fully cooked. Transfer to a wire rack or paper towel-lined plate to drain.
5. Cook the rice according to package instructions while the chicken is frying.
6. Slice the cooked chicken into strips once slightly cooled.
7. Build the bowl by placing rice in a bowl, topping with sliced chicken, then drizzling with tonkatsu sauce and spicy mayo.
8. Garnish with parsley or green onion and serve immediately.
Notes
Pound your chicken evenly for consistent cooking and better crisping.
Let the fried cutlets rest for a few minutes before slicing to retain moisture.
Use an air fryer to reheat for the crispiest leftovers without extra oil.
- Prep Time: 15 minutes
- Cook Time: 20 minutes
- Category: Dinner
- Method: Frying
- Cuisine: Japanese
Nutrition
- Serving Size: 1 bowl
- Calories: 620
- Sugar: 8g
- Sodium: 950mg
- Fat: 33g
- Saturated Fat: 6g
- Unsaturated Fat: 24g
- Trans Fat: 0g
- Carbohydrates: 54g
- Fiber: 2g
- Protein: 32g
- Cholesterol: 120mg