

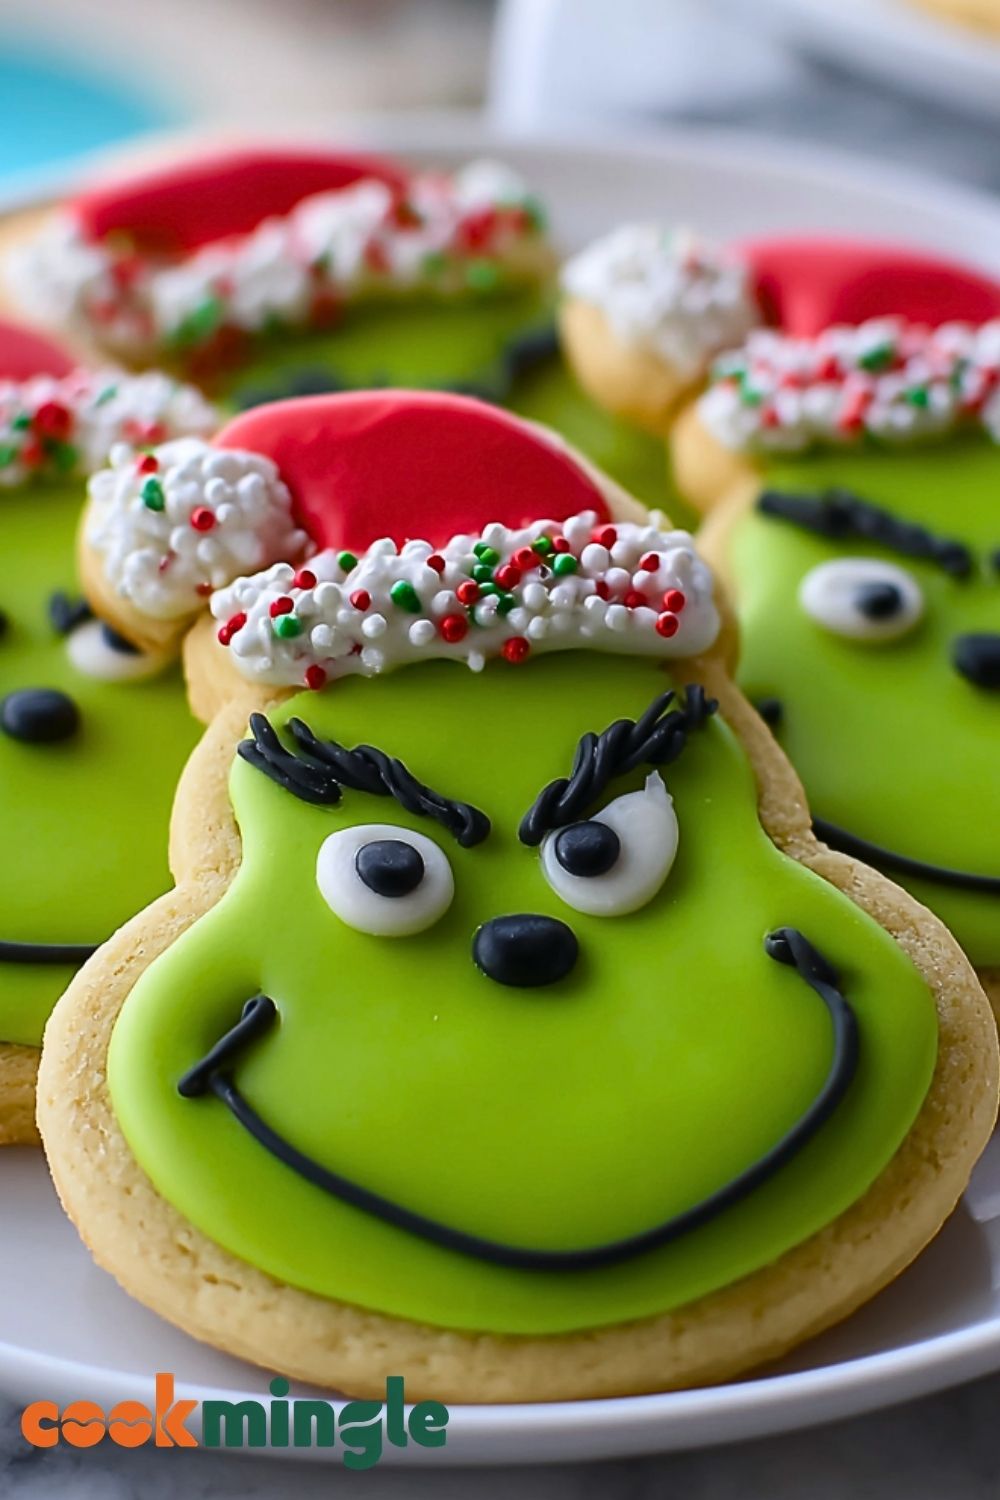
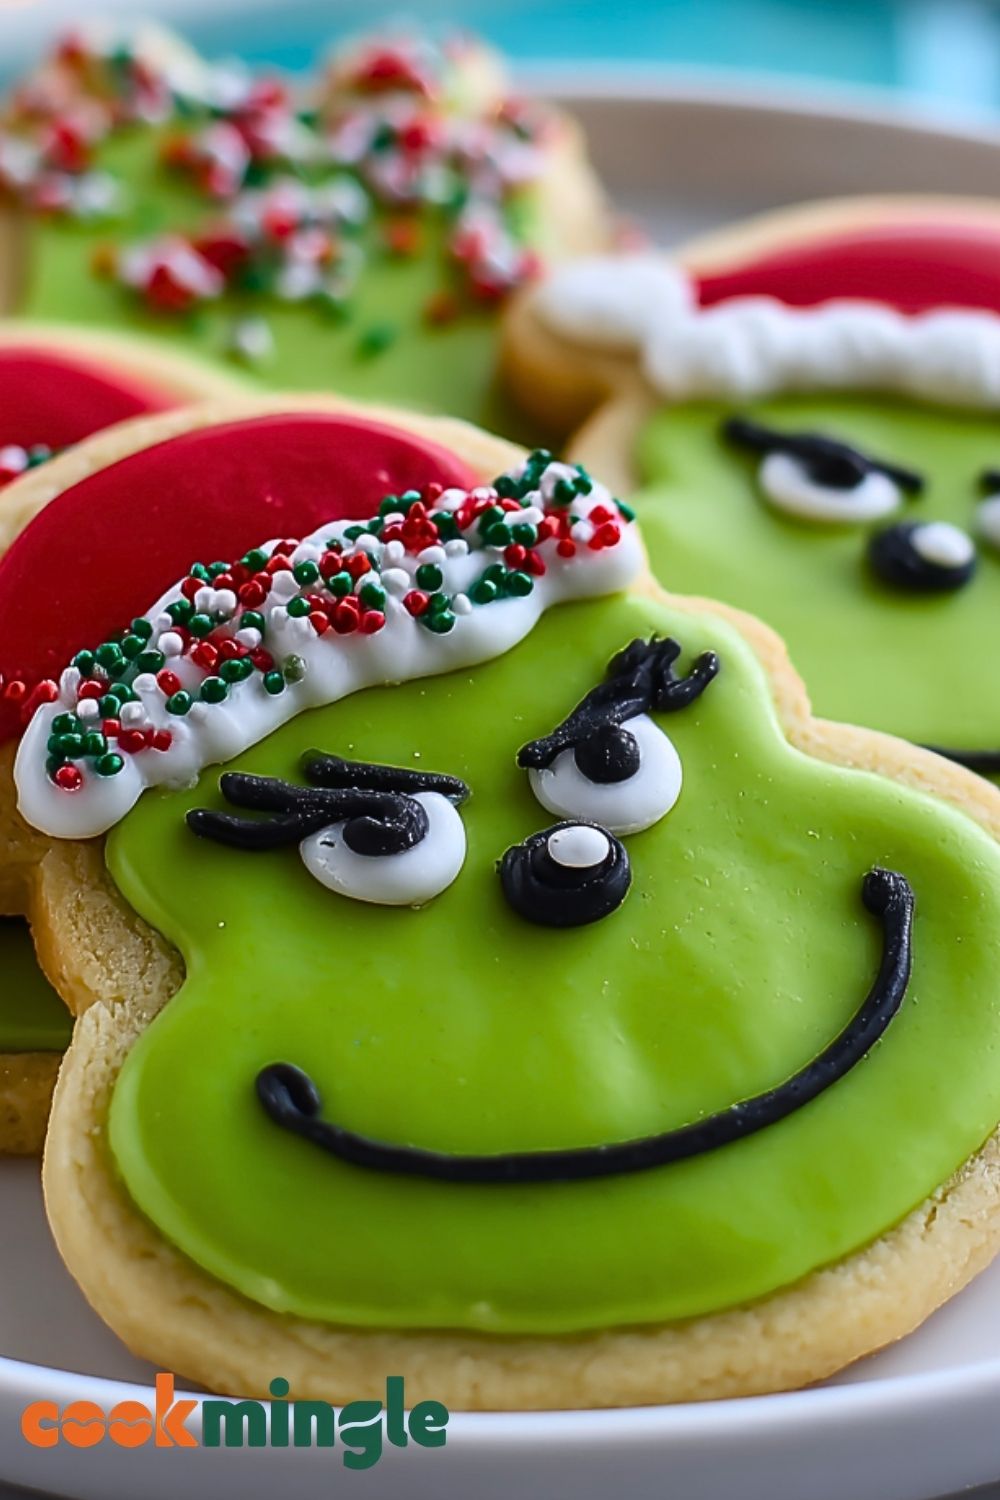
Bright green and mischievously grinning, these Grinch Cookies Decorated are a festive favorite that bring holiday cheer with a playful twist. Each sugar cookie is skillfully shaped and topped with vibrant royal icing to resemble the beloved Dr. Seuss character — complete with expressive eyebrows, a Santa hat, and that unmistakable smirk. They’re the perfect blend of whimsy and sweetness, making them a hit at holiday parties, cookie exchanges, or a fun baking day with the kids.
But don’t let their detailed design fool you — these cookies are easier to make than they look, thanks to a forgiving sugar cookie base and easy-to-pipe royal icing. Whether you’re a seasoned decorator or a beginner with a steady hand, creating these cookies is a joyful, artistic escape that results in a batch of delightful, edible art.
Why You’ll Love This Grinch Cookies Decorated Recipe
These cookies combine the nostalgia of a classic holiday story with a hands-on decorating experience the whole family can enjoy. They’re ideal for Christmas cookie platters, personalized gifts, or just spreading a little festive fun. Not to mention, they taste just as good as they look — buttery, soft, and perfectly sweet.
Preparation Phase & Tools to Use
To make these Grinch cookies, you’ll need cookie cutters in the shape of the Grinch’s head (or round cutters for a simplified version), rolling pins to evenly flatten the dough, baking sheets lined with parchment paper, and a hand or stand mixer to prepare the dough and icing.
For the decorating phase, use piping bags fitted with small round tips (like Wilton #2 or #3), food coloring gel (especially green, red, black, and white), and toothpicks for detail work. Each tool plays a vital role — precision tips help keep lines clean, while gel color offers vibrant saturation without thinning your icing.
Preparation Tips
Chill your dough before rolling and cutting to ensure the cookies hold their shape in the oven. When it comes to royal icing, aim for a stiff consistency for outlining and a slightly thinner version for flooding. Outline first, then let it set slightly before flooding the center. Allow each color to dry before adding new layers to avoid bleeding. Patience is key in creating clean, expressive faces. You can also sketch your design on parchment for practice before piping on the actual cookies.
Ingredients for this Grinch Cookies Decorated Recipe
For the Sugar Cookies:
- 2 3/4 cups all-purpose flour
- 1/2 teaspoon baking powder
- 1/4 teaspoon salt
- 1 cup unsalted butter (softened)
- 3/4 cup granulated sugar
- 1 large egg
- 1 tablespoon vanilla extract
- 1/2 teaspoon almond extract (optional, for enhanced flavor)
For the Royal Icing:
- 4 cups powdered sugar (sifted)
- 3 tablespoons meringue powder
- 6 tablespoons water (plus more as needed)
- Food coloring gel: green, black, red, and white
Optional for Decoration:
- Edible marker pens (for outlining or detailing)
- Toothpicks (for fine adjustments)
- Piping bags with #2 or #3 round tips
- Sprinkles or sanding sugar (for added texture or sparkle)
Step 1: Make the Sugar Cookie Dough
In a medium bowl, whisk together the flour, baking powder, and salt. In a separate large bowl, beat the butter and sugar using a hand mixer or stand mixer until light and fluffy. Add the egg, vanilla extract, and almond extract. Mix until fully incorporated. Gradually add the dry ingredients into the wet, mixing just until a smooth dough forms.
Step 2: Chill and Roll Out the Dough
Divide the dough into two discs, wrap in plastic wrap, and refrigerate for at least 1 hour. Chilling helps the dough firm up, making it easier to cut shapes that hold well during baking. Once chilled, roll the dough on a floured surface to about 1/4-inch thickness.
Step 3: Cut and Bake the Cookies
Preheat the oven to 350°F (175°C). Use Grinch-shaped cookie cutters or simple circles to cut out the dough. Transfer the cookies to a parchment-lined baking sheet, spacing them 1 inch apart. Bake for 8–10 minutes, or until edges are just barely golden. Let them cool on the tray for 5 minutes, then transfer to a wire rack.
Step 4: Prepare the Royal Icing
In a large bowl, combine powdered sugar and meringue powder. Add water gradually, beating with an electric mixer on medium speed until stiff peaks form (about 7–10 minutes). Divide the icing into bowls and tint with food coloring gel: green for the face, black for details, red for the hat, and white for eyes and trim. Adjust consistency with a few drops of water for flood icing.
Step 5: Outline and Flood the Base Layer
Using a piping bag with a small round tip, outline each cookie with green icing. Let it dry for a few minutes, then flood the inside of the outline with thinner green icing. Use a toothpick to guide the icing into edges and pop air bubbles. Allow the base to dry completely (at least 1 hour or overnight if possible).
Step 6: Add Grinch Face Details
Once the green base is dry, use black icing to draw the mischievous smile, nostrils, and eyebrows. Use white icing to pipe the eyes and add black pupils. If decorating with a Santa hat, add red icing on the top portion of the cookie and pipe white trim and pom-pom details.
Step 7: Finishing Touches and Dry Time
Let all icing layers dry fully before stacking or packaging. This can take several hours. For added flair, sprinkle white sanding sugar on the hat trim before it sets, or use edible glitter for festive sparkle.
Notes
Allowing ample time for chilling the dough and drying each layer of icing is essential for well-defined shapes and crisp decorations. If you’re working in a warm or humid environment, royal icing may take longer to set, so consider using a fan to speed up the drying process. Also, gel food coloring is preferred over liquid because it delivers vibrant color without thinning the icing, which is key for clean piping.
Watch Out for These Mistakes While Cooking
- Skipping the chill time: Warm dough spreads and ruins cookie shapes during baking.
- Overmixing the dough: This can lead to tough cookies instead of soft and tender ones.
- Too much water in royal icing: It makes the icing runny and causes bleeding between colors.
- Piping before the base dries: This results in smudged or sunken details.
- Stacking cookies too soon: Doing so before full drying leads to smears and sticking.
Storage Instructions
Once the decorated cookies are completely dry, store them in an airtight container at room temperature for up to 1 week. Place parchment or wax paper between layers to prevent smudging. If you want to make them in advance, undecorated cookies can be frozen for up to 3 months, and royal icing decorations can be added after thawing and reaching room temperature.
Estimated Nutrition (Per Cookie)
- Calories: 190
- Total Fat: 8g
- Saturated Fat: 5g
- Cholesterol: 30mg
- Sodium: 55mg
- Total Carbohydrates: 28g
- Sugars: 18g
- Fiber: 0g
- Protein: 2g
Frequently Asked Questions
Can I make the dough in advance?
Yes! The sugar cookie dough can be made up to 3 days in advance and kept in the fridge, or frozen for up to 2 months.
What if I don’t have a Grinch-shaped cookie cutter?
You can use a round cutter and decorate the face to resemble the Grinch, or hand-cut the shape using a printed template and a sharp knife.
Can I use store-bought icing instead of royal icing?
Store-bought icing can be used in a pinch, but it won’t harden the same way as royal icing, making it less ideal for detailed decoration and stacking.
How long should I wait between icing layers?
Let each color and layer dry at least 30-60 minutes before adding the next. For best results, allow the base to dry overnight.
Can kids help decorate?
Absolutely! Let them flood the base or add sprinkles while you handle the finer details.
Do I need a mixer for royal icing?
A hand or stand mixer is highly recommended to whip the meringue powder properly and achieve the right consistency.
Why does my icing look dull?
Overmixing or using too much water can reduce the shine. Try mixing until just stiff peaks form and letting it dry in a cool, dry place.
What’s the best way to package these for gifting?
Use cellophane bags with ribbon, or layer them in a cookie tin with parchment paper between each layer. Be sure they’re completely dry to avoid smudging.
Conclusion
Grinch Cookies Decorated are the perfect edible craft for holiday celebrations. They’re playful, colorful, and an excellent way to get creative in the kitchen. Whether you’re baking for a party, a school event, or a holiday gift basket, these cookies bring a smile to anyone who sees them — just like the story that inspired them. Make a batch, turn up the holiday music, and enjoy decorating your way to a deliciously festive season.
Grinch Cookies Decorated
- Total Time: 1 hour 40 minutes
- Yield: 24 cookies
Description
These Grinch Cookies Decorated are a playful and festive treat perfect for the holiday season. Bright green with that signature smirk, they’re inspired by the beloved Dr. Seuss character and are ideal for cookie exchanges, Christmas parties, or a fun weekend bake with the kids. With soft sugar cookie bases and colorful royal icing details, this easy recipe blends creativity with flavor. Perfect for holiday desserts, Christmas cookies, easy recipe ideas, food ideas, and fun baking projects.
Ingredients
2 3/4 cups all-purpose flour
1/2 teaspoon baking powder
1/4 teaspoon salt
1 cup unsalted butter, softened
3/4 cup granulated sugar
1 large egg
1 tablespoon vanilla extract
1/2 teaspoon almond extract
4 cups powdered sugar, sifted
3 tablespoons meringue powder
6 tablespoons water
green gel food coloring
red gel food coloring
black gel food coloring
white gel food coloring
Instructions
1. Whisk together the flour, baking powder, and salt in a medium bowl.
2. Beat the softened butter and granulated sugar in a large bowl until light and fluffy.
3. Mix in the egg, vanilla extract, and almond extract until fully combined.
4. Gradually add the dry ingredients and mix until a soft dough forms.
5. Divide the dough into two portions, wrap them, and chill for at least 1 hour.
6. Preheat the oven to 350°F and line baking sheets with parchment paper.
7. Roll the chilled dough to 1/4-inch thickness on a lightly floured surface.
8. Cut into Grinch face shapes or round cookies and transfer to the prepared baking sheets.
9. Bake for 8 to 10 minutes, until the edges are just lightly golden.
10. Cool on the pan for 5 minutes, then transfer to a wire rack to cool completely.
11. Beat the powdered sugar, meringue powder, and water until stiff peaks form.
12. Divide the icing into bowls and color with green, red, black, and white gel food coloring.
13. Outline and flood the cookie faces with green icing, then let them dry.
14. Pipe the eyes, eyebrows, smile, nose, Santa hat, and trim using the remaining icing colors.
15. Let the decorated cookies dry completely before serving, stacking, or packaging.
Notes
Chill the dough well before rolling and cutting so the cookies keep their shape during baking.
Let the green base icing dry before piping the facial features to prevent colors from bleeding together.
Store decorated cookies between layers of parchment paper in an airtight container to protect the design.
- Prep Time: 1 hour 30 minutes
- Cook Time: 10 minutes
- Category: Dessert
- Method: Baking
- Cuisine: American
Nutrition
- Serving Size: 1 cookie
- Calories: 190
- Sugar: 18g
- Sodium: 55mg
- Fat: 8g
- Saturated Fat: 5g
- Unsaturated Fat: 2g
- Trans Fat: 0g
- Carbohydrates: 28g
- Fiber: 0g
- Protein: 2g
- Cholesterol: 30mg