
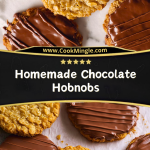
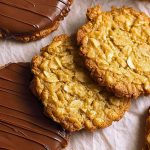
There’s something incredibly nostalgic about biting into a crumbly, chewy oat biscuit topped with smooth, glossy chocolate. Homemade Chocolate Hobnobs strike the perfect balance between rustic comfort and indulgent treat — a classic British favorite made even better in your own kitchen. With their golden, toasty oats and rich chocolate topping, these cookies are crisp at the edges, chewy in the center, and totally irresistible.

What makes these Hobnobs extra special is the homemade touch — no artificial flavors or preservatives, just real butter, brown sugar, oats, and a decadent layer of melted milk or dark chocolate. They’re the perfect pairing with a hot cup of tea, an afternoon snack that feels both hearty and luxurious, and a great introduction to British biscuit culture for anyone outside the UK.
Why You’ll Love This Homemade Chocolate Hobnobs Recipe
- Easy & Fun to Make: No fancy ingredients or complicated techniques — just simple steps with a delicious reward.
- Perfect Texture: Crispy on the outside, chewy in the middle, with that satisfying snap from the chocolate.
- Versatile: Choose your favorite chocolate (milk, dark, or even white) and easily make it gluten-free if needed.
- Better Than Store-Bought: Fresher flavor, no palm oil, and you can tweak the sweetness or texture to your liking.
- Ideal for Gifting or Sharing: These biscuits store beautifully and make a charming homemade gift.
Preparation Phase & Tools to Use (Essential Tools and the Importance of Each)
Before diving into making Homemade Chocolate Hobnobs, it’s helpful to get your kitchen prepped with the right tools. This isn’t a complicated bake, but the right equipment can make all the difference in texture, ease, and overall enjoyment.
- Mixing Bowls: Use a large bowl for combining your dry ingredients and another for creaming butter and sugar. Stainless steel or glass bowls are best for even mixing and easy cleanup.
- Electric Hand Mixer or Stand Mixer: While you can cream butter and sugar by hand, an electric mixer saves time and ensures a light, fluffy mixture — crucial for the perfect biscuit texture.
- Kitchen Scale & Measuring Cups: Accuracy matters. A digital scale ensures consistent results, especially when working with oats and flour.
- Baking Sheets & Parchment Paper: Choose sturdy, rimless baking sheets for even browning. Parchment prevents sticking and helps with clean removal.
- Cooling Rack: Allows air to circulate around the cookies so they don’t become soggy on the bottom.
- Microwave-Safe Bowl or Double Boiler: You’ll need this to melt the chocolate topping gently without burning it.
- Spoon or Small Offset Spatula: For spreading the melted chocolate neatly across each biscuit.
Preparation Tips
- Use Room Temperature Butter: It creams better and traps air, making the texture lighter and more pleasant.
- Chill the Dough: After shaping, a short chill helps the biscuits hold their shape and prevents overspreading.
- Toast the Oats (Optional): For deeper flavor, lightly toast the oats in a dry pan before adding them.
- Don’t Skip the Parchment Paper: These cookies can be delicate after baking. Parchment ensures they lift off easily.
- Even Sizing: Use a small cookie scoop or weigh each ball of dough to ensure even baking and consistent results.
- Let the Chocolate Set Properly: After spreading, allow the biscuits to sit at room temp or in the fridge until the chocolate is fully firm before storing.
Ingredients for Homemade Chocolate Hobnobs
These Hobnobs are made with pantry-friendly ingredients that come together for a cookie that’s rich, oaty, and perfectly coated in chocolate. Here’s what you’ll need:
- 1 cup (225g) unsalted butter, softened
Adds richness and helps create a chewy center with crisp edges. - 3/4 cup (150g) light brown sugar
Provides moisture and a warm, caramel-like sweetness. - 1 tablespoon golden syrup
Key to getting that traditional Hobnob chew and flavor. Can substitute with honey or maple syrup in a pinch. - 1 teaspoon vanilla extract
For a subtle boost in aroma and flavor depth. - 1 1/4 cups (150g) rolled oats
The heart of a Hobnob — gives texture, bite, and rustic appeal. - 1 cup (120g) all-purpose flour
Helps hold the cookie together and gives it structure. - 1/2 teaspoon baking soda
Gives a slight lift and helps the cookies spread properly. - 1/4 teaspoon salt
Balances sweetness and enhances flavor overall. - 7 oz (200g) milk or dark chocolate (bars or chips)
For the topping — choose quality chocolate for the best finish and taste.
Optional:
- 1 tablespoon coconut oil (if melting chocolate chips)
Helps smooth and shine the melted chocolate for a glossier finish.

Step 1: Cream the Butter and Sugar
In a large mixing bowl, beat the softened butter and light brown sugar together until pale, fluffy, and creamy. This step is essential — it incorporates air and gives the biscuits their light, tender texture.
Step 2: Add Syrup and Vanilla
Mix in the golden syrup and vanilla extract until well combined. The golden syrup helps bind the mixture while adding that distinct Hobnob flavor.
Step 3: Combine Dry Ingredients
In a separate bowl, whisk together the rolled oats, all-purpose flour, baking soda, and salt. Stir to evenly distribute the dry ingredients.
Step 4: Mix Wet and Dry
Gradually add the dry ingredients to the butter mixture, stirring with a spatula or wooden spoon until a thick, slightly sticky dough forms. Avoid overmixing.
Step 5: Shape the Cookies
Scoop out tablespoon-sized portions of dough, roll them into balls, and place them on a parchment-lined baking sheet. Flatten each one slightly with your fingers or the back of a spoon — they won’t spread much on their own.
Step 6: Chill (Optional but Recommended)
Pop the tray in the fridge for about 20 minutes. This helps the cookies hold their shape better while baking and enhances their chewy texture.
Step 7: Bake
Preheat your oven to 350°F (175°C). Bake the cookies for 12–15 minutes, or until the edges are golden and the centers are just set. Let them cool on the tray for 5 minutes, then transfer to a cooling rack.
Step 8: Melt the Chocolate
Break the chocolate into pieces and melt it in a microwave-safe bowl (in 20-second bursts, stirring each time) or using a double boiler. Stir until smooth. If using chocolate chips, add 1 tablespoon of coconut oil for a glossier finish.
Step 9: Top the Cookies
Once the biscuits are completely cool, spoon melted chocolate over each one, spreading it gently with a spoon or offset spatula. Let the chocolate drip naturally or add a decorative drizzle with a piping bag or fork.
Step 10: Let Set and Enjoy
Allow the chocolate to fully set — at room temperature for a couple of hours, or in the fridge for faster results. Store in an airtight container once set.
Notes
- Golden Syrup Substitutes: If you can’t find golden syrup, light corn syrup or honey can work, though the flavor will be slightly different. Golden syrup provides that classic Hobnob chew and toffee-like depth.
- Texture Tweaks: Want them crunchier? Bake a few minutes longer. Prefer them soft? Pull them out when the edges are golden, but the centers still look slightly underdone.
- Make Them Vegan: Swap butter for a plant-based alternative and use dairy-free chocolate — the result is just as satisfying.
Watch Out for These Mistakes While Cooking
- Overbaking: These cookies can go from golden to overdone quickly. Keep a close eye in the last few minutes — the centers should look just set.
- Melting Chocolate Too Fast: Chocolate can seize or burn easily. Use short bursts in the microwave or a gentle double boiler setup.
- Skipping the Chill Time: While optional, chilling helps control spread and improves the texture. Don’t rush it if you want that perfect chew.
- Using Quick Oats: Rolled oats are key for the authentic Hobnob bite. Quick oats or instant oats will change the texture completely.
- Not Letting Cookies Cool Before Topping: Warm cookies + melted chocolate = a mess. Be patient, let them cool fully before decorating.
- Inconsistent Sizing: Unevenly sized dough balls will bake at different rates. Try to keep them uniform for best results.
- Improper Storage: Leaving cookies exposed to air will make them lose their crunch. Always store in an airtight container once the chocolate sets.
- Overmixing the Dough: Stir only until combined. Overmixing can make the biscuits tough instead of tender.
What to Serve With Homemade Chocolate Hobnobs?
Homemade Chocolate Hobnobs are delightfully versatile — perfect on their own but even better when paired thoughtfully. Whether you’re planning a cozy tea time or dressing up a dessert board, these biscuits can shine in many ways.
8 Recommendations
- A Classic Cup of Tea
Nothing beats the British combo — Hobnobs and black tea (like Earl Grey or English Breakfast) are simply made for each other. - Iced Coffee or Cold Brew
The biscuit’s oatiness pairs beautifully with bold, chilled coffee — especially with a splash of oat milk. - Cheese Platter Twist
Break the Hobnobs into quarters and serve alongside a soft cheese like brie or goat cheese for a salty-sweet contrast. - Yogurt and Berries
Crumble a Hobnob over Greek yogurt with fresh berries — a great balance of crunch, sweetness, and tang. - Vanilla Ice Cream Sandwiches
Place a scoop of vanilla ice cream between two Hobnobs for a quick, crunchy frozen dessert. - Hot Chocolate or Mocha
Pair with a rich cup of cocoa or a mocha for a double-chocolate hit that’s comforting and indulgent. - Afternoon Tea Spread
Add them to a tiered tray with scones, finger sandwiches, and mini pastries for a showstopping tea party. - Milk — Warm or Cold
Simple but nostalgic: a cold glass of milk or a warm mug before bed makes these cookies even more satisfying.
Storage Instructions
To keep your Homemade Chocolate Hobnobs tasting fresh and delicious, proper storage is key. Here’s how to do it:
- Room Temperature: Store the cooled and chocolate-set cookies in an airtight container at room temperature for up to 1 week. Layer with parchment or wax paper to prevent sticking.
- Refrigerator: While not necessary, refrigerating can extend their life to 2 weeks, especially in warmer climates. Note: refrigeration may slightly firm the texture.
- Freezer: Freeze baked Hobnobs (without chocolate) for up to 3 months. When ready to enjoy, thaw at room temperature and add fresh melted chocolate topping.
Tip: Avoid storing in humid conditions — moisture can soften the biscuits and dull the chocolate finish.
Estimated Nutrition (Per Cookie – Approximate)
- Calories: 160 kcal
- Total Fat: 9g
- Saturated Fat: 5g
- Unsaturated Fat: 3g
- Trans Fat: 0g
- Cholesterol: 20mg
- Sodium: 60mg
- Carbohydrates: 18g
- Fiber: 1g
- Sugars: 9g
- Protein: 2g
- Serving Size: 1 cookie
- Category: Dessert / Snack
- Diet: Vegetarian
Note: These values are estimates based on standard ingredients and may vary depending on brands and chocolate used.
Frequently Asked Questions
1. Can I make these Chocolate Hobnobs gluten-free?
Yes! Simply substitute the all-purpose flour with a gluten-free blend and ensure your oats are certified gluten-free. The result is just as delicious.
2. What’s the best chocolate to use?
A high-quality milk or dark chocolate bar (chopped and melted) gives the best finish and taste. Chocolate chips work too, but adding a teaspoon of coconut oil will help them melt more smoothly.
3. Can I freeze the dough instead of baking all at once?
Absolutely. Roll the dough into balls and freeze on a tray. Once solid, transfer to a freezer bag. When ready to bake, no need to thaw — just add an extra 2–3 minutes to the baking time.
4. Why are my Hobnobs spreading too much?
This usually happens if the butter is too soft or if the dough wasn’t chilled. Try refrigerating the dough for 20–30 minutes before baking to help them keep their shape.
5. Can I skip the chocolate topping?
Of course! While the chocolate adds that classic touch, these cookies are still incredibly satisfying without it. You might even enjoy them more as a rustic oat biscuit.
6. Are Hobnobs supposed to be crunchy or chewy?
Homemade versions tend to be chewier in the center with crisp edges, though you can bake them longer for a crunchier result. Store-bought ones are usually more consistently crunchy.
7. What can I use instead of golden syrup?
If you can’t find golden syrup, light corn syrup, honey, or maple syrup can be used, though they’ll change the flavor slightly. Golden syrup provides a toffee-like richness.
8. How do I make them more flavorful?
Try adding a pinch of cinnamon, nutmeg, or even a little orange zest to the dough. You can also sprinkle sea salt on the melted chocolate for a sweet-salty finish.
Conclusion
Homemade Chocolate Hobnobs are more than just a treat — they’re a bite of comfort, nostalgia, and satisfaction all rolled into one chewy, oaty, chocolate-topped biscuit. Whether you’re recreating a British favorite or just looking for a new go-to cookie, these deliver in taste, texture, and charm. Once you’ve tried them, you may never go back to store-bought again. Perfect for afternoon tea, gifting, or sneaking one with your morning coffee — these Hobnobs belong in your recipe rotation.
Homemade Chocolate Hobnobs
- Total Time: 30 minutes
- Yield: 20 cookies
- Diet: Vegetarian
Description
Craving something sweet, hearty, and irresistibly dunkable? These *Homemade Chocolate Hobnobs* are the perfect fusion of crispy oat cookies and smooth, melt-in-your-mouth chocolate. Whether you’re looking for easy dessert ideas, snack recipes, or a quick baking project, these biscuits bring rustic charm and big flavor to your kitchen. Ideal for teatime, lunchbox treats, or just indulging in a homemade version of a British classic, they’re guaranteed to become a family favorite.
Ingredients
225g unsalted butter, softened
150g light brown sugar
1 tablespoon golden syrup
1 teaspoon vanilla extract
150g rolled oats
120g all-purpose flour
1/2 teaspoon baking soda
1/4 teaspoon salt
200g milk or dark chocolate
1 tablespoon coconut oil (optional, for chocolate melt)
Instructions
1. Cream the softened butter and light brown sugar in a mixing bowl until pale and fluffy.
2. Mix in the golden syrup and vanilla extract until smooth.
3. In a separate bowl, whisk together oats, flour, baking soda, and salt.
4. Gradually stir the dry mix into the wet ingredients until a thick dough forms.
5. Scoop tablespoon-sized portions, roll into balls, flatten slightly, and place on a parchment-lined baking sheet.
6. Chill the cookie dough in the fridge for 20 minutes to reduce spreading.
7. Preheat the oven to 175°C (350°F) and bake the cookies for 12–15 minutes until golden at the edges.
8. Let cookies cool on the tray for 5 minutes before transferring to a rack.
9. Melt the chocolate (and optional coconut oil) in a microwave or double boiler until smooth.
10. Spread a spoonful of melted chocolate on each cooled cookie, let it set at room temperature or refrigerate.
Notes
Toasting the oats before mixing adds an extra layer of nutty flavor.
Let cookies cool completely before topping with chocolate to avoid melting mess.
For a crunchier version, bake 2–3 minutes longer.
- Prep Time: 15 minutes
- Cook Time: 15 minutes
- Category: Dessert
- Method: Baking
- Cuisine: British
Nutrition
- Serving Size: 1 cookie
- Calories: 160
- Sugar: 9g
- Sodium: 60mg
- Fat: 9g
- Saturated Fat: 5g
- Unsaturated Fat: 3g
- Trans Fat: 0g
- Carbohydrates: 18g
- Fiber: 1g
- Protein: 2g
- Cholesterol: 20mg