
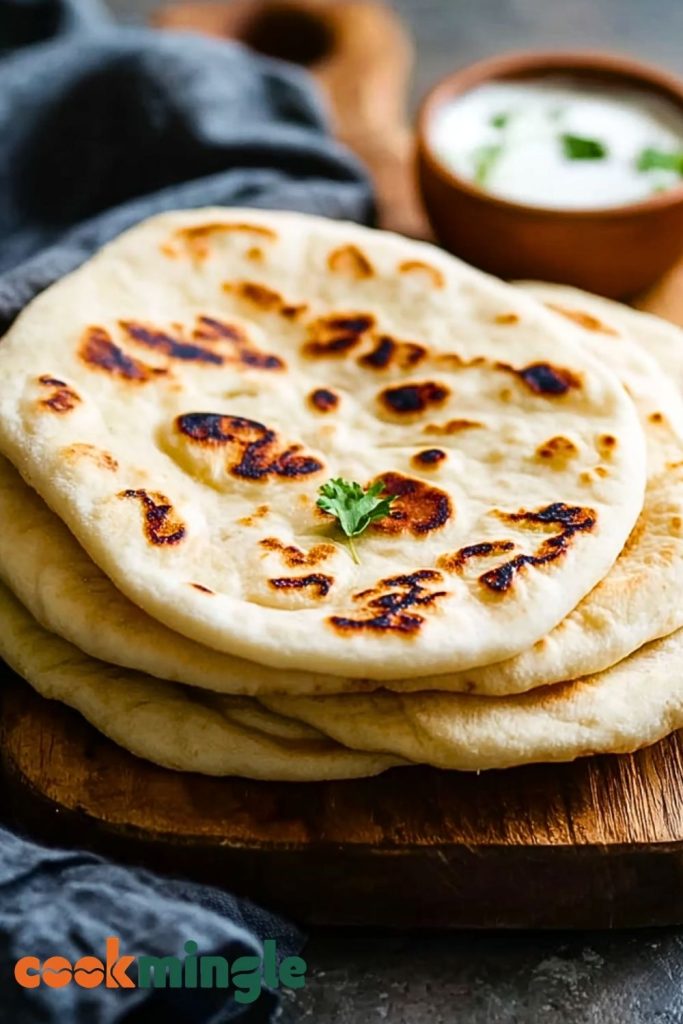
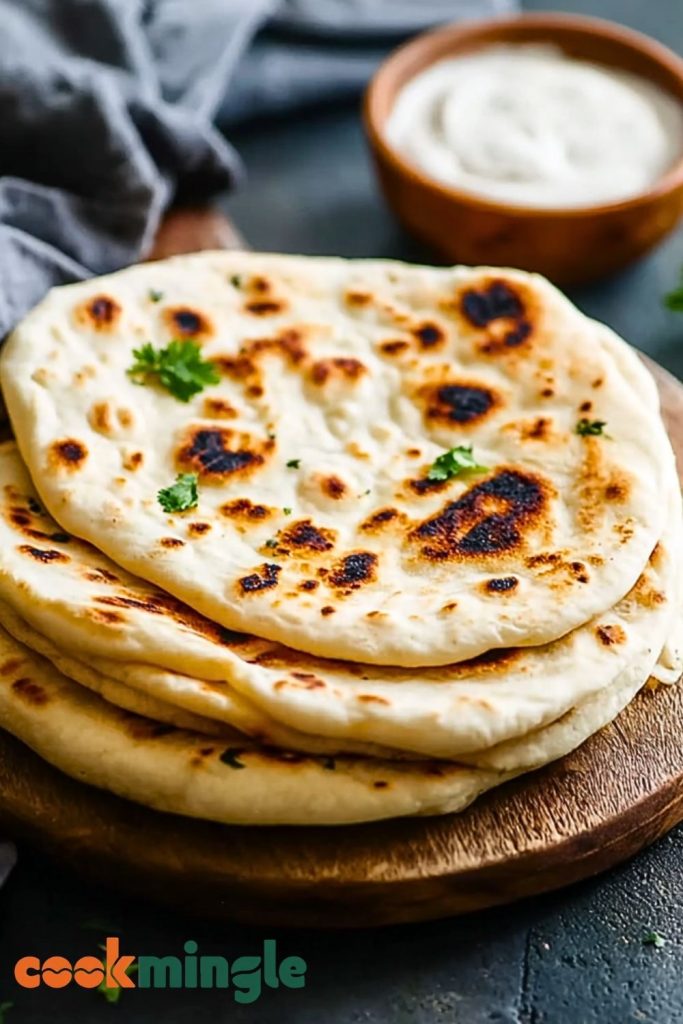
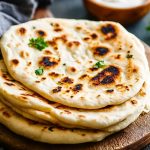
There’s something incredibly satisfying about making Homemade Pita Bread from scratch. The warm, slightly puffed rounds, with their golden brown spots and pillowy softness, are so much better than anything store-bought. I still remember the first time I saw the pita puff up in the pan — it felt like magic, and I was instantly hooked.
Pita bread is such a versatile staple. I use it as a wrap, tear it to scoop up dips like hummus or tzatziki, or even crisp it in the oven for crunchy chips. The best part? You don’t need any fancy ingredients or a special oven setup — just a bit of time, patience, and a hot pan. Once you make it yourself, you’ll never look at store-bought pita the same way again.
Why You’ll Love This Homemade Pita Bread
Homemade pita is soft, chewy, and just the right amount of fluffy. It’s made with simple pantry staples and doesn’t require a ton of kneading or effort. Plus, the aroma that fills your kitchen while it cooks is absolutely mouthwatering. It’s one of those recipes that’s fun to make and even more fun to eat.
What Kind of Flour Should I Use?
All-purpose flour works beautifully for soft and light pita bread. If you want a heartier texture, you can substitute up to half the flour with whole wheat flour. Bread flour also works and can give your pitas a bit more chew, but it’s not necessary for a good rise or puff.
Options for Substitutions
- Yeast: If you don’t have active dry yeast, you can use instant yeast — just skip the proofing step and add it directly to the dry ingredients.
- Yogurt: A spoonful of Greek yogurt in the dough can make the pita even softer and add a subtle tang.
- Dairy-Free: This recipe is naturally dairy-free, but if you add yogurt, use a plant-based alternative to keep it that way.
- Flour: Gluten-free blends won’t give you the same puff, but you can experiment with them for a flatbread-style version.
Ingredients for This Homemade Pita Bread
- All-Purpose Flour – The base of the dough. It provides the structure and softness essential for that perfect pita texture.
- Active Dry Yeast – Helps the dough rise, creating that airy pocket inside.
- Warm Water – Activates the yeast and hydrates the flour. Make sure it’s not too hot to avoid killing the yeast.
- Sugar – Just a small amount to feed the yeast and aid in fermentation.
- Salt – Essential for flavor. It also controls yeast activity and strengthens the dough.
- Olive Oil – Adds richness and keeps the dough tender and pliable.
Step 1: Bloom the Yeast
In a bowl, combine warm water (about 110°F), sugar, and active dry yeast. Let it sit for 5-10 minutes until foamy. This step ensures your yeast is alive and ready to work.
Step 2: Make the Dough
In a large mixing bowl, combine the flour and salt. Add the bloomed yeast mixture and olive oil. Stir until a shaggy dough forms.
Step 3: Knead the Dough
Transfer the dough to a lightly floured surface and knead for about 8–10 minutes until the dough is smooth and elastic. You can also use a stand mixer with a dough hook.
Step 4: First Rise
Place the dough in a lightly oiled bowl, cover it with a damp cloth or plastic wrap, and let it rise in a warm place for 1 to 1.5 hours or until doubled in size.
Step 5: Divide and Shape
Once risen, punch down the dough and divide it into 8 equal pieces. Shape each piece into a ball, then roll each into a 6–7 inch circle on a lightly floured surface.
Step 6: Second Rest
Let the rolled-out dough rest, covered with a towel, for about 15–20 minutes. This step helps with puffing during cooking.
Step 7: Cook the Pitas
Heat a cast iron skillet or heavy-bottomed pan over medium-high heat. Place one pita on the hot skillet and cook for 1–2 minutes until bubbles form. Flip and cook for another 1–2 minutes. The pita should puff up. Repeat with remaining dough.
Step 8: Keep Them Soft
Place the cooked pitas in a clean kitchen towel to trap steam and keep them soft. Serve warm or at room temperature.
How Long to Prepare Homemade Pita Bread
Making homemade pita bread doesn’t take as long as you might expect, but timing matters to get that signature puff.
Preparation Time:
Mixing and kneading the dough takes about 15–20 minutes. The initial rise will need 1 to 1.5 hours, depending on the temperature of your kitchen.
Cooking Time:
Each pita cooks in just 2–3 minutes on a hot skillet. Cooking the entire batch takes around 15–20 minutes total. So you’re looking at about 2 hours total from start to finish, most of which is hands-off.
Tips for Perfect Homemade Pita Bread
- Use a hot skillet to encourage that puff — preheat it for at least 5 minutes.
- Don’t skip the rest after rolling out the dough; it helps with the puff.
- Roll the dough evenly; too thin or too thick can prevent proper puffing.
- Cover cooked pitas with a clean towel to keep them soft and warm.
- If the pitas don’t puff, don’t worry — they’ll still be soft, chewy, and delicious.
Watch Out for These Mistakes While Cooking
- Cold Skillet: If your pan isn’t hot enough, the pita won’t puff.
- Thick Dough: Rolling too thick can result in flatbread without a pocket.
- Dry Dough: A dry dough won’t rise well. Stick to the recipe’s hydration.
- Under-Kneading: Not kneading enough can affect gluten development and puff.
- Skipping the Second Rest: It helps the dough relax before cooking. Don’t rush it.
What to Serve With Homemade Pita Bread?
1. Hummus
Creamy chickpea dip is a classic companion that turns your pita into a Mediterranean snack.
2. Chicken Shawarma
Stuff your pita with spiced grilled chicken, lettuce, tomatoes, and garlic sauce.
3. Tzatziki
Cool, garlicky yogurt and cucumber sauce perfect for dipping.
4. Falafel
A warm pita stuffed with crispy falafel and fresh veggies makes a filling vegetarian meal.
5. Pita Chips
Slice and bake leftover pita into crispy chips, then serve with salsa or guac.
Storage Instructions
Room Temperature:
Store cooled pita in a zip-top bag for up to 2 days. Keep it wrapped to prevent drying out.
Refrigeration:
Not recommended — refrigeration can make them dry and rubbery.
Freezing:
Freeze in a single layer with parchment paper between them, then transfer to a freezer bag. Reheat from frozen in the oven or on a skillet.
Estimated Nutrition (per pita)
- Calories: 165 kcal
- Protein: 4.5g
- Carbohydrates: 32g
- Fat: 2.5g
- Fiber: 1g
- Sugar: 0.5g
- Sodium: 210mg
Frequently Asked Questions
How do I get the pita to puff up every time?
Use a hot pan, roll evenly, and don’t skip the second rest after shaping.
Can I bake these in the oven instead?
Yes! Bake on a preheated pizza stone or baking steel at 475°F for 2–3 minutes.
How do I reheat leftover pita?
Warm on a skillet or wrap in foil and heat in a 300°F oven for 5–7 minutes.
Can I make the dough ahead of time?
Yes, you can refrigerate the dough after the first rise. Let it come to room temp before shaping.
What if my pitas don’t puff?
No worries! They’ll still be soft and perfect for wraps or dipping, just without the pocket.
Conclusion
Homemade pita bread is one of those simple pleasures that’s worth every minute. Soft, warm, and beautifully puffed, these pitas elevate any meal or snack. Whether you fill them, dip them, or toast them into chips, making them from scratch will quickly become a favorite kitchen ritual. Once you experience the magic of fresh pita puffing up on a hot skillet, you’ll wonder why you ever bought them in a bag.
Homemade Pita Bread
- Total Time: 1 hour 50 minutes
- Yield: 8 pitas
- Diet: Vegetarian
Description
Soft, warm, and beautifully puffed, this Homemade Pita Bread recipe is your go-to for a delicious, fresh-baked flatbread that’s better than store-bought. Perfect for wraps, dipping in hummus or tzatziki, or turning into crunchy pita chips, it’s a simple, quick bread made with pantry ingredients. Whether you’re looking for a quick breakfast idea, easy dinner bread, or a healthy snack, this easy recipe will have you coming back for more!
Ingredients
1 ½ cups warm water
2 teaspoons sugar
2 ¼ teaspoons active dry yeast
3 ½ cups all-purpose flour
1 ½ teaspoons salt
2 tablespoons olive oil
Instructions
1. In a bowl, combine warm water (about 110°F), sugar, and active dry yeast. Let it sit for 5–10 minutes until foamy.
2. In a large mixing bowl, mix the flour and salt. Add the yeast mixture and olive oil. Stir until a shaggy dough forms.
3. Knead the dough on a floured surface for 8–10 minutes until smooth and elastic.
4. Transfer to an oiled bowl, cover, and let it rise for 1 to 1.5 hours until doubled in size.
5. Punch down the dough and divide it into 8 equal pieces. Roll each piece into a ball, then flatten into a 6–7 inch round.
6. Cover and let the shaped dough rest for 15–20 minutes before cooking.
7. Heat a skillet over medium-high heat. Cook each pita for 1–2 minutes per side until puffed and golden spots appear.
8. Transfer cooked pitas to a clean towel to keep warm and soft. Serve fresh.
Notes
Let the dough rest after rolling to encourage the perfect puff.
Make sure your skillet is hot before cooking each pita.
If the pita doesn’t puff, it’s still soft and delicious for wraps or dips.
- Prep Time: 1 hour 30 minutes
- Cook Time: 20 minutes
- Category: Bread
- Method: Stovetop
- Cuisine: Middle Eastern
Nutrition
- Serving Size: 1 pita
- Calories: 165
- Sugar: 0.5g
- Sodium: 210mg
- Fat: 2.5g
- Saturated Fat: 0.5g
- Unsaturated Fat: 2g
- Trans Fat: 0g
- Carbohydrates: 32g
- Fiber: 1g
- Protein: 4.5g
- Cholesterol: 0mg