
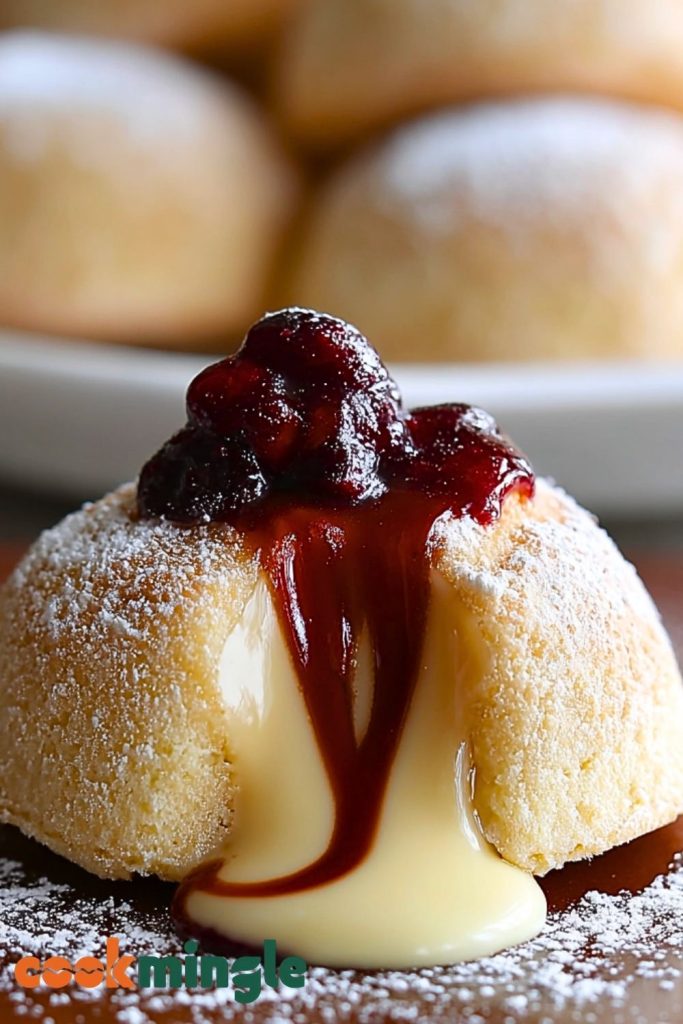
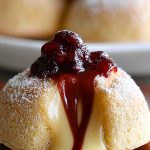
Melt-in-your-mouth, buttery, and delicately sweet—Melting Moments are the kind of cookies that disappear from the plate before they’ve even cooled. With a shortbread-like texture that crumbles beautifully with each bite, they’re lightly dusted in powdered sugar and made to evoke pure nostalgia. These dreamy cookies live up to their name, breaking apart on your tongue in a soft, silky swoon of flavor.
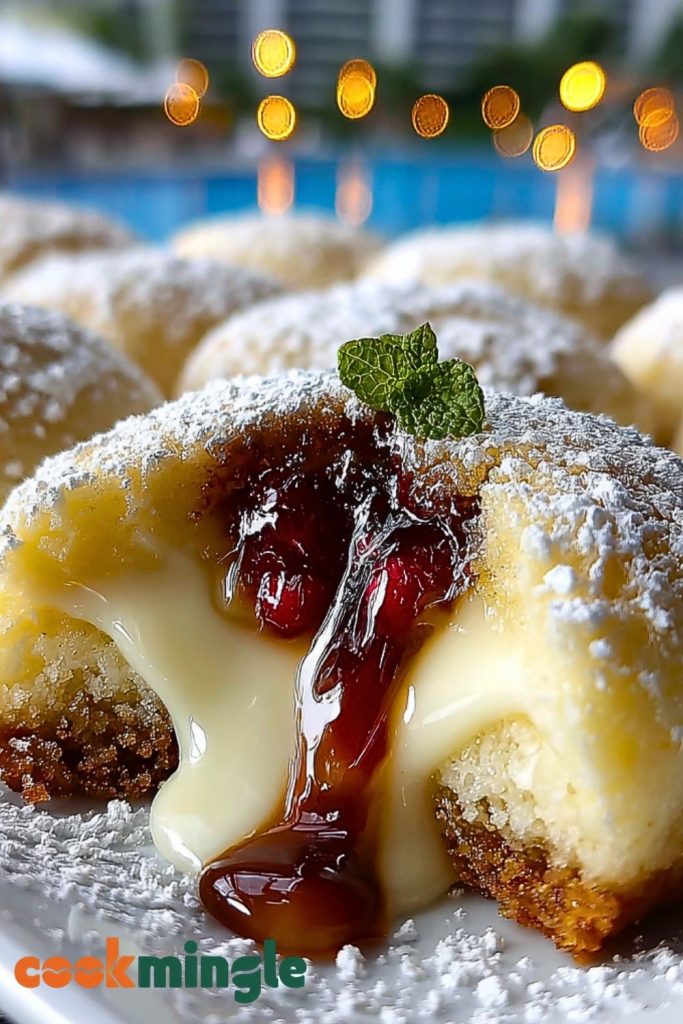
Perfect for holidays, tea parties, or a cozy afternoon treat, Melting Moments are a simple yet elegant dessert. They’re made with only a few pantry staples, yet taste like something from a high-end bakery. Whether you enjoy them plain, filled with a touch of jam, or dusted with a generous snowfall of sugar, these cookies will steal the show wherever they go.
Why You’ll Love This Melting Moments Recipe
- Texture like no other: So soft and buttery, they truly melt on your tongue.
- Minimal ingredients: Uses basic pantry staples—nothing fancy, but feels indulgent.
- Perfect for gifting: Beautifully delicate, they make elegant edible gifts.
- Versatile flavor base: Easily infused with citrus zest, vanilla, or even a touch of rosewater.
- Bakes fast: These cookies are ready in under 30 minutes from start to finish.
- Freezer-friendly: Make ahead and store for whenever cravings hit.
Preparation Phase & Tools to Use (Essential Tools and Equipment, and Why They Matter)
Creating the perfect Melting Moments starts with precision and gentleness—this isn’t the time for overmixing or improvising. To get that delicate, shortbread-style texture, using the right tools is crucial:
- Hand Mixer or Stand Mixer: Creaming the butter and sugar together until pale and fluffy is key to the cookie’s melt-in-the-mouth texture. A mixer helps incorporate air without overworking the dough.
- Mixing Bowls: Have one large bowl for your dough, and smaller ones for dry ingredients to ensure even blending.
- Fine Mesh Sifter: A must-have for sifting the powdered sugar and flour, which helps prevent lumps and makes your cookies light and airy.
- Silicone Spatula: Useful for folding and scraping without deflating your dough.
- Baking Tray: A flat, nonstick or parchment-lined tray ensures even baking.
- Cookie Scoop or Spoon: For uniform portions and quicker shaping.
- Cooling Rack: Essential for allowing the cookies to cool and set without becoming soggy underneath.
Using high-quality butter and accurate measurements makes all the difference in a recipe this simple. Precision equals perfection.
Preparation Tips
- Room Temperature Butter: Make sure your butter is soft but not melted. It should leave a slight fingerprint when pressed.
- Sift Dry Ingredients: Sifting isn’t optional here. It makes the dough finer and the cookies smoother.
- Chill if Necessary: If your dough becomes too soft, chill it for 10–15 minutes before shaping.
- Handle Gently: Don’t overmix or knead—minimal handling ensures a tender crumb.
- Uniform Size: Scoop evenly to promote consistent baking and texture.
- Don’t Overbake: These cookies should remain pale. Slight browning at the bottom is enough.
Each of these tips helps retain the airy, delicate texture that defines a true Melting Moment.
Ingredients for This Melting Moments Recipe
These delicate cookies come together with just a handful of pantry staples, but each one plays a key role in achieving the signature melt-in-your-mouth texture.
- 1 cup (225g) unsalted butter, softened – High-fat, quality butter is crucial for richness and the signature crumbly texture.
- ¾ cup (90g) powdered sugar (plus more for dusting) – Adds sweetness and keeps the texture light; regular granulated sugar won’t work here.
- 1 ½ cups (180g) all-purpose flour – The base of the cookie that gives it structure without heaviness.
- ½ cup (60g) cornstarch – The secret ingredient that gives these cookies their delicate, powdery melt.
- 1 tsp vanilla extract – For subtle depth and aromatic sweetness.
- Optional: zest of 1 lemon or orange – A fragrant citrus boost if desired.
Tip: For extra indulgence, you can sandwich two cookies together with vanilla or lemon buttercream.
Step 1: Cream the Butter and Sugar
In a large mixing bowl, beat the softened butter and powdered sugar together using a hand or stand mixer. Mix on medium speed for about 2–3 minutes, until light, fluffy, and pale in color. This step incorporates air into the dough for that delicate, melt-in-the-mouth feel.
Step 2: Add Vanilla and Optional Zest
Mix in the vanilla extract (and citrus zest if using). Blend just until incorporated. This enhances flavor without altering the soft texture.
Step 3: Sift and Add Dry Ingredients
In a separate bowl, sift together the all-purpose flour and cornstarch. Gradually add the dry mixture to the creamed butter, mixing on low speed or folding in gently with a spatula until fully combined. The dough should be soft but not sticky.
Step 4: Shape the Dough
Using a spoon or small cookie scoop, take portions of dough and roll them into balls (about 1 inch in diameter). Place on a parchment-lined baking sheet, spacing them slightly apart. Gently press each one down with a fork or your fingers to flatten slightly, or leave them domed if you prefer the classic look.
Step 5: Chill (Optional but Recommended)
If your dough feels too soft or sticky, refrigerate the shaped cookies for about 10–15 minutes. This helps them hold their shape during baking and enhances texture.
Step 6: Bake
Preheat your oven to 325°F (160°C). Bake the cookies for 12–15 minutes or until the bottoms are just barely golden. The tops should remain pale. Do not overbake—these cookies are meant to stay light in color and soft.
Step 7: Cool and Dust
Let the cookies rest on the baking sheet for 5 minutes before transferring to a cooling rack. Once fully cooled, dust generously with powdered sugar for that classic finish.
Notes
- Butter Quality Matters: These cookies are all about the butter. Choose a high-fat, European-style butter if possible for the richest, most flavorful result.
- Flavor Variations: You can switch things up by adding almond extract, rosewater, or even sandwiching them with raspberry jam or lemon curd.
- Make-Ahead Friendly: The dough can be stored in the refrigerator for up to 48 hours or frozen (pre-shaped) for a month—just bake straight from frozen with an extra minute or two added.
Watch Out for These Mistakes While Cooking
- Overmixing the Dough: This will develop the gluten and make the cookies chewy instead of delicate. Mix just until everything is incorporated.
- Skipping the Sifting: Powdered sugar and cornstarch can clump. Unsifted dry ingredients can ruin the smooth texture.
- Using Cold Butter: If your butter isn’t fully softened, the dough won’t cream properly, affecting both texture and structure.
- Overbaking: Melting Moments should not brown on top. Take them out as soon as the bottom edges just begin to turn golden.
- Skipping Chill Time on Warm Days: If your kitchen is warm, chilling the dough helps the cookies retain their shape and prevents spreading.
- Not Measuring Flour Correctly: Too much flour leads to dry cookies. Spoon and level your flour into the measuring cup rather than scooping.
- Dusting Too Soon: If the cookies aren’t completely cool, powdered sugar will melt into them instead of creating a pretty finish.
- Crowding the Baking Sheet: Give them space. Even though they don’t spread much, good airflow ensures even baking.
What to Serve With Melting Moments?
These delicate cookies pair beautifully with a wide range of drinks and light bites. Whether you’re planning a full afternoon tea or just want a cozy pairing for your midday break, here are some top companions.
8 Recommendations
- English Breakfast Tea – A classic pairing that enhances the buttery flavor of the cookies.
- Espresso or Cappuccino – The creamy texture of the cookie complements the boldness of coffee.
- Sparkling Lemonade – A refreshing contrast to balance the rich, sweet notes.
- Earl Grey with a Twist of Orange – Brings out the citrus zest if used in the recipe.
- Chilled Milk – A simple but comforting choice, especially for kids (or kids at heart).
- Fruit Compote or Berries – Serve on the side for a pop of tartness and color.
- Vanilla Ice Cream – Create a dessert plate with one or two cookies and a scoop for a melt-in-your-mouth duo.
- Rosé or Moscato Wine – A light dessert wine offers an elegant way to serve these cookies at events.
These pairings elevate Melting Moments from a casual treat to a delightful part of a full culinary experience.
Storage Instructions
Melting Moments are delicate but store surprisingly well when handled with care:
- Room Temperature: Store in an airtight container at room temperature for up to 1 week. Separate layers with parchment paper to avoid sticking or breaking.
- Refrigerator: Not recommended, as the fridge can dry them out or make them taste stale more quickly.
- Freezer (Unbaked): You can freeze the shaped dough balls (unbaked) for up to 1 month. Bake directly from frozen—just add 1–2 minutes to the bake time.
- Freezer (Baked): Once baked and fully cooled, freeze in a single layer, then transfer to a container. Dust with powdered sugar after thawing.
Always let frozen cookies come to room temperature before serving for the best flavor and texture.
Estimated Nutrition
Per one cookie (approximate values based on standard recipe yield of 24 cookies)
- Calories: 115 kcal
- Total Fat: 7g
- Saturated Fat: 4.5g
- Unsaturated Fat: 2g
- Trans Fat: 0g
- Cholesterol: 20mg
- Sodium: 2mg
- Total Carbohydrates: 12g
- Dietary Fiber: 0.2g
- Sugars: 4g
- Protein: 0.7g
- Serving Size: 1 cookie
These cookies are small but rich, so one or two is usually enough to satisfy sweet cravings!
Frequently Asked Questions
1. Can I use margarine instead of butter?
It’s not recommended. Margarine lacks the fat content and flavor needed for the signature melt-in-your-mouth texture. Stick with high-quality unsalted butter for best results.
2. Do I need to chill the dough before baking?
It’s optional but helpful—especially in warmer kitchens. A quick chill helps maintain shape and improves texture.
3. Can I make these gluten-free?
Yes, use a good quality gluten-free flour blend and ensure your cornstarch is certified gluten-free. The texture might vary slightly but should still be light and crumbly.
4. What can I use instead of cornstarch?
You can try using potato starch or rice flour, but cornstarch is ideal for achieving that signature softness. Avoid using regular flour as a substitute.
5. How do I prevent the cookies from spreading too much?
Make sure the butter isn’t too soft and avoid overmixing the dough. Chilling the shaped cookies before baking also helps.
6. Can I flavor these cookies differently?
Absolutely! Lemon zest, orange zest, almond extract, or even a dash of cinnamon can give them a unique twist without ruining the base recipe.
7. Why are my cookies crumbly or dry?
Most likely too much flour was added. Be sure to spoon and level your flour instead of scooping it. Also, avoid overbaking.
8. Can I make sandwich cookies with these?
Yes! Pipe or spread a small amount of buttercream, jam, or lemon curd between two cookies for a beautiful and indulgent treat.
Conclusion
Melting Moments are a celebration of simplicity and elegance. With just a few ingredients and the right techniques, you can create cookies that live up to their name—delicate, buttery bites that melt the moment they touch your tongue. Whether you enjoy them with a hot cup of tea or dressed up with a dollop of jam, they’re sure to become a treasured recipe in your collection. Share them, gift them, or keep them all to yourself—we won’t judge.
Melting Moment
- Total Time: 30 mins
- Yield: 24 cookies
- Diet: Vegetarian
Description
Soft, buttery, and melt-in-your-mouth perfect, these Melting Moments cookies are a timeless treat. Ideal for tea parties, easy dessert ideas, or holiday cookie trays, they deliver incredible texture with minimal effort. Made with simple ingredients like cornstarch, powdered sugar, and quality butter, these easy cookies come together quickly and store beautifully. Whether you’re seeking a quick dessert, an elegant gift, or an afternoon snack to enjoy with tea or coffee, these Melting Moments are the perfect addition to your list of breakfast ideas, easy recipe options, and food ideas worth repeating.
Ingredients
1 cup unsalted butter, softened
¾ cup powdered sugar
1 ½ cups all-purpose flour
½ cup cornstarch
1 teaspoon vanilla extract
zest of 1 lemon or orange (optional)
Instructions
1. Beat the softened butter and powdered sugar together until light and fluffy.
2. Mix in vanilla extract and optional citrus zest just until blended.
3. Sift together flour and cornstarch, then gradually add to butter mixture and combine gently.
4. Roll dough into small 1-inch balls and place on a parchment-lined baking tray.
5. Flatten slightly with a fork or leave domed, then chill for 10–15 minutes if dough is soft.
6. Bake in a preheated oven at 325°F (160°C) for 12–15 minutes until just golden at the bottom.
7. Let cool on the tray for 5 minutes, then transfer to a cooling rack.
8. Once completely cooled, dust generously with powdered sugar.
Notes
Use high-quality butter for the best flavor and texture.
Always sift dry ingredients to ensure a smooth, delicate crumb.
Avoid overbaking—cookies should remain pale on top with slight golden bottoms.
- Prep Time: 15 mins
- Cook Time: 15 mins
- Category: Dessert
- Method: Baking
- Cuisine: Western
Nutrition
- Serving Size: 1 cookie
- Calories: 115
- Sugar: 4
- Sodium: 2
- Fat: 7
- Saturated Fat: 4.5
- Unsaturated Fat: 2
- Trans Fat: 0
- Carbohydrates: 12
- Fiber: 0.2
- Protein: 0.7
- Cholesterol: 20