

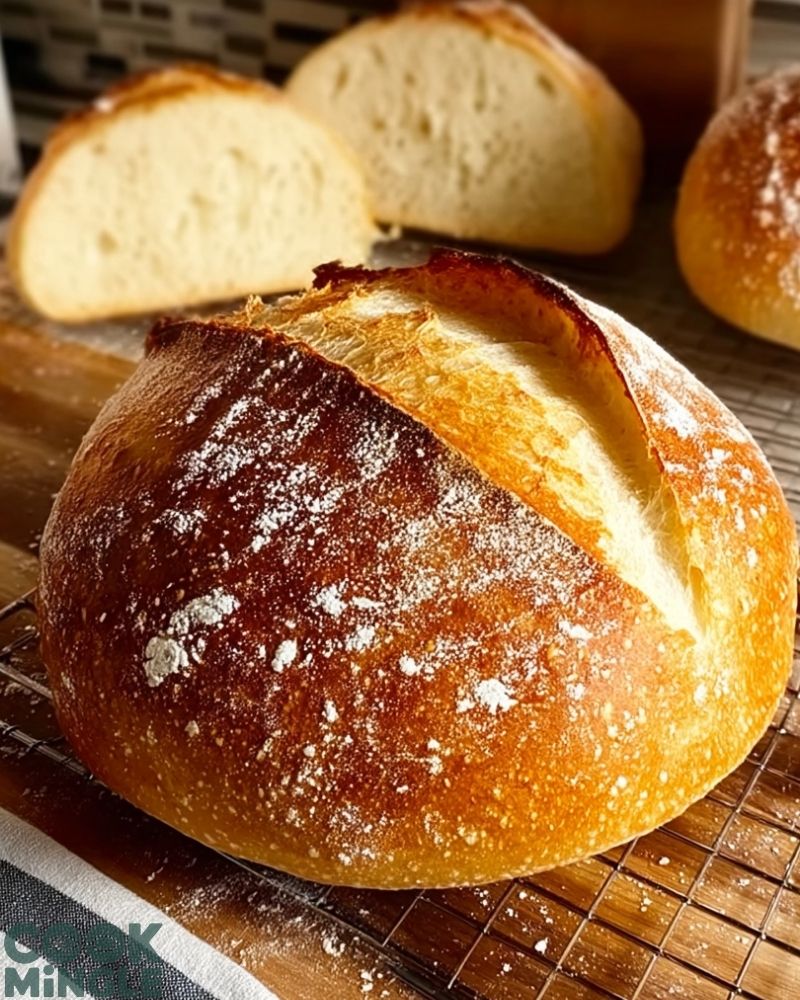
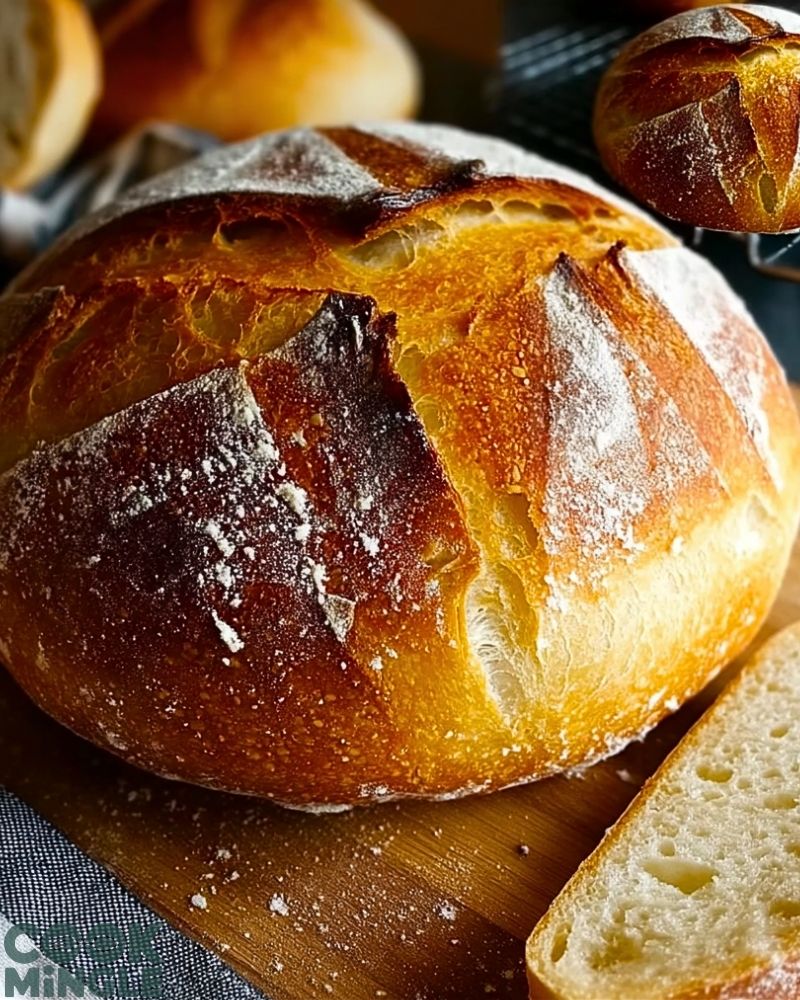
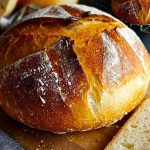
Baking sourdough bread used to feel like a multi-day mission that tested my patience—but everything changed when I discovered this Same Day Sourdough Bread recipe. It’s the perfect blend of simplicity and satisfaction. With a little planning in the morning, you can slice into a golden-crusted, airy loaf by dinner. The crust has that ideal crunch while the inside stays soft and pillowy with a mild tang that makes it irresistible.
I created this recipe for those of us who love the flavor and texture of traditional sourdough but don’t have 36 hours to spare. This bread is perfect for weekday cravings, dinner party flexes, or when you just want the aroma of fresh-baked bread to fill your kitchen. Trust me, once you see how easy it is, you’ll want to bake it weekly.
Why You’ll Love This Same Day Sourdough Bread Recipe
- Quick and Doable: No need for overnight proofing. You can start in the morning and enjoy it by evening.
- Perfect Crust and Crumb: That rustic, golden crust cracks under the knife to reveal a tender, open crumb.
- Mild Tang, Big Flavor: A beautiful sourdough flavor that isn’t too sharp—just balanced and satisfying.
- Beginner-Friendly: No fancy tools or complicated techniques. Just your hands, a bowl, and an oven.
What Type of Flour is Best for Same Day Sourdough Bread?
I’ve tested this recipe with all sorts of flour blends, and honestly, the best results come from using bread flour. It has a higher protein content which strengthens the gluten network and gives your loaf that airy, chewy interior with a beautifully risen dome. That said, if you don’t have bread flour, all-purpose flour can still give you a decent loaf—it just won’t have as much structure or spring.
For those who like a deeper flavor and heartier crumb, mixing in a small amount (10–20%) of whole wheat flour can add wonderful nutty tones. Just remember: more whole wheat = more density, so keep the balance in mind.
Options for Substitutions
Don’t stress if you’re missing a specific ingredient—this recipe is super flexible:
- Flour: Swap bread flour with all-purpose flour or mix with whole wheat flour for a rustic touch.
- Sourdough Starter: If your starter isn’t super active, add a pinch of commercial yeast (about 1/8 tsp) to help boost the rise.
- Water: Filtered or distilled water works best, especially if your tap water contains a lot of chlorine which can affect fermentation.
- Salt: Regular sea salt or kosher salt is perfect—avoid iodized salt, which can inhibit the yeast.
- Dutch Oven: No Dutch oven? Bake on a pizza stone with a pan of hot water at the bottom of your oven to mimic steam baking.
Ingredients for This Same Day Sourdough Bread
Every ingredient in this recipe plays a specific role to create that perfect loaf you see cooling on the wire rack. Here’s what you’ll need—and why it matters:
Bread Flour
This is the backbone of the loaf. Its higher protein content helps develop strong gluten strands, resulting in a tall, airy, and chewy sourdough bread. If you’re after those dramatic cuts and crust, this flour is key.
Active Sourdough Starter
Your natural leavening agent. It gives the bread rise and its signature tang. Make sure it’s bubbly and doubled in size before using—this ensures proper fermentation within a single day.
Warm Water
Hydration is everything. Warm water (around 80–85°F) helps activate your starter quickly and aids gluten formation. Too hot and you’ll kill the culture; too cold and it slows everything down.
Salt
It strengthens the dough structure and controls the fermentation rate. It also enhances the overall flavor of the bread. Without it, your loaf could taste flat or over-fermented.
Rice Flour (for dusting)
Used to dust your proofing basket or towel, rice flour helps prevent sticking and gives the loaf that iconic rustic finish. It doesn’t absorb into the dough the way wheat flour does, so it’s ideal for surface dusting.
Step 1: Mix the Dough
In a large mixing bowl, combine your active sourdough starter, warm water, and bread flour. Stir until no dry bits remain. The dough will look shaggy and a bit sticky at this stage—don’t worry, that’s totally normal.
Let it rest for 30 minutes. This rest period is called autolyse, and it helps hydrate the flour and start gluten development naturally.
Step 2: Add the Salt
Sprinkle the salt over the rested dough and gently work it in using your hands. You can use a pinch-and-fold technique or a quick knead until the salt disappears and the dough feels a bit smoother. Give it another short rest (15 minutes or so).
Step 3: Stretch and Fold
Perform 3–4 rounds of stretch and fold every 30 minutes. To do this, grab one edge of the dough, stretch it upwards, then fold it over itself. Turn the bowl a quarter turn and repeat. This strengthens the dough without heavy kneading.
Each time you do it, you’ll notice the dough becoming smoother and more elastic. Cover and let it bulk ferment in a warm spot after the final fold.
Step 4: Bulk Fermentation
Let the dough rise undisturbed for about 4–5 hours, or until it has doubled in size. It should feel puffy, with visible bubbles forming underneath the surface. A slightly domed top is a good sign you’re ready to move on.
Step 5: Shape the Dough
Gently turn the dough out onto a lightly floured surface. Shape it into a round by folding the edges into the center, then flipping it over and using your hands to tighten the ball. Let it rest for 20 minutes.
Step 6: Final Shaping and Proof
Place the shaped dough seam-side up in a well-floured proofing basket or a bowl lined with a floured kitchen towel. Let it rise for 1 to 1.5 hours at room temp—just until it looks slightly puffed. Meanwhile, preheat your oven to 475°F (245°C) with a Dutch oven inside.
Step 7: Score and Bake
Carefully flip the dough onto a sheet of parchment paper. Score the top with a sharp razor or bread lame—this helps control the expansion and gives it that beautiful crust. Transfer it (with parchment) into the hot Dutch oven.
Cover and bake for 20 minutes, then uncover and bake another 20–25 minutes until deep golden brown. Let it cool completely on a wire rack.
How Long to Cook the Same Day Sourdough Bread
Timing is everything in sourdough baking, and with this same-day method, it’s all about balance:
- Initial Bake (Covered): 20 minutes at 475°F (245°C). This steamy environment encourages maximum oven spring—the bread rises dramatically during this phase.
- Final Bake (Uncovered): 20–25 minutes. This is where the magic happens—the crust deepens in color, blisters appear, and the loaf takes on that classic golden-brown hue.
You’ll know it’s done when the crust is hard and the loaf sounds hollow when tapped on the bottom. If you have a thermometer, aim for an internal temp of around 208–210°F (98–99°C).
Tips for Perfect Same Day Sourdough Bread
- Use an Active Starter: Your starter should be at its peak—bubbly and doubled in size—when added to the dough. This ensures proper fermentation within a shorter window.
- Warm Environment is Key: Sourdough loves warmth. If your kitchen is cold, place the dough inside a turned-off oven with the light on or next to a warm appliance.
- Don’t Skip the Preheat: A blazing hot Dutch oven and oven are essential. They replicate professional steam ovens and help with that perfect rise.
- Score Confidently: Don’t be timid with your blade. A deep, clean slash gives the loaf room to expand and creates those stunning ear-like edges.
- Cool Completely Before Slicing: It’s tempting, I know—but slicing too early can lead to gummy bread. Let it rest for at least an hour.
Watch Out for These Mistakes While Cooking
Sourdough baking can feel like a delicate dance, especially when you’re trying to fast-track it into one day. Here are the most common missteps—and how to dodge them:
- Underestimating the Starter: Using a starter that isn’t at peak activity will slow everything down or lead to dense bread. Feed it the night before and keep it warm.
- Skipping the Stretch & Folds: These steps build the gluten strength that sourdough relies on. If you skip them, the dough may spread instead of rise.
- Overproofing: Since you’re working within a single day, it’s easy to go too far. Look for dough that’s just puffed—not doubled—during the final proof.
- Cold Oven or Dutch Oven: A hot baking environment gives you that dramatic oven spring. Always preheat thoroughly.
- Wrong Flour Ratio: Using too much whole wheat or low-protein flour without adjusting hydration can make the dough heavy and tight.
- Cutting While Hot: Let the bread cool at least an hour before slicing, or the crumb will compress and feel gummy.
- Not Enough Hydration: Dry dough won’t yield an open crumb. If your flour is very absorbent, consider increasing the water just slightly.
- Forgetting to Score: This small step gives your bread a chance to expand where you want it to—otherwise, it’ll burst unpredictably.
What to Serve With Same Day Sourdough Bread?
This bread’s versatility is one of its best features. Whether you’re dressing it up or keeping it simple, here are 8 delicious ways to serve it:
1. Whipped Herb Butter
Spread soft butter infused with garlic, rosemary, and thyme. It’s melt-in-your-mouth magic.
2. Avocado Smash
Creamy avocado with chili flakes, lime, and flaky sea salt makes a vibrant, wholesome breakfast.
3. Classic Tomato Soup
Dip a warm slice into a bowl of rich, savory tomato soup for the ultimate comfort combo.
4. Bruschetta
Top with diced tomatoes, basil, garlic, and olive oil for a bright and zesty appetizer.
5. Smoked Salmon & Cream Cheese
Layer slices with tangy cream cheese, smoked salmon, red onion, and capers.
6. Soft-Boiled Eggs
Tear a slice and dip it into jammy eggs for a rustic breakfast or lunch.
7. Charcuterie Boards
Use toasted slices as a crunchy companion to cheese, meats, olives, and spreads.
8. Grilled Cheese Sandwiches
Upgrade your grilled cheese game with thick, golden-crusted sourdough and sharp cheddar.
Storage Instructions
Sourdough has a longer shelf life than yeasted bread thanks to its natural acidity, but proper storage still makes a big difference. Here’s how to keep your same day sourdough bread fresh and delicious:
- Room Temperature (Best for 2–3 Days): Store the whole loaf cut-side down on a wooden cutting board, loosely covered with a clean kitchen towel. This keeps the crust crisp and the interior from drying out too quickly.
- Paper or Linen Bags: Better than plastic, these materials allow the bread to breathe, preventing sogginess while keeping it from going stale too fast.
- Freezing: For long-term storage, slice the bread and place parchment between slices, then freeze in a zip-top bag. Toast or warm in the oven straight from frozen—no thawing needed.
- Avoid Refrigeration: The fridge actually dries out bread faster. If you’re not eating it within a couple of days, freeze it instead.
Estimated Nutrition
Here’s a general estimate for one slice (from a medium loaf sliced into 12 portions). Values may vary slightly depending on the flour used and hydration level:
- Calories: 150
- Protein: 5g
- Fat: 0.5g
- Carbohydrates: 30g
- Fiber: 1g
- Sugar: 0g
- Sodium: 180mg
Sourdough is often easier to digest thanks to its fermentation process, and it typically has a lower glycemic index than conventional bread. Plus, it’s naturally free of added sugars and preservatives.
Frequently Asked Questions
1. Can I use sourdough discard instead of active starter?
Not for this recipe. Discard doesn’t have enough leavening power to make the dough rise within a day. You need a bubbly, active starter at its peak for the best results.
2. What if my dough is too sticky?
Sticky dough is actually a good sign—it usually means better hydration and a more open crumb. But if it’s unmanageable, lightly wet your hands instead of adding extra flour when handling it.
3. How do I know when bulk fermentation is done?
Look for dough that’s doubled in size, with visible bubbles along the sides and top. It should feel jiggly and soft when you move the bowl—like a marshmallow.
4. Can I use whole wheat flour only?
You can, but be prepared for a denser loaf with less rise. Whole wheat absorbs more water and has less gluten strength. A mix of 20–30% whole wheat with bread flour strikes a nice balance.
5. Do I need a Dutch oven?
It’s highly recommended for crusty results. But if you don’t have one, bake the loaf on a preheated baking stone or sheet pan with a tray of hot water underneath to mimic steam.
6. What’s the best way to reheat leftovers?
Wrap a slice in foil and warm it in the oven at 325°F for about 10 minutes. Or toast it directly to bring back that perfect texture.
7. How do I make my loaf more sour?
Let your starter ferment longer before mixing, or do a cold overnight proof in the fridge (if you decide to go beyond same-day). The longer the fermentation, the tangier the loaf.
8. Can I double this recipe?
Absolutely! Just make sure you’re mixing and folding thoroughly. And use a larger Dutch oven or bake in two batches to avoid crowding the dough.
Conclusion
Same Day Sourdough Bread is proof (pun intended) that artisan-style bread doesn’t have to take days. With a strong starter, some stretch-and-folds, and a bit of patience throughout the day, you can enjoy that classic crust and chewy crumb by dinner time. This recipe has become my go-to when I need fresh bread fast, but still want that old-world sourdough charm.
Whether you’re pairing it with soup, topping it with eggs, or simply tearing off a warm piece to eat plain—it’s a total game changer for home bakers. And once you’ve made it, I promise: you’ll never go back to store-bought.
Same Day Sourdough Bread Recipe
- Total Time: 8 hours 45 minutes
- Yield: 1 medium loaf (about 12 slices)
Description
Wake up craving fresh bread? With this Same Day Sourdough Bread recipe, you can start in the morning and enjoy a golden, crusty, bakery-style loaf by evening—no overnight wait required. Perfect for quick breakfast ideas, easy dinner sides, or a wholesome snack, this easy recipe delivers a tangy, chewy crumb wrapped in a perfectly blistered crust. Whether you’re new to sourdough or just short on time, this method brings artisan results to your kitchen table in just one day. The smell, the taste, the texture—it’s a heartwarming experience in every slice.
Ingredients
- 500g bread flour
- 100g active sourdough starter (fed and bubbly)
- 350g warm water (around 80–85°F)
- 10g sea salt
- Rice flour (for dusting proofing basket)
Instructions
- In a large bowl, mix the starter, warm water, and bread flour until no dry bits remain. Let rest for 30 minutes (autolyse).
- Add salt and mix thoroughly. Let rest for 15 minutes.
- Perform 3–4 sets of stretch-and-folds every 30 minutes.
- After final fold, cover and let bulk ferment for 4–5 hours, or until doubled in size.
- Turn dough onto a floured surface, shape into a ball, and bench rest for 20 minutes.
- Final shape and place seam-side up in a floured proofing basket. Proof at room temp for 1–1.5 hours.
- Preheat oven and Dutch oven to 475°F (245°C).
- Flip dough onto parchment paper, score the top, and transfer into the hot Dutch oven.
- Bake covered for 20 minutes, then uncovered for another 20–25 minutes until deep golden brown.
- Cool completely on a wire rack before slicing.
- Prep Time: 8 hours
- Cook Time: 45 minutes