
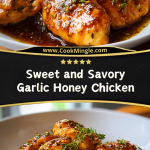
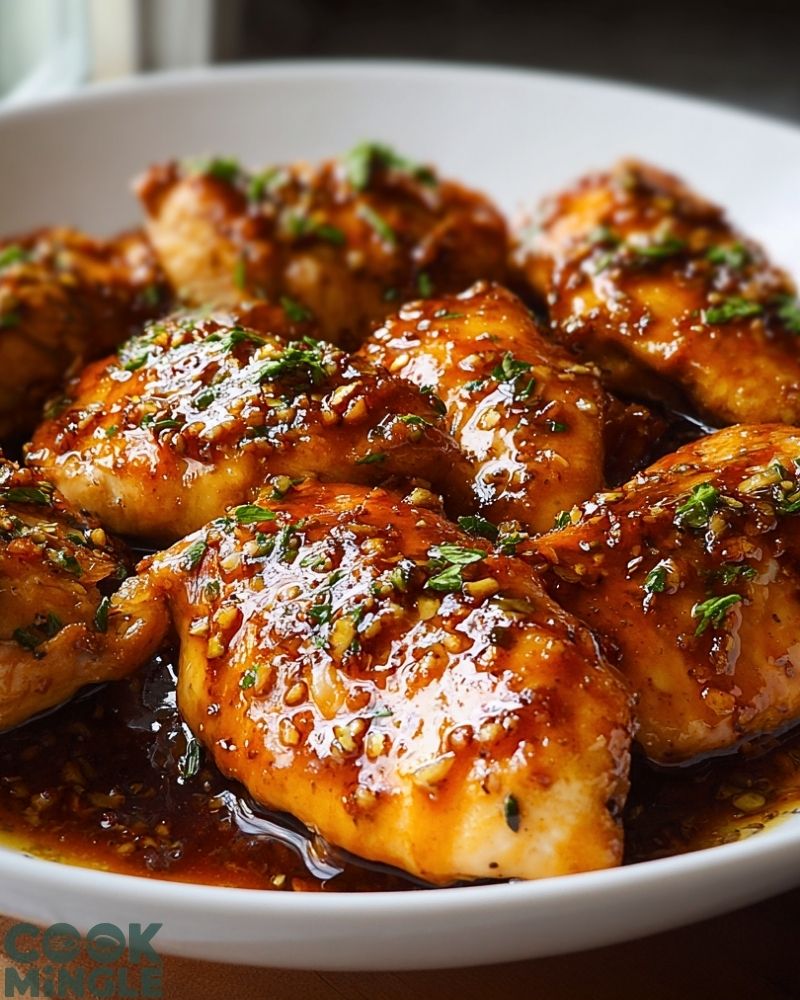
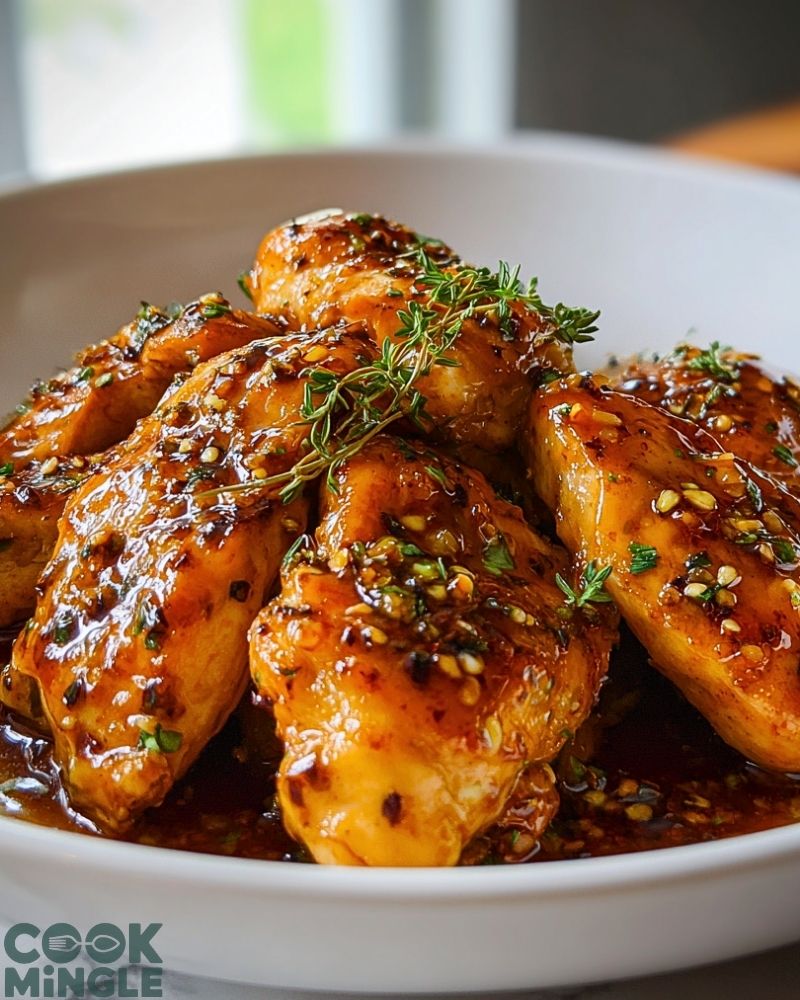
Sweet and Savory Garlic Honey Chicken is the kind of dish that makes dinner feel special without demanding too much from your schedule. Perfectly seared chicken breasts are glazed in a glossy, garlicky honey sauce with just the right balance of sweetness, umami, and a hint of heat. Each bite delivers juicy tenderness coated in a thick, sticky glaze that clings to every piece, finishing with a sprinkle of toasted sesame seeds and fresh herbs for added texture and aroma.
This dish is a weeknight hero that easily transforms into a crowd-pleaser for gatherings. Whether you serve it over fluffy rice, nestle it into lettuce cups, or pair it with roasted vegetables, Garlic Honey Chicken adapts beautifully to any occasion. It’s a one-pan wonder with bold flavor and minimal effort — ideal for those craving something rich, satisfying, and utterly delicious.
Why You’ll Love This Sweet and Savory Garlic Honey Chicken
- Fast and Flavorful: Ready in about 30 minutes with maximum taste payoff.
- One-Pan Wonder: Less mess, easy cleanup, and everything happens in a single skillet.
- Kid-Approved: The sticky-sweet glaze is a guaranteed hit with all ages.
- Customizable Heat: Adjust the spice level to your liking with red pepper flakes or chili paste.
- Perfect Meal Prep: Keeps well and reheats beautifully, making it a smart choice for weekly lunches.
Preparation Phase & Tools to Use (Essential Tools and Equipment, and Their Importance)
Before you dive into cooking Sweet and Savory Garlic Honey Chicken, having the right tools on hand makes the process smoother and more efficient. Here’s what you’ll need and why each item matters:
- Large Skillet or Sauté Pan: This is your main cooking vessel. A heavy-bottomed nonstick or stainless steel skillet allows for even heat distribution and caramelization of the sauce without burning.
- Tongs: Perfect for flipping the chicken breasts without piercing them and losing precious juices.
- Sharp Chef’s Knife: You’ll need this to finely mince the garlic, which is essential to infuse the sauce with maximum flavor.
- Cutting Board: Designate one for poultry to maintain kitchen hygiene.
- Small Mixing Bowl: Ideal for pre-mixing the sauce ingredients for a smoother cooking process.
- Whisk or Fork: For blending the sauce components until smooth and fully combined.
- Measuring Cups and Spoons: Accuracy matters, especially with the honey-soy sauce ratio to get the right balance of sweet and savory.
Preparation Tips
- Pound the Chicken Evenly: Lightly pound the chicken breasts to an even thickness for consistent cooking and tenderness.
- Mise en Place: Pre-measure and prep your sauce ingredients before you start cooking. Once the chicken is seared, the sauce comes together quickly.
- Don’t Crowd the Pan: Cook the chicken in batches if needed. Overcrowding lowers the pan’s temperature and prevents proper browning.
- Deglaze for Flavor: If you get fond (browned bits) at the bottom of the pan after searing the chicken, that’s gold. Use a splash of water or broth to deglaze and incorporate that flavor into your sauce.
Ingredients for Sweet and Savory Garlic Honey Chicken
To make this dish irresistibly delicious, here’s what you’ll need:
For the Chicken:
- 4 boneless, skinless chicken breasts (or thighs, if preferred)
- Salt and freshly ground black pepper, to taste
- 1 tablespoon olive oil (or any neutral cooking oil)
For the Garlic Honey Sauce:
- 4 garlic cloves, finely minced
- 1/3 cup honey
- 1/4 cup low-sodium soy sauce
- 1 tablespoon rice vinegar (or apple cider vinegar)
- 1 teaspoon sesame oil (optional, but adds depth)
- 1 teaspoon cornstarch + 2 tablespoons water (slurry for thickening)
- 1/2 teaspoon crushed red pepper flakes (adjust to spice preference)
Optional Garnishes:
- 1 tablespoon toasted sesame seeds
- Fresh chopped parsley or green onions
These ingredients work in harmony to give you a balanced, glossy glaze with plenty of garlicky character and a touch of kick.
Step 1: Prepare and Season the Chicken
Pat the chicken breasts dry with paper towels. Season both sides generously with salt and black pepper. If the pieces are thick, lightly pound them to an even thickness for even cooking.
Step 2: Sear the Chicken
Heat 1 tablespoon of olive oil in a large skillet over medium-high heat. Once hot, add the chicken breasts (in batches if necessary). Sear for about 4–5 minutes on each side, or until golden brown and cooked through. Remove from the skillet and set aside.
Step 3: Make the Garlic Honey Sauce
In the same skillet, reduce the heat to medium. Add the minced garlic and sauté for 30 seconds until fragrant. Pour in the honey, soy sauce, rice vinegar, sesame oil (if using), and red pepper flakes. Stir well and bring to a light simmer.
Step 4: Thicken the Sauce
Whisk together 1 teaspoon cornstarch and 2 tablespoons water to create a slurry. Pour it into the sauce, stirring constantly until it thickens—this should take about 1–2 minutes. The sauce should become glossy and slightly sticky.
Step 5: Return Chicken to the Pan
Place the seared chicken back into the skillet, coating each piece with the thickened sauce. Let it simmer for another 2–3 minutes, spooning the sauce over the chicken to fully glaze it.
Step 6: Garnish and Serve
Turn off the heat and sprinkle the chicken with toasted sesame seeds and chopped parsley or green onions. Serve immediately while hot and juicy.
Notes
- Chicken Options: You can use thighs instead of breasts for a juicier, richer result. Just adjust cooking time slightly, as thighs may take a bit longer.
- Double the Sauce: If you love extra sauce to drizzle over rice or veggies, simply double the sauce ingredients.
- Low-Sodium Choice: Always opt for low-sodium soy sauce to control saltiness. Regular soy sauce can quickly overwhelm the balance.
- Marinate Ahead: For even more flavor, marinate the chicken in a portion of the sauce (without the cornstarch) for 30 minutes before cooking.
- Make it Spicy: Add sriracha or a touch of chili paste for more heat, especially if you love a spicy glaze.
Watch Out for These Mistakes While Cooking
- Overcooking the Chicken: Chicken breasts can dry out quickly. Use a meat thermometer and remove from heat when internal temperature hits 165°F (74°C).
- Burning the Garlic: Garlic burns fast and turns bitter. Only sauté it briefly before adding liquids to the pan.
- Crowding the Pan: This prevents browning and can steam the chicken instead. Sear in batches if your pan isn’t large enough.
- Not Thickening the Sauce Properly: If you skip the cornstarch slurry, the sauce won’t cling well to the chicken. Don’t rush this step.
- Using Cold Chicken: Let the chicken come to room temperature for about 15 minutes before searing to ensure even cooking.
What to Serve With Sweet and Savory Garlic Honey Chicken?
The sweet, garlicky glaze of this chicken pairs beautifully with both simple sides and bold flavors. Here are eight complementary ideas to round out your meal:
8 Recommendations
- Steamed Jasmine or Basmati Rice – The soft, fluffy texture is perfect for soaking up the extra sauce.
- Garlic Stir-Fried Green Beans – Crisp and vibrant with a hint of garlic to echo the chicken’s flavors.
- Roasted Sweet Potatoes – Their natural sweetness balances the savory soy-honey glaze.
- Asian Slaw – A fresh, crunchy contrast with tangy dressing helps cut through the richness.
- Coconut Rice – Creamy and slightly sweet, it adds a tropical flair that pairs wonderfully with the sticky sauce.
- Sautéed Bok Choy or Baby Spinach – Lightly wilted greens keep the meal feeling clean and nutritious.
- Chilled Cucumber Salad – Refreshing and slightly tangy, great for contrast in both texture and temperature.
- Lo Mein or Udon Noodles – Tossed with sesame oil and scallions, they make for a hearty and satisfying base.
Storage Instructions
Refrigeration: Store any leftover Sweet and Savory Garlic Honey Chicken in an airtight container in the fridge for up to 4 days. Make sure the chicken has cooled to room temperature before sealing.
Freezing: This dish freezes well. Place the cooled chicken and sauce in a freezer-safe bag or container and freeze for up to 2 months. For best results, thaw overnight in the fridge and reheat gently on the stove or in the microwave.
Reheating Tips: When reheating, add a splash of water or broth to loosen the sauce and prevent drying out. Reheat over medium heat on the stove or in the microwave in 30-second bursts, covered.
Estimated Nutrition
(Per serving, based on 4 servings)
- Calories: ~320
- Protein: 28g
- Fat: 9g
- Carbohydrates: 30g
- Sugars: 18g
- Sodium: 620mg
- Fiber: 0.5g
Note: Values may vary slightly based on exact ingredients and portions used.
Frequently Asked Questions
1. Can I use chicken thighs instead of breasts?
Absolutely! Chicken thighs are juicy and flavorful. Just be sure to adjust the cooking time slightly, as thighs may take a couple of extra minutes to cook through.
2. How can I make this dish spicier?
Add more crushed red pepper flakes, a splash of sriracha, or a teaspoon of chili garlic paste to the sauce while it simmers.
3. What’s the best way to tell when the chicken is fully cooked?
Use an instant-read thermometer. Chicken is safely cooked when it reaches an internal temperature of 165°F (74°C).
4. Can I prepare this dish ahead of time?
Yes! You can cook the chicken and make the sauce in advance. Reheat them together gently in a skillet just before serving.
5. Is this recipe gluten-free?
As written, it’s not. To make it gluten-free, substitute the soy sauce with a gluten-free alternative like tamari or coconut aminos.
6. Can I add vegetables directly into the skillet?
Yes, quick-cooking veggies like snap peas, bell peppers, or broccoli work great. Sauté them briefly before returning the chicken to the pan.
7. What if I don’t have cornstarch?
You can use arrowroot powder or flour as a thickening agent, though the texture may vary slightly.
8. Does this dish work well for meal prep?
Definitely! It keeps well in the fridge and reheats nicely. Pair it with rice or noodles in meal prep containers for easy weekday lunches.
Conclusion
Sweet and Savory Garlic Honey Chicken is the perfect balance of quick, flavorful, and comforting. With its sticky glaze and garlicky bite, it brings takeout-style satisfaction right to your kitchen. Whether you’re cooking for yourself or a table full of guests, this dish hits all the right notes—easy prep, mouthwatering flavor, and versatility that fits any meal plan. Once you try it, you’ll want it on repeat.

Sweet and Savory Garlic Honey Chicken
- Total Time: 30 minutes
- Yield: 4 servings
Description
Sweet and Savory Garlic Honey Chicken is a quick, flavorful dish featuring juicy chicken glazed in a garlicky, honey-soy sauce. It’s sticky, slightly spicy, and perfect over rice, noodles, or vegetables.
Ingredients
For the Chicken:
- 4 boneless, skinless chicken breasts
- Salt and pepper, to taste
- 1 tbsp olive oil
For the Sauce:
- 4 garlic cloves, minced
- 1/3 cup honey
- 1/4 cup low-sodium soy sauce
- 1 tbsp rice vinegar
- 1 tsp sesame oil (optional)
- 1/2 tsp red pepper flakes
- 1 tsp cornstarch + 2 tbsp water
Optional Garnishes:
- Toasted sesame seeds
- Chopped parsley or green onions
Instructions
- Pat chicken dry and season with salt and pepper. Pound if needed for even thickness.
- Heat olive oil in a skillet over medium-high heat. Sear chicken for 4–5 minutes per side until golden and cooked through. Remove and set aside.
- Lower heat to medium. Add minced garlic to the skillet; sauté 30 seconds.
- Stir in honey, soy sauce, vinegar, sesame oil, and red pepper flakes. Simmer briefly.
- Mix cornstarch with water and stir into the sauce. Cook until thickened, about 1–2 minutes.
- Return chicken to the pan and coat with the sauce. Simmer 2–3 minutes.
- Garnish with sesame seeds and herbs. Serve hot.
- Prep Time: 10 minutes
- Cook Time: 20 minutes