

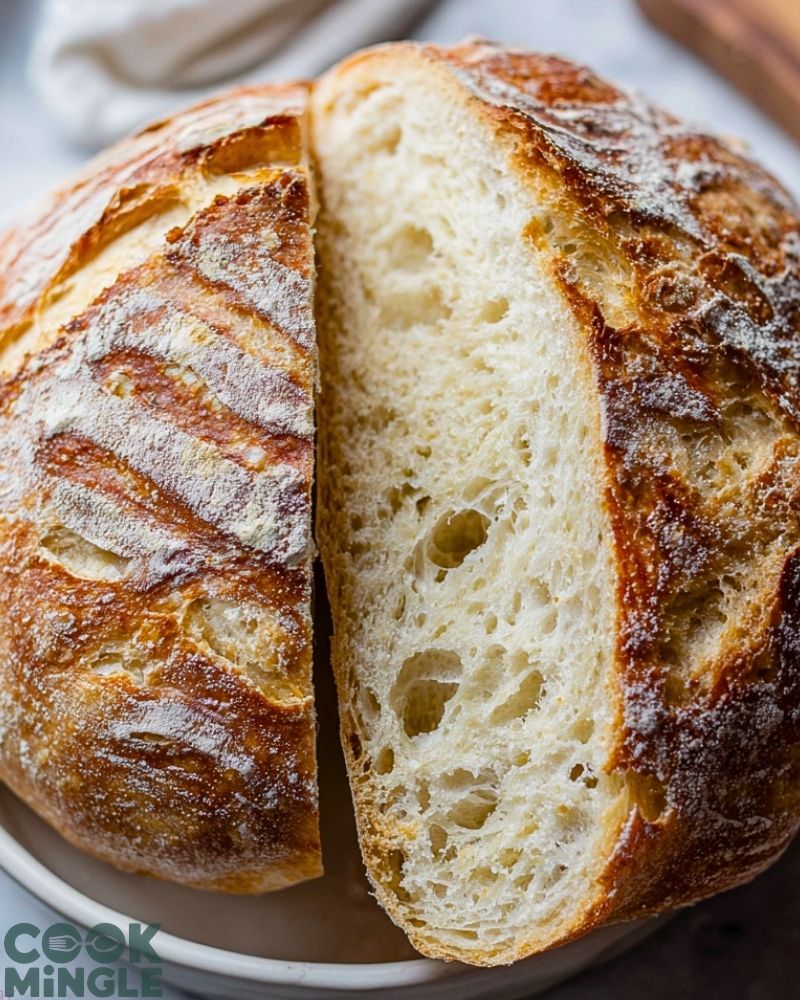
Sourdough bread has a rhythm to it. It asks for your time, your hands, and your patience—but what it gives back is unmatched. I still remember the first time I pulled a golden-crusted sourdough loaf from my oven, hearing the subtle crackle of the crust cooling on the wire rack. It felt like more than just baking—it was creating something timeless. This recipe has been my go-to ever since, bringing that same joy every time I slice into the soft, airy crumb.
I’ve spent years testing different hydration levels, fermentation times, and shaping techniques, and this version is my favorite. Whether you’re brand new to baking or a seasoned sourdough enthusiast, this method strikes a beautiful balance between flavor and ease. Once you get into the groove, it becomes second nature—and the reward is a crusty, chewy, tangy loaf that fills your kitchen with that unmistakable fresh bread aroma.
Why You’ll Love This Sourdough Bread Recipe
- Incredible flavor: The long fermentation adds deep, complex tang without being overpowering.
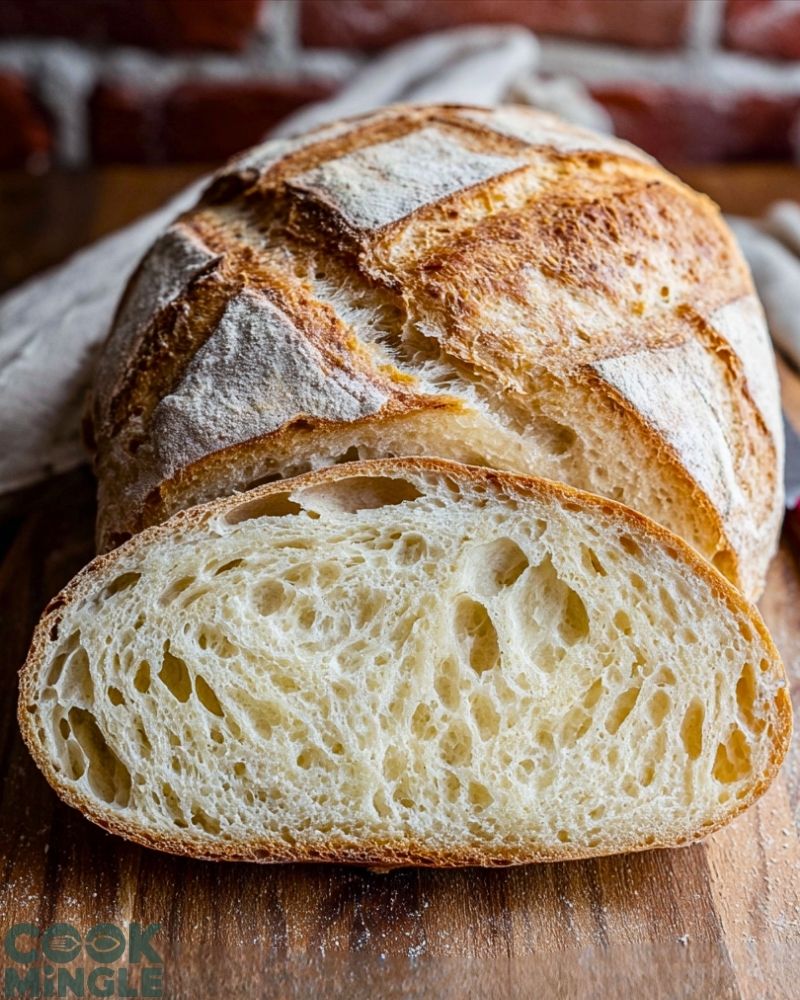
- Crisp, blistered crust: That satisfying crunch when you slice through is pure perfection.
- Open, tender crumb: Ideal for butter, avocado, or your favorite spread.
- Naturally leavened: No commercial yeast—just wild, living culture.
- Great for beginners and pros alike: The steps are broken down clearly with flexibility in timing.
What Kind of Flour Should I Use for Sourdough Bread?
I’ve had the best results using a mix of bread flour and whole wheat flour. Bread flour gives the dough strength and elasticity thanks to its higher protein content, helping you achieve that gorgeous oven spring and chewy texture. Whole wheat, on the other hand, brings a nutty depth and adds more nutrients to the loaf. If you’re just starting out, using only bread flour can make things a little more forgiving as you get used to handling sourdough.
You can also try adding a small percentage of rye flour—it boosts fermentation and adds a rustic note to the flavor. Just be careful with higher whole grain ratios, as they can make the dough trickier to work with.
Options for Substitutions
- Flour: If you don’t have bread flour, all-purpose flour works in a pinch. Just expect a slightly less structured loaf. Spelt flour can be swapped in for some of the whole wheat for a mild, earthy flavor.
- Water: Filtered water is best, especially if your tap water is heavily chlorinated—it can inhibit your starter.
- Salt: Fine sea salt or kosher salt are ideal. Avoid iodized salt, which can interfere with fermentation.
- Sourdough starter: If you’re running low, you can scale down the starter amount and allow a longer bulk fermentation to compensate.
- Dutch oven: If you don’t have one, a baking stone with a steam tray or even a heavy pot with a lid can do the job.
Ingredients for This Sourdough Bread Recipe
- Bread Flour: This high-protein flour is essential for creating a strong dough structure, helping the loaf rise and hold its shape while developing that classic chewy texture.
- Whole Wheat Flour: Adds complexity and richness to the flavor, along with a little more fiber and nutrition. Just a small percentage goes a long way.
- Water: Hydrates the flour and activates the enzymes in the starter. The right hydration helps create an open, airy crumb.
- Sourdough Starter (Active and Bubbly): This is the heart of the recipe. It’s your natural leavening agent, full of wild yeast and friendly bacteria that give sourdough its signature flavor.
- Salt: Balances the flavor and strengthens the gluten network. Without it, your loaf would taste flat and feel overly soft.
That’s it. No commercial yeast. No sugar or additives. Just a few ingredients coming together through time and technique to create something truly special.
Step 1: Feed Your Starter
Make sure your sourdough starter is active and bubbly. Feed it 4–6 hours before you plan to mix your dough. It should pass the “float test” when ready—just drop a small spoonful in water; if it floats, it’s good to go.
Step 2: Mix the Dough
In a large bowl, combine bread flour, whole wheat flour, and water. Stir until no dry flour remains. Let it rest (autolyse) for 30–45 minutes. This gives the flour time to hydrate and develop gluten naturally.
Step 3: Add Starter and Salt
Add your active starter and salt to the dough. Use your hands to pinch and fold the ingredients together until fully incorporated. It’ll feel shaggy and sticky at first—that’s normal.
Step 4: Bulk Fermentation + Stretch and Folds
Let the dough rise in a covered bowl at room temperature for 4–6 hours, performing 3–4 sets of stretch and folds (every 30 minutes during the first 2 hours). This strengthens the dough and encourages an open crumb.
Step 5: Shape the Dough
Turn the dough out onto a lightly floured surface. Let it rest for 20 minutes, then shape it into a round or oval, depending on your baking vessel. Use gentle hands and tension to create a taut surface.
Step 6: Final Proof
Place the shaped dough into a floured proofing basket (or a bowl lined with a floured towel). Cover and refrigerate overnight (12–16 hours) for cold fermentation. This step builds flavor and structure.
Step 7: Bake
Preheat your Dutch oven at 475°F (245°C) for at least 30 minutes. Turn the dough out onto parchment, score the top with a razor or sharp knife, then carefully place it into the hot Dutch oven. Bake covered for 20 minutes, then uncover and bake another 25–30 minutes until deeply golden and crisp.
How Long to Cook the Sourdough Bread
The baking process takes about 45–50 minutes total in a preheated 475°F (245°C) oven. Start with 20 minutes covered (this traps steam, helping the loaf rise), followed by 25–30 minutes uncovered to develop that deep golden, crusty exterior. The bread is done when it sounds hollow when tapped on the bottom, or reaches an internal temperature of 205–210°F (96–99°C).
Tips for Perfect Sourdough Bread
- Use a kitchen scale: Precision is key in sourdough baking. Measuring by weight rather than cups ensures consistency.
- Don’t rush the fermentation: Giving your dough time to rise slowly enhances both structure and flavor.
- Keep your hands damp: When stretching and folding, wet hands prevent sticking without adding extra flour.
- Score with confidence: A clean, deep score allows the loaf to expand properly in the oven and creates a beautiful ear.
- Let it cool completely: As tempting as it is, wait at least an hour before slicing. This helps the crumb set and prevents gumminess.
Watch Out for These Mistakes While Cooking
- Underproofing the dough: This leads to a tight crumb and poor oven spring. Watch for signs like slow rise and tight skin.
- Overproofing: If your dough becomes too relaxed and sticky, it may collapse during baking. It should feel airy but still hold shape.
- Skipping the autolyse: That initial rest without salt or starter is crucial for gluten development and better texture.
- Not preheating your Dutch oven: A screaming-hot pot ensures your loaf gets a quick rise and crispy crust.
- Using too much flour while shaping: It can prevent the surface from sealing properly and lead to floury spots on your crust.
- Cutting too soon: The bread keeps cooking internally after baking. Cutting too early affects texture and flavor.
What to Serve With Sourdough Bread?
Avocado Smash
Creamy avocado, lemon juice, and chili flakes make this the perfect topping for a warm slice.
Soft-Boiled Eggs
Simple and elegant. Let that yolk run into the crumb—it’s a match made in heaven.
Hearty Soups
Tomato basil, French onion, or lentil soup all pair beautifully with sourdough’s chew and tang.
Sharp Cheeses
Think aged cheddar, gouda, or blue cheese—something that complements the sour bite.
Olive Oil & Balsamic Dip
A splash of balsamic in peppery olive oil is a classic way to highlight the crust’s crunch.
Grilled Sandwiches
Use it for paninis or melts—its structure holds up beautifully to heat and fillings.
Butter & Sea Salt
Sometimes, all you need is a slab of good butter and a sprinkle of flaky salt on warm bread.
Fresh Tomato Bruschetta
Diced tomatoes, garlic, basil, and olive oil on a toasted slice? Pure summer perfection.
Storage Instructions
Sourdough bread keeps well for several days thanks to its natural acidity. Here’s how to store it:
- Room temperature: Store your loaf in a paper bag or wrapped in a clean kitchen towel inside a bread box. Avoid plastic, which traps moisture and softens the crust.
- Freezing: Slice the bread, then freeze in a zip-top bag with parchment between slices. Toast or reheat directly from frozen.
- Refresh the crust: If your loaf gets soft, you can revive it by placing it in a 350°F (175°C) oven for about 10 minutes.
Avoid refrigerating sourdough—it tends to dry it out faster than room temp storage.
Estimated Nutrition (Per Slice, Based on 12 Slices)
- Calories: 150
- Carbohydrates: 28g
- Protein: 5g
- Fat: 1g
- Saturated Fat: 0g
- Fiber: 2g
- Sugar: 0g
- Sodium: 290mg
- Cholesterol: 0mg
These numbers can vary depending on your flour ratios and slice thickness, but they’re a good general guide.
Frequently Asked Questions
What kind of starter should I use?
You’ll want a mature, active sourdough starter—ideally one that doubles within 4–6 hours of feeding. It should smell tangy but not foul, and pass the float test.
Can I use whole wheat flour only?
Yes, but expect a denser loaf. Whole wheat absorbs more water and ferments faster, so you may need to adjust hydration and proofing time.
Do I really need a Dutch oven?
It’s highly recommended! The enclosed environment traps steam, mimicking a professional bread oven. If you don’t have one, use a baking stone and cover your loaf with a metal bowl during the first half of baking.
What if I don’t have a banneton?
You can use a bowl lined with a well-floured kitchen towel. Just make sure the towel is thick enough to hold the dough’s shape.
Can I bake the same day I start?
Technically, yes—with a warm environment and more starter. But cold fermentation overnight gives far better flavor and texture.
Why is my crust too thick or too hard?
This might be from overbaking or baking too long uncovered. You can also try reducing oven temp slightly in the final 10 minutes.
My bread didn’t rise much—what went wrong?
Check your starter’s activity level and make sure you gave the dough enough bulk fermentation time. Dough temperature and underproofing are common culprits.
Can I add seeds or herbs to this recipe?
Absolutely! Add-ins like sesame, flax, or rosemary work beautifully. Just mix them in during the second set of stretch and folds.
Conclusion
Baking sourdough bread is as much an experience as it is a recipe. It teaches patience, intuition, and the joy of working with your hands. Whether you’re sharing a slice fresh from the oven or savoring it with your morning coffee, each loaf carries the story of your care and time. Once you find your rhythm, this recipe will become a comforting, dependable favorite. Keep baking, keep experimenting, and most importantly—enjoy every bite.
The Best Sourdough Bread Recipe
- Total Time: 24 hours
- Yield: 1 loaf
- Diet: Vegan
Description
This classic sourdough bread recipe uses just flour, water, salt, and wild yeast to create a crusty, tangy loaf with an open crumb and chewy texture. Perfect for beginners and experienced bakers alike, this method includes all the steps needed for a flavorful, naturally leavened bread you’ll be proud to bake and share.
Ingredients
450g bread flour
50g whole wheat flour
375g water
100g active sourdough starter
10g fine sea salt
Instructions
1. Feed your sourdough starter 4–6 hours before baking and ensure it’s bubbly and passes the float test.
2. In a large bowl, mix the bread flour, whole wheat flour, and water until no dry flour remains. Let rest for 30–45 minutes (autolyse).
3. Add the active starter and salt. Pinch and fold to combine fully.
4. Let dough ferment for 4–6 hours, doing stretch and folds every 30 minutes during the first 2 hours.
5. Turn dough onto a floured surface, rest 20 minutes, then shape into a round or oval.
6. Place dough into a floured banneton or towel-lined bowl. Cover and refrigerate overnight (12–16 hours).
7. Preheat Dutch oven at 475°F (245°C) for 30 minutes. Score dough and bake covered for 20 minutes.
8. Remove lid and bake an additional 25–30 minutes until deep golden brown.
9. Cool on wire rack for at least 1 hour before slicing.
Notes
Prep time: 30 minutes (active)
Cook time: 45–50 minutes
Total time: 24 hours (includes fermentation)
Yield: 1 loaf
Category: Bread
Calories: 150
Carbohydrates: 28g
Protein: 5g
Fat: 1g
Saturated Fat: 0g
Fiber: 2g
Sugar: 0g
Sodium: 290mg
Cholesterol: 0mg
- Prep Time: 30 minutes
- Cook Time: 45–50 minutes
- Category: Bread
- Method: Baking
- Cuisine: Traditional
Nutrition
- Serving Size: 1 slice
- Calories: 150
- Sugar: 0g
- Sodium: 290mg
- Fat: 1g
- Saturated Fat: 0g
- Unsaturated Fat: 0.5g
- Trans Fat: 0g
- Carbohydrates: 28g
- Fiber: 2g
- Protein: 5g
- Cholesterol: 0mg