

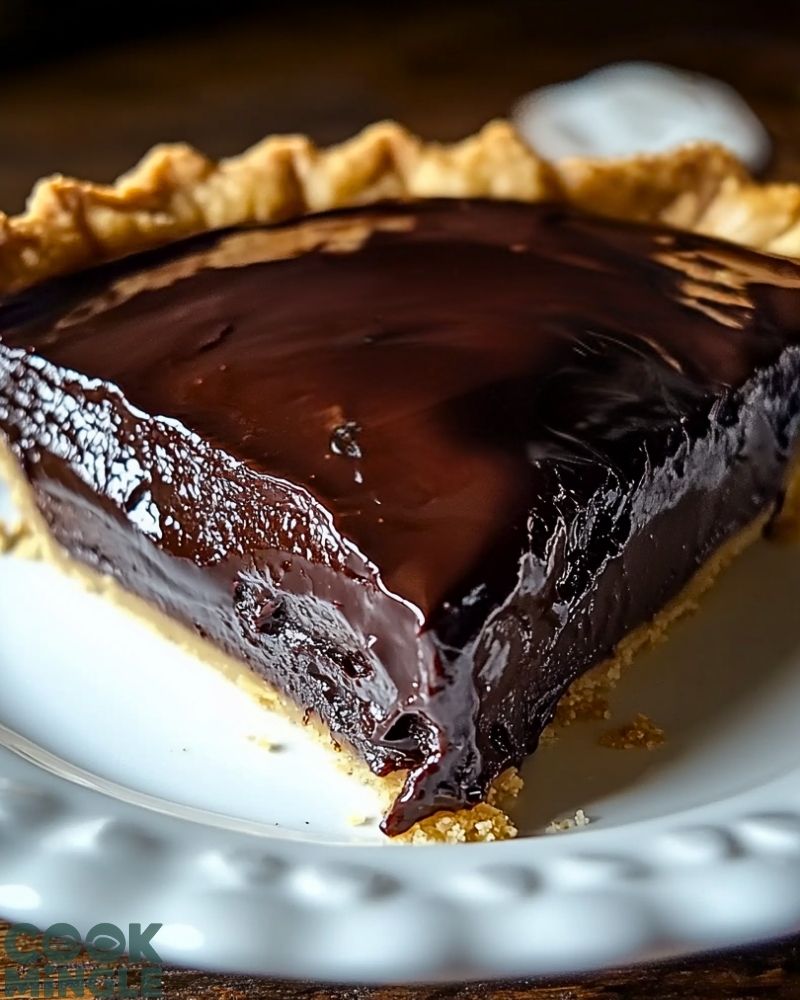
Imagine slicing into a warm, glossy pie with a luscious, velvety chocolate filling that oozes with each cut. That’s the promise of this Hot Fudge Pie—a dessert that manages to be both rich and comforting, decadent and easygoing. With its crisp, flaky crust supporting a molten chocolate center, every bite feels like a spoonful of pure indulgence.
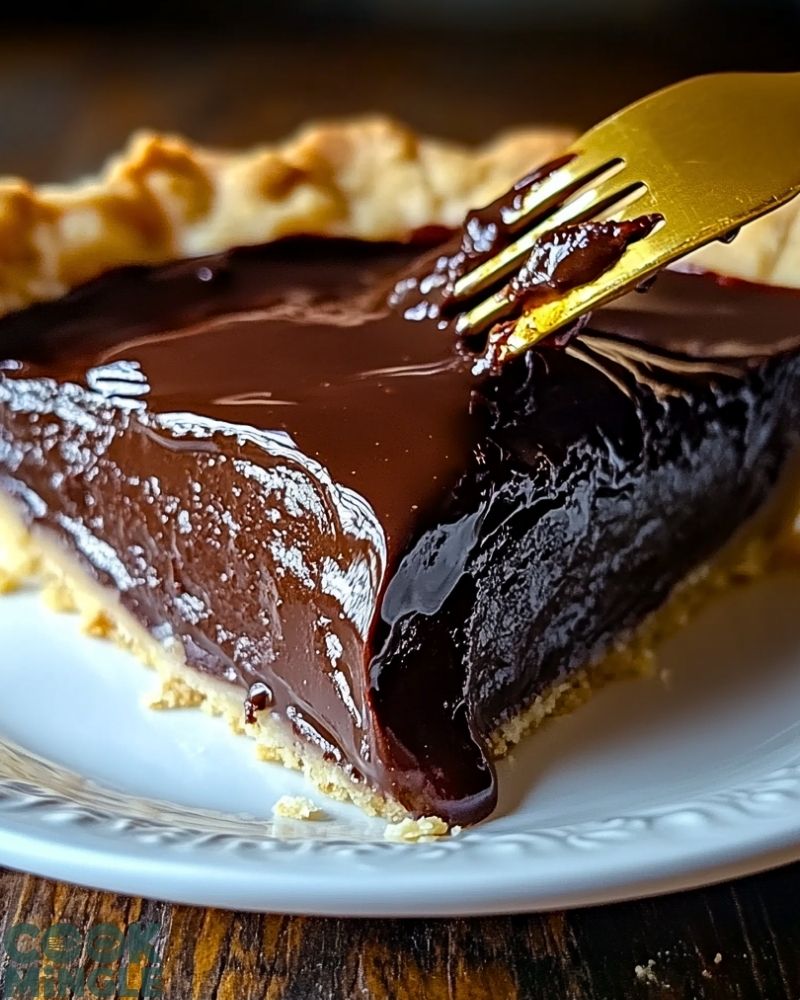
Hot Fudge Pie is one of those timeless, soul-satisfying desserts that evokes warm memories and cozy moments. It’s perfect for family gatherings, weekend treats, or whenever that deep chocolate craving hits. It’s not just a pie; it’s a chocolate experience that lingers delightfully on the tongue.
Why You’ll Love This Hot Fudge Pie
- Decadently Rich Texture: Think molten chocolate meets fudgy brownie—all encased in a buttery crust.
- Minimal Ingredients: No fancy extras, just pantry staples.
- Quick & Simple: Mix, pour, bake. Done.
- Versatile for Occasions: Dress it up with berries and whipped cream or serve it rustic and warm with a scoop of vanilla ice cream.
- Make-Ahead Friendly: Even better the next day after a night in the fridge.
Preparation Phase & Tools to Use (Essential Tools and the Importance of Each)
Before diving into the chocolatey magic of Hot Fudge Pie, take a moment to gather the right tools. This will streamline your process and ensure the pie turns out with that perfect fudgy texture.
- Mixing Bowls (2–3 sizes): One for dry ingredients, another for the wet, and optionally a third for combining. A large mixing bowl is key to keeping things mess-free.
- Whisk or Electric Mixer: Helps achieve a smooth, lump-free batter. A whisk works great for those who prefer a more hands-on approach, while an electric mixer speeds up the process.
- Rubber Spatula: Perfect for scraping down the sides of the bowl to make sure no chocolatey goodness is left behind.
- Measuring Cups & Spoons: Accuracy is crucial—especially with cocoa powder and sugar—to maintain that intense chocolate flavor.
- 9-inch Pie Dish: The classic size that ensures even baking and a satisfying slice-to-filling ratio.
- Oven Thermometer (optional but helpful): Ensures your oven is at the correct temperature, since Hot Fudge Pie depends on precise baking to avoid overcooking the center.
- Cooling Rack: Allows the pie to cool evenly, helping it firm up just enough without losing that gooey middle.
Preparation Tips
- Room Temperature Ingredients: Bring eggs and butter to room temperature before starting. This helps them incorporate more evenly into the batter, resulting in a smoother texture.
- Don’t Overmix: Stir just until combined. Overmixing will develop gluten in the flour, making your pie chewy instead of gooey.
- Pre-bake Crust (if using a homemade one): Blind-baking the crust for 10 minutes keeps it from turning soggy once the fudgy filling is added.
- Grease the Pie Dish Well: Even if you’re using a pre-made crust, grease any exposed areas of the dish to prevent sticking.
- Use High-Quality Cocoa: Since the chocolate flavor is front and center, the quality of your cocoa powder makes a noticeable difference.
Ingredients for This Hot Fudge Pie
Creating the ultimate Hot Fudge Pie doesn’t require a long shopping list—just a handful of simple, familiar ingredients that come together in the most indulgent way.
For the Pie Filling:
- 1 stick (½ cup) unsalted butter, melted
Adds richness and helps achieve that signature fudgy texture. - 1 cup granulated sugar
Sweetens the pie and balances the bitterness of the cocoa. - 2 large eggs
Bind the mixture and provide structure while keeping the filling moist. - ¼ cup unsweetened cocoa powder
The main player for deep chocolate flavor—use a good-quality brand for best results. - ¼ cup all-purpose flour
Just enough to hold the fudge filling together without making it cakey. - 1 teaspoon vanilla extract
Adds depth and enhances the chocolate notes. - Pinch of salt
Balances the sweetness and brings out the cocoa’s intensity.
For the Crust:
- 1 9-inch pie crust (store-bought or homemade)
Acts as a sturdy, flaky base to support the soft filling.
Optional: Whipped cream, ice cream, or berries for serving
Step 1: Prepare Your Pie Crust
If you’re using a homemade crust, roll it out and fit it into a 9-inch pie dish. Crimp or trim the edges as desired. To prevent a soggy bottom, blind bake the crust by covering it with parchment paper and pie weights (or dried beans) and baking at 350°F (175°C) for 10 minutes. Let it cool while you make the filling.
Step 2: Melt the Butter
In a medium saucepan or microwave-safe bowl, melt 1 stick (½ cup) of unsalted butter. Let it cool slightly so it doesn’t scramble the eggs when mixed in later.
Step 3: Mix the Wet Ingredients
In a large mixing bowl, whisk together the melted butter and 1 cup of granulated sugar until combined. Then add 2 large eggs, one at a time, whisking thoroughly after each addition to achieve a smooth consistency.
Step 4: Add Cocoa and Vanilla
Stir in ¼ cup of unsweetened cocoa powder and 1 teaspoon of vanilla extract. Mix until the batter becomes dark, glossy, and evenly colored. This is where the rich chocolate aroma will start to kick in.
Step 5: Incorporate Dry Ingredients
Sift together ¼ cup of all-purpose flour and a pinch of salt. Gradually add this to your wet mixture, folding it in with a rubber spatula. Do not overmix—stop as soon as no dry streaks remain. The batter should be thick and fudgy.
Step 6: Pour and Smooth
Pour the filling into the prepared pie crust. Use a spatula to spread the mixture evenly, making sure it reaches all edges.
Step 7: Bake
Place the pie in a preheated oven at 350°F (175°C) and bake for 30–35 minutes. The center should be set but slightly jiggly—it will firm up more as it cools. A toothpick inserted an inch from the edge should come out with moist crumbs.
Step 8: Cool and Serve
Let the pie cool on a wire rack for at least 15–20 minutes before slicing. For a cleaner cut, cool it completely or refrigerate for an hour. Serve warm or at room temperature with whipped cream or ice cream.
Notes
- Serve It Warm for Full Effect: Hot Fudge Pie shines brightest when slightly warm—this keeps the center gloriously gooey and melty. If you’ve refrigerated it, give slices a quick 15–20 second zap in the microwave before serving.
- Chill for Cleaner Slices: Want picture-perfect slices? Chill the pie in the fridge for at least an hour before cutting. The fudge layer firms up beautifully and cuts smoothly.
- Customizable Add-ins: Want to make it your own? Fold in a handful of chocolate chips, chopped pecans, or even a swirl of peanut butter before baking.
- Go Crustless If You Like: While the pie crust adds a buttery crunch, the filling is rich enough to stand alone. You can bake it in a greased pie plate for a crust-free version.
- Double the Recipe for a Crowd: Make it in a 9×13-inch pan and cut into bars—great for potlucks and parties.
Watch Out for These Mistakes While Cooking
- Overbaking: The number one error! If you bake until the center is fully firm, you’ll lose the gooey texture that makes this pie magical. It should still jiggle slightly in the middle when you take it out.
- Using Cold Eggs or Butter: These can lead to a lumpy batter or improper blending. Always let your eggs and butter come to room temp.
- Overmixing the Batter: Stirring too much can make the texture tough or cakey. Mix only until the ingredients are just combined.
- Skipping the Blind Bake (if using homemade crust): This can result in a soggy, undercooked base. Pre-baking ensures your crust stays flaky and crisp.
- Using Low-Quality Cocoa: Your chocolate flavor is only as good as your cocoa. Invest in a reputable unsweetened brand for the best results.
- Cutting Too Soon: Let the pie rest before slicing. Cutting it straight out of the oven may lead to a runny mess.
What to Serve With Hot Fudge Pie?
Hot Fudge Pie is undeniably the star of any dessert table, but the right pairing can elevate it to a whole new level. Whether you’re aiming for contrast, richness, or just a little extra indulgence, here are some stellar companions.
8 Recommendations
- Vanilla Ice Cream
A scoop of creamy vanilla cuts through the richness of the chocolate and melts into the warm pie—absolutely classic. - Fresh Raspberries or Strawberries
Their tartness complements the deep chocolate flavor and adds a touch of freshness to every bite. - Salted Caramel Sauce
Drizzle over each slice for a sweet-savory kick that blends beautifully with the fudge base. - Espresso or Strong Coffee
A robust cup of coffee pairs naturally with the dense chocolate, making each bite more intense. - Whipped Cream with a Hint of Almond Extract
Light, airy, and just a touch nutty—perfect to balance the heavy richness. - Toasted Nuts (like pecans or hazelnuts)
Sprinkle over the pie or ice cream for added crunch and depth of flavor. - Mint Leaves or Mint Ice Cream
Adds a refreshing counterpoint to the warm, dense texture of the pie. - Red Wine or a Ruby Port
If serving to adults, a glass of red with berry or chocolate notes can add a luxurious, grown-up vibe to the dessert.
Storage Instructions
Hot Fudge Pie stores beautifully and may even taste better the next day as the flavors deepen and the texture firms up.
- Room Temperature: If you plan to eat the pie within 1 day, it can safely sit covered at room temperature.
- Refrigerator: For longer storage (up to 4–5 days), cover the pie tightly with plastic wrap or aluminum foil and store it in the fridge. The center will firm up, but it can be gently reheated for that warm, gooey effect.
- Freezer: Yes, you can freeze Hot Fudge Pie! Wrap slices individually in plastic wrap and then in foil, or use a freezer-safe container. It will keep for up to 2 months. Thaw overnight in the refrigerator and warm in the oven or microwave before serving.
- Reheating Tip: Warm individual slices in the microwave for 15–20 seconds or place the whole pie in a 300°F (150°C) oven for about 10 minutes.
Estimated Nutrition
Estimates per slice, assuming 8 servings per 9-inch pie:
- Calories: ~380
- Total Fat: 21g
- Saturated Fat: 12g
- Cholesterol: 85mg
- Sodium: 100mg
- Total Carbohydrates: 45g
- Dietary Fiber: 2g
- Sugars: 30g
- Protein: 4g
Note: Nutrition values may vary slightly depending on brands and exact ingredient amounts.
Frequently Asked Questions
1. Can I make Hot Fudge Pie ahead of time?
Absolutely. In fact, it often tastes even better the next day. Simply bake it, let it cool, and store it in the fridge. Reheat individual slices before serving for a warm, gooey center.
2. Can I use a store-bought pie crust?
Yes, a store-bought crust works perfectly for this recipe. You can use a pre-rolled refrigerated crust or even a frozen one—just make sure to blind bake if it’s not pre-baked.
3. Is this pie gluten-free?
As written, no—it includes all-purpose flour. However, you can easily substitute with a 1:1 gluten-free flour blend. The fudgy nature of the filling makes it very forgiving.
4. Can I make this pie without a crust?
Yes! It holds up well as a crustless dessert. Simply grease your pie dish thoroughly and bake the filling directly. It becomes more of a molten brownie pie, and it’s just as delicious.
5. Can I double the recipe?
You can double it and bake it in a 9×13-inch pan. The baking time might increase slightly, so start checking around the 35-minute mark and look for that characteristic jiggle in the center.
6. Why is my pie too firm or dry?
It was likely overbaked. The pie should be pulled from the oven while the center still looks a little soft. It will continue to firm up as it cools.
7. Can I freeze Hot Fudge Pie?
Yes, freeze it whole or in slices. Wrap well and store up to 2 months. Thaw in the fridge and reheat before serving for best results.
8. What cocoa powder should I use?
Go for an unsweetened, high-quality cocoa powder. Brands like Ghirardelli, Valrhona, or Hershey’s Special Dark work well. Avoid Dutch-processed unless you adjust the recipe, as it may alter texture and leavening.
Conclusion
Hot Fudge Pie is one of those rare desserts that delivers maximum flavor with minimal effort. Rich, gooey, and unapologetically chocolatey, it’s the kind of recipe you’ll want to keep on repeat—perfect for holidays, gatherings, or that random Tuesday night when you need something comforting and sweet.
With its crisp crust, fudgy center, and endless topping options, this pie isn’t just a treat—it’s a guaranteed crowd-pleaser. Whether you enjoy it warm with a scoop of ice cream or chilled straight from the fridge, every bite promises pure indulgence.

The Ultimate Hot Fudge Pie
- Total Time: 40 minutes
- Yield: 8 slices
Description
Hot Fudge Pie is a rich and gooey chocolate dessert with a soft, molten center and a lightly crisp top. Baked inside a buttery pie crust, it delivers deep cocoa flavor in every bite. It’s simple to make, wildly indulgent, and perfect for serving warm with ice cream or whipped cream.
Ingredients
For the Filling:
- 1 stick (1/2 cup) unsalted butter, melted
- 1 cup granulated sugar
- 2 large eggs
- 1/4 cup unsweetened cocoa powder
- 1/4 cup all-purpose flour
- 1 teaspoon vanilla extract
- Pinch of salt
For the Crust:
- 1 9-inch pie crust (store-bought or homemade)
Instructions
- Preheat oven to 350°F (175°C).
- If using homemade pie crust, blind bake it for 10 minutes, then let cool.
- Melt butter and let it cool slightly.
- In a large bowl, whisk melted butter and sugar together.
- Add eggs one at a time, whisking well after each.
- Stir in cocoa powder and vanilla extract.
- Sift in flour and salt; gently fold into the mixture until just combined.
- Pour filling into prepared pie crust and spread evenly.
- Bake for 30–35 minutes, until edges are set and center is slightly jiggly.
- Cool for at least 15 minutes before slicing. Serve warm or at room temperature.
- Prep Time: 10 minutes
- Cook Time: 30 minutes