
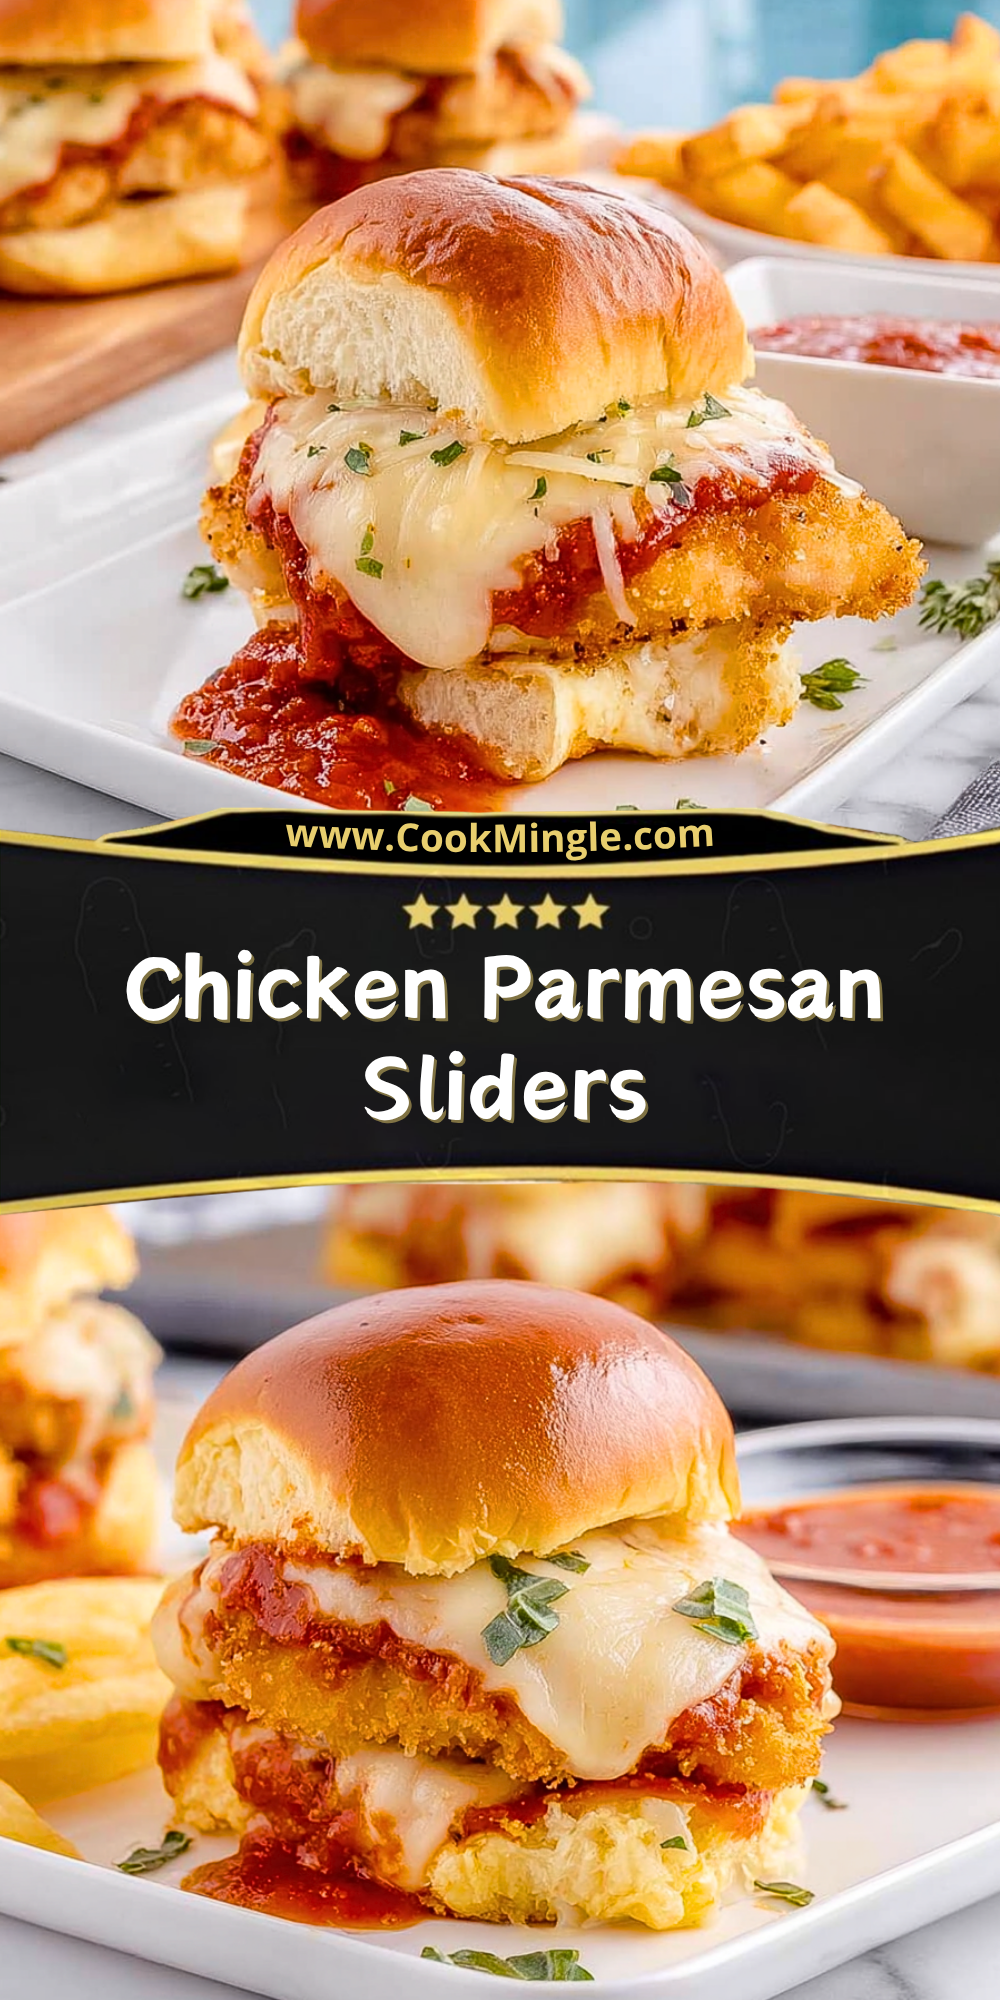
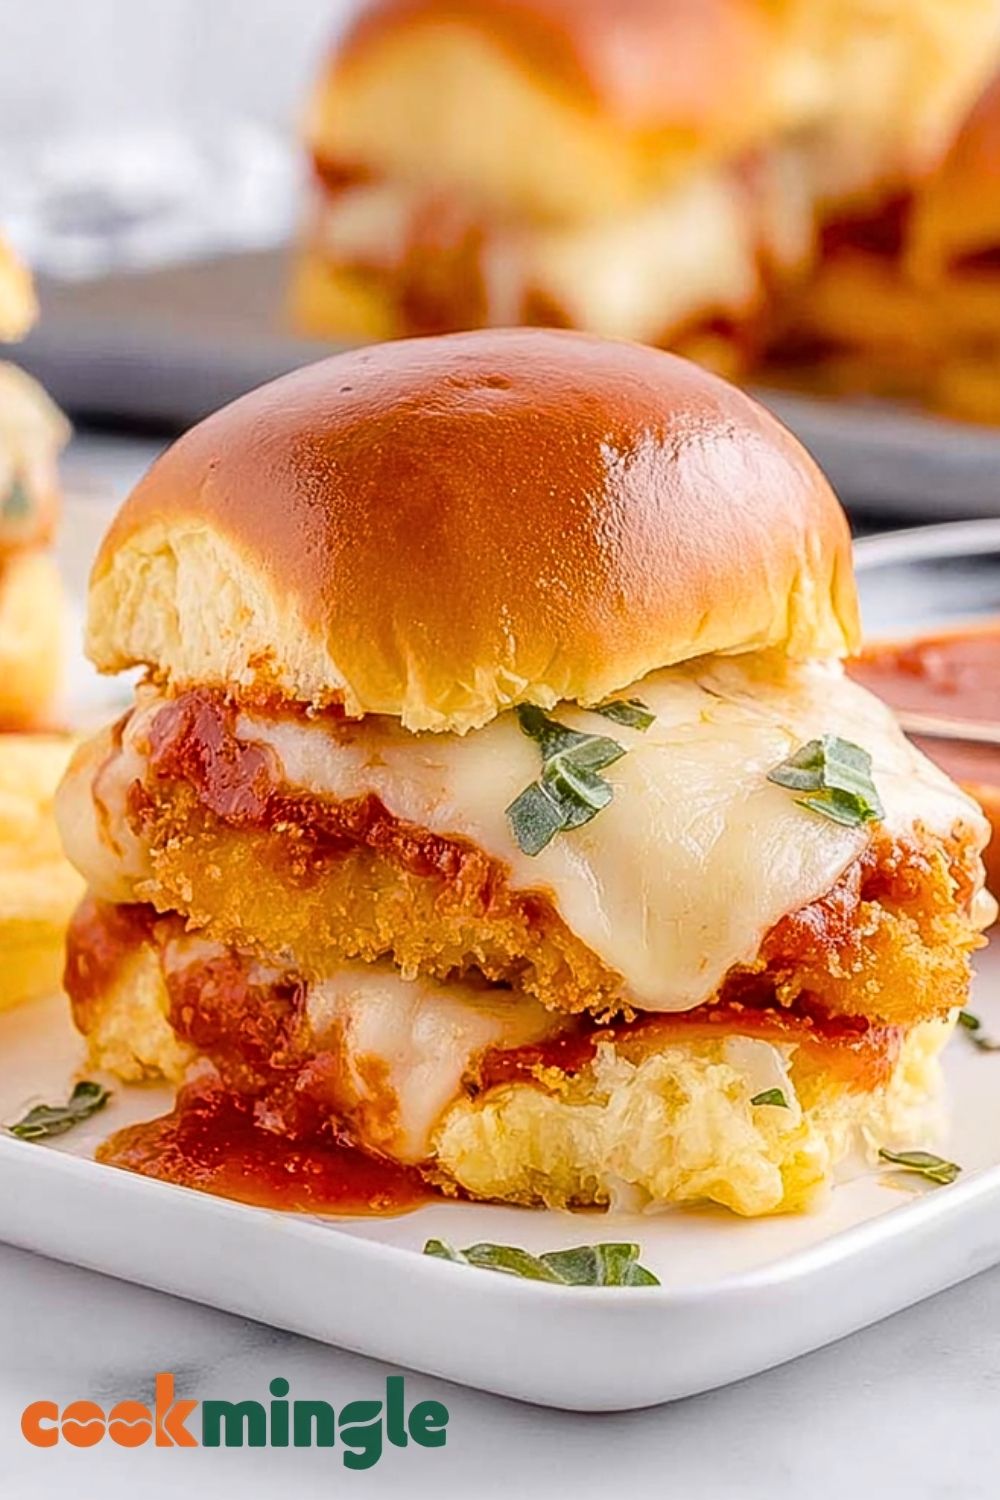
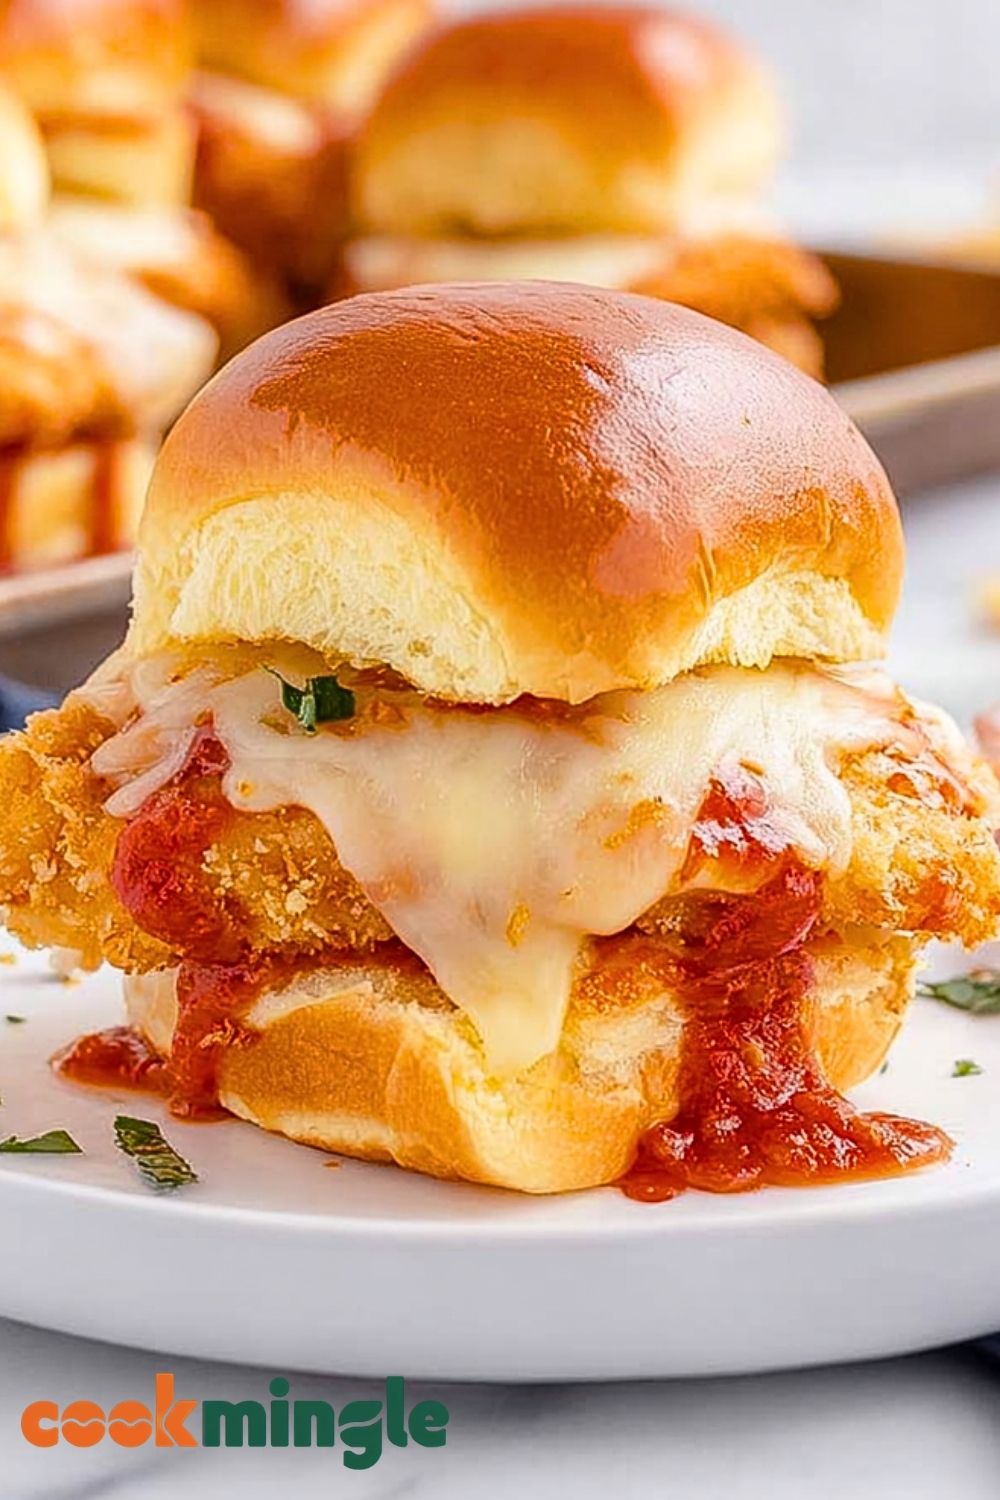
Chicken Parmesan Sliders are the kind of meal that instantly disappears from the table. Crispy breaded chicken layered with rich marinara sauce, gooey melted mozzarella, and buttery toasted slider buns creates the perfect combination of comfort food and party favorite. Every bite delivers crunchy, cheesy, savory goodness that feels like a mash-up of classic chicken parmesan and handheld sliders.
These sliders work beautifully for game days, family dinners, potlucks, or casual weekend gatherings. They’re easy to assemble, simple to bake in batches, and packed with bold Italian-inspired flavor. The soft rolls soak up just enough sauce while still holding everything together, making them irresistibly satisfying and wonderfully messy in the best possible way.
Why You’ll Love This Chicken Parmesan Sliders Recipe
Chicken Parmesan Sliders are quick enough for busy weeknights while still feeling special enough for entertaining guests. The recipe combines crispy chicken tenders, melted cheese, and garlic butter rolls into one easy baked dish that feeds a crowd with minimal effort. Since everything bakes together in one pan, cleanup stays simple and stress-free.
The flavor balance is another reason these sliders stand out. The tangy marinara cuts through the richness of the cheese, while the buttery buns add softness that complements the crunchy chicken coating. You can customize them with extra herbs, spicy sauce, or different cheeses depending on your preference. They also reheat surprisingly well, making leftovers just as delicious the next day.
Preparation Phase & Tools to Use
Preparing Chicken Parmesan Sliders becomes much easier when the right tools are ready before cooking begins. A large baking dish is essential because it keeps the sliders tightly packed together, helping the cheese melt evenly while preventing the buns from drying out. A sharp serrated knife is important for slicing slider buns cleanly without crushing them.
A skillet or air fryer helps achieve crispy chicken texture before assembly, ensuring the breading stays crunchy beneath the sauce and cheese. Using a pastry brush makes it easy to spread garlic butter evenly over the tops of the buns for that golden bakery-style finish. Aluminum foil is also useful during baking because it prevents over-browning while the cheese melts thoroughly.
Essential tools and equipment:
- Large baking dish
- Serrated knife
- Mixing bowls
- Skillet or air fryer
- Pastry brush
- Measuring cups and spoons
- Aluminum foil
- Spatula or tongs
Each tool contributes to better texture, smoother preparation, and more consistent cooking results.
Preparation Tips
For the crispiest Chicken Parmesan Sliders, avoid adding too much marinara sauce directly onto the chicken. Excess sauce can soften the breading too quickly, reducing the crunch. Lightly toasting the bottom buns before assembling also helps prevent sogginess and keeps the sliders sturdy.
Allow frozen chicken tenders to cook fully before layering them into the sliders so they stay crispy during baking. Fresh mozzarella melts beautifully, but low-moisture mozzarella works best if you want less liquid in the pan. Brushing the tops with garlic butter right before baking adds extra flavor and gives the buns a glossy golden finish. Let the sliders rest for a few minutes after baking so the cheese settles slightly and the sliders hold together more easily when served.
Ingredients for Chicken Parmesan Sliders
For the Sliders
- 12 slider buns or Hawaiian rolls
- 6 crispy chicken tenders or 2 large breaded chicken breasts, cooked and sliced
- 1 ½ cups marinara sauce
- 8 slices mozzarella cheese
- ½ cup grated Parmesan cheese
- 2 tablespoons chopped fresh parsley or basil
For the Garlic Butter Topping
- 4 tablespoons unsalted butter, melted
- 2 garlic cloves, minced
- 1 teaspoon Italian seasoning
- 1 tablespoon grated Parmesan cheese
- ½ teaspoon garlic powder
Optional Add-Ons
- Red pepper flakes for heat
- Provolone cheese for extra richness
- Fresh basil leaves
- Pepperoni slices
- Pesto drizzle
Ingredient Notes
Using crispy chicken tenders keeps preparation fast and convenient, but homemade breaded chicken provides even better flavor and texture. Hawaiian rolls create a slightly sweet contrast against the savory marinara and salty Parmesan, though classic slider buns also work well.
Freshly grated Parmesan melts more smoothly and offers stronger flavor than pre-packaged versions. Thick marinara sauce is ideal because watery sauce can make the sliders soggy during baking.
Step 1: Prepare the Oven and Baking Dish
Preheat the oven to 350°F (175°C). Lightly grease a 9×13-inch baking dish or line it with parchment paper for easier cleanup.
Carefully slice the slider buns horizontally without separating each roll individually. Keep the top and bottom halves intact to make assembly easier and help the sliders hold together after baking.
Place the bottom half of the buns into the prepared baking dish.
Step 2: Cook the Chicken
If using frozen chicken tenders, bake or air fry them according to package instructions until fully cooked and crispy. For homemade breaded chicken, cook until golden brown and the internal temperature reaches 165°F (74°C).
Once cooked, slice larger chicken pieces into slider-sized portions. Keeping the chicken evenly sized ensures every slider gets balanced layers and consistent flavor.
Allow the chicken to cool slightly before assembly so excess steam does not soften the buns too quickly.
Step 3: Add the Marinara Sauce
Spread a thin layer of marinara sauce across the bottom buns. This first layer adds flavor while helping anchor the chicken in place.
Avoid overloading the bread with sauce. Too much liquid can make the sliders difficult to hold and reduce the crispiness of the chicken coating.
For extra flavor, sprinkle a small amount of Italian seasoning directly into the sauce layer.
Step 4: Layer the Chicken
Arrange the crispy chicken evenly across the buns. Cover the entire surface so every slider has a generous amount of chicken.
If needed, overlap smaller chicken pieces slightly to avoid empty spots. The chicken forms the heart of the sliders, so even distribution is important for presentation and texture.
Press gently to stabilize the layers without crushing the breading.
Step 5: Add Cheese and Parmesan
Lay mozzarella slices evenly across the chicken layer. Cover as much surface area as possible to create that signature melted cheese pull when serving.
Sprinkle grated Parmesan over the mozzarella for added salty richness and authentic chicken parmesan flavor.
At this stage, optional toppings like basil leaves, pepperoni, or crushed red pepper flakes can also be added.
Step 6: Add More Sauce
Spoon small amounts of marinara sauce over the cheese layer. This second layer of sauce intensifies the flavor while keeping the sliders moist during baking.
Using moderate amounts prevents excessive dripping and keeps the buns from becoming overly soft.
Step 7: Add the Top Buns
Place the top half of the slider buns over the layered filling. Press gently to compact the sliders slightly so they bake evenly.
Make sure the buns align properly with the bottom layer to create clean, uniform sliders when sliced later.
Step 8: Prepare the Garlic Butter Topping
In a small bowl, combine melted butter, minced garlic, Italian seasoning, garlic powder, and Parmesan cheese.
Mix thoroughly until evenly combined. The butter topping enhances both flavor and appearance while helping the buns bake into a glossy golden brown finish.
Step 9: Brush and Bake
Use a pastry brush to coat the tops of the buns generously with the garlic butter mixture.
Cover the baking dish loosely with aluminum foil and bake for 15 minutes. Then remove the foil and continue baking for another 5–8 minutes until the cheese is melted and bubbly and the tops are golden brown.
Keep an eye on the buns during the final minutes to avoid over-browning.
Step 10: Garnish and Serve
Remove the sliders from the oven and let them rest for 3–5 minutes before slicing. Resting allows the cheese to settle slightly, making the sliders easier to serve.
Sprinkle fresh parsley or basil over the top for color and freshness.
Serve warm with:
- Extra marinara sauce
- Caesar salad
- Garlic fries
- Roasted vegetables
- Mozzarella sticks
These sliders are best enjoyed fresh while the chicken remains crispy and the cheese is perfectly melted.
Variations of Chicken Parmesan Sliders
Spicy Chicken Parmesan Sliders
Add hot sauce to the marinara or sprinkle crushed red pepper flakes between layers for a spicy kick.
Alfredo Chicken Sliders
Replace marinara sauce with creamy Alfredo sauce for a richer, creamier version.
Buffalo Chicken Parmesan Sliders
Toss crispy chicken in buffalo sauce before layering with mozzarella and ranch drizzle.
Low-Carb Version
Use lettuce wraps or low-carb slider buns to reduce carbohydrates while keeping the flavors intact.
Deluxe Italian Version
Add sautéed mushrooms, caramelized onions, or roasted red peppers for more complex flavor.
Serving Suggestions
Chicken Parmesan Sliders pair well with both casual party foods and lighter side dishes. Some excellent serving options include:
- Garlic Parmesan fries
- Pasta salad
- Tomato basil soup
- Antipasto skewers
- Caesar salad
- Roasted broccoli
- Crispy zucchini fries
- Italian chopped salad
For gatherings, serving them alongside dipping sauces like ranch, spicy marinara, or garlic aioli creates a fun slider platter experience.
Notes
Chicken Parmesan Sliders are best when served fresh from the oven because the contrast between crispy chicken and melted cheese creates the ultimate texture combination. Using quality marinara sauce makes a noticeable difference in the final flavor, so choose one with rich tomato flavor and balanced seasoning. Fresh herbs added after baking brighten the dish and help balance the richness of the cheese and butter.
These sliders are incredibly versatile and can easily be adjusted for different occasions. For game-day parties, they can be made slightly smaller for easy snacking, while family dinners may call for heartier portions with side dishes. You can also prepare the sliders ahead of time and refrigerate them before baking, making them ideal for entertaining or busy evenings.
If you enjoy extra crunch, lightly toast the buns before assembling. This creates a stronger barrier against the sauce and helps the bread stay firm during baking. For even more flavor, try mixing shredded mozzarella and provolone together for a richer cheese pull and deeper savory taste.
Watch Out for These Mistakes While Cooking
Using Too Much Sauce
Adding excessive marinara can make the buns soggy and overwhelm the crispy texture of the chicken. Use enough sauce for flavor without soaking the bread.
Skipping the Resting Time
Cutting the sliders immediately after baking can cause the cheese and layers to slide apart. Allowing them to rest for a few minutes helps everything set properly.
Overbaking the Sliders
Leaving the sliders in the oven too long can dry out the chicken and harden the bread. Bake only until the cheese is melted and the tops are golden brown.
Not Crisping the Chicken First
Soft or undercooked chicken loses texture once layered with sauce and cheese. Always cook the chicken until crispy before assembling.
Forgetting to Cover During Initial Baking
Baking uncovered from the start may brown the buns too quickly before the cheese fully melts. Cover loosely with foil for the first portion of baking.
Uneven Ingredient Distribution
Stacking too much filling in certain areas can make some sliders difficult to serve. Spread the chicken, cheese, and sauce evenly throughout the pan.
Storage Instructions
Chicken Parmesan Sliders can be refrigerated in an airtight container for up to 3 days. For the best texture, reheat them in the oven or air fryer rather than the microwave. This helps restore the crispiness of the chicken and prevents the buns from becoming too soft.
To reheat in the oven, place the sliders in a baking dish, cover loosely with foil, and warm at 325°F (163°C) for about 10–15 minutes. Remove the foil during the last few minutes for a crispier top.
If freezing, wrap individual sliders tightly in plastic wrap and place them in a freezer-safe container. They can be frozen for up to 2 months. Thaw overnight in the refrigerator before reheating for the best results.
For make-ahead preparation, assemble the sliders without baking, cover tightly, and refrigerate for up to 24 hours before cooking.
Estimated Nutrition
Per Slider (Approximate)
- Calories: 320
- Protein: 18g
- Carbohydrates: 24g
- Fat: 17g
- Saturated Fat: 7g
- Cholesterol: 55mg
- Sodium: 640mg
- Fiber: 1g
- Sugar: 5g
Nutritional values may vary depending on the type of buns, chicken, cheese, and marinara sauce used.
Frequently Asked Questions
Can I make Chicken Parmesan Sliders ahead of time?
Yes, you can fully assemble the sliders several hours in advance and refrigerate them before baking. Add the butter topping just before placing them in the oven.
What type of chicken works best?
Breaded chicken tenders, crispy chicken patties, or homemade breaded chicken breasts all work well. The key is making sure the chicken stays crispy.
Can I use different cheeses?
Absolutely. Mozzarella is traditional, but provolone, fontina, or an Italian cheese blend also taste excellent in these sliders.
How do I keep the sliders from becoming soggy?
Use thick marinara sauce, avoid overloading with sauce, and lightly toast the buns before assembling.
Are Chicken Parmesan Sliders good for parties?
Yes, they are perfect party food because they are easy to serve, simple to prepare in large batches, and crowd-pleasing.
Can I make them spicy?
Yes. Add crushed red pepper flakes, spicy marinara, or hot sauce to create a spicier version.
What side dishes pair well with these sliders?
Caesar salad, garlic fries, roasted vegetables, pasta salad, and mozzarella sticks all pair wonderfully with Chicken Parmesan Sliders.
Can I cook them in an air fryer?
You can air fry the chicken portion, but the assembled sliders are usually easier to bake in the oven for even melting and serving.
Conclusion
Chicken Parmesan Sliders combine everything people love about classic Italian comfort food into one easy, handheld dish. Crispy chicken, rich marinara sauce, melted mozzarella, and buttery toasted buns create layers of flavor and texture that feel both comforting and exciting. They are simple enough for weeknight dinners yet impressive enough for parties and gatherings.
One of the best things about these sliders is their flexibility. You can customize them with different cheeses, sauces, spices, and toppings while still keeping the core flavors that make them irresistible. Whether served for game day, family dinner, or casual entertaining, Chicken Parmesan Sliders always deliver warm, cheesy satisfaction in every bite.
Chicken Parmesan Sliders
- Total Time: 38 minutes
- Yield: 12 sliders
Description
Golden, crispy Chicken Parmesan Sliders loaded with marinara sauce, melted mozzarella cheese, and buttery garlic buns make the ultimate easy dinner, party food, and game day recipe. These baked chicken sliders combine crunchy breaded chicken with rich Italian-inspired flavors in a quick and satisfying meal that everyone loves. Perfect for busy weeknights, family dinners, potlucks, lunch ideas, and easy comfort food cravings, these cheesy sliders deliver restaurant-style flavor with minimal effort.
Ingredients
12 slider buns or Hawaiian rolls
6 crispy chicken tenders
1 1/2 cups marinara sauce
8 slices mozzarella cheese
1/2 cup grated Parmesan cheese
2 tablespoons chopped parsley
4 tablespoons unsalted butter
2 cloves garlic
1 teaspoon Italian seasoning
1 tablespoon grated Parmesan cheese for topping
1/2 teaspoon garlic powder
Instructions
1. Preheat the oven to 350°F and lightly grease a 9×13-inch baking dish.
2. Slice the slider buns in half horizontally while keeping the rolls connected.
3. Place the bottom half of the buns into the baking dish.
4. Spread a thin layer of marinara sauce over the buns.
5. Arrange the crispy chicken tenders evenly across the buns.
6. Layer mozzarella cheese slices over the chicken.
7. Sprinkle grated Parmesan cheese evenly across the sliders.
8. Spoon additional marinara sauce lightly over the cheese layer.
9. Place the top buns over the sliders.
10. In a bowl, combine melted butter, garlic, Italian seasoning, garlic powder, and Parmesan cheese.
11. Brush the garlic butter mixture generously over the tops of the buns.
12. Cover loosely with foil and bake for 15 minutes.
13. Remove the foil and bake for another 5 to 8 minutes until golden brown and the cheese is melted.
14. Garnish with chopped parsley and allow the sliders to rest for a few minutes before serving.
Notes
Lightly toast the buns before assembling to help prevent sogginess.
Avoid using too much marinara sauce to maintain crispy chicken texture.
Let the sliders rest for 3 to 5 minutes after baking for easier serving.
- Prep Time: 15 minutes
- Cook Time: 23 minutes
- Category: Dinner
- Method: Baking
- Cuisine: Italian-American
Nutrition
- Serving Size: 1 slider
- Calories: 320
- Sugar: 5g
- Sodium: 640mg
- Fat: 17g
- Saturated Fat: 7g
- Unsaturated Fat: 8g
- Trans Fat: 0g
- Carbohydrates: 24g
- Fiber: 1g
- Protein: 18g
- Cholesterol: 55mg