
I still remember the first time I made this Christmas Mac and Cheese—it was meant to be a simple side dish, but it completely stole the spotlight. The rich, creamy sauce wrapped around every piece of pasta, while the golden, crispy topping added just the right contrast. It quickly became a holiday tradition in my kitchen, and now I can’t imagine a festive table without it.
What I love most about this dish is how it brings comfort and celebration together in one bite. It’s indulgent without being complicated, and it has that nostalgic warmth that makes everyone gather a little closer around the table. Whether you’re cooking for family or hosting friends, this recipe always delivers something special.
Why You’ll Love This Christmas Mac and Cheese
This dish strikes the perfect balance between creamy and crispy, giving you the best of both textures. It’s easy to prepare ahead of time, which is a lifesaver during busy holiday cooking. The flavors are rich and satisfying, making it a guaranteed crowd-pleaser for both kids and adults.
Another reason I keep coming back to this recipe is its versatility. You can dress it up with gourmet cheeses or keep it simple with pantry staples—it works beautifully either way. Plus, it pairs well with almost any main course on your Christmas menu.
What Makes Christmas Mac and Cheese So Special?
What sets this version apart is the combination of cheeses and the baked finish that creates that irresistible golden crust. It’s not just mac and cheese—it’s elevated into something worthy of a holiday celebration.
The layering of flavors, from the creamy base to the slightly toasted topping, makes every bite more interesting than the last. It feels comforting yet festive at the same time.
Options for Substitutions
If you don’t have elbow macaroni on hand, you can easily swap it for shells, cavatappi, or penne. Each shape holds the sauce a little differently, but they all work wonderfully.
For the cheese, feel free to experiment. Cheddar is classic, but adding mozzarella, Gruyère, or even a bit of Parmesan can deepen the flavor. If you prefer a lighter version, you can use milk alternatives and reduce the amount of butter without losing too much creaminess.
And if you’re looking to add a twist, consider mixing in cooked bacon, sautéed mushrooms, or even a hint of garlic for extra depth. This recipe adapts easily to your taste and what you have in your kitchen.
Ingredients for this Christmas Mac and Cheese
Elbow Macaroni
This is the classic base of the dish. Its curved shape holds onto the creamy cheese sauce perfectly, ensuring every bite is rich and satisfying.
Unsalted Butter
Butter forms the foundation of the sauce, adding richness and helping create the roux that thickens everything beautifully.
All-Purpose Flour
Flour is essential for building the roux, which gives the cheese sauce its smooth, velvety texture without becoming too runny.
Whole Milk
Milk provides the creamy body of the sauce. Using whole milk gives the best richness, but it can be adjusted depending on your preference.
Heavy Cream
This elevates the dish to a holiday level by making the sauce extra luxurious and silky.
Sharp Cheddar Cheese
The backbone of flavor. Sharp cheddar brings that classic tangy, cheesy taste that defines mac and cheese.
Mozzarella Cheese
Adds stretch and meltability, giving the dish that irresistible gooey texture.
Gruyère Cheese
This cheese adds a slightly nutty and sophisticated flavor, perfect for a festive upgrade.
Parmesan Cheese
Used both in the sauce and topping, Parmesan adds a salty, umami depth and helps create a golden crust.
Salt
Enhances all the flavors and balances the richness of the cheese.
Black Pepper
Adds a subtle heat and depth to the creamy sauce.
Garlic Powder
Provides a gentle aromatic flavor without overpowering the dish.
Paprika
Adds a hint of warmth and color, making the dish more visually appealing.
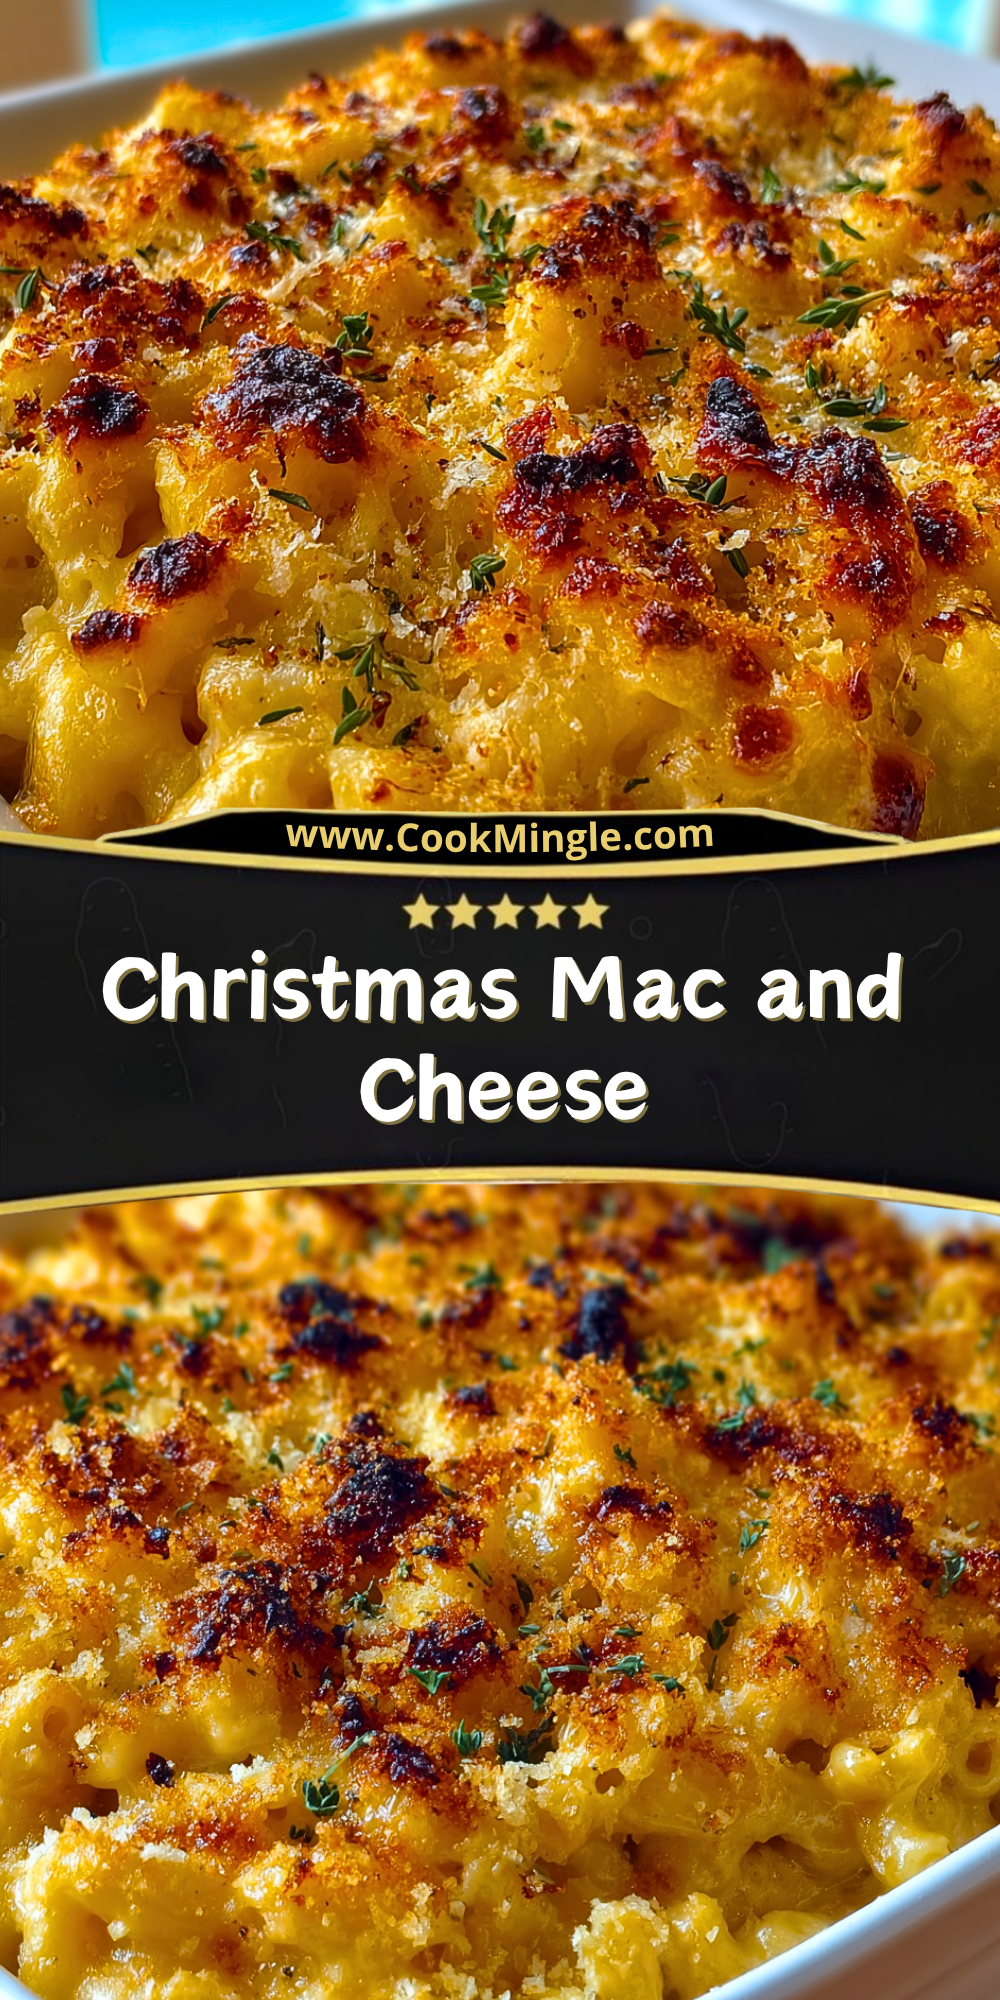
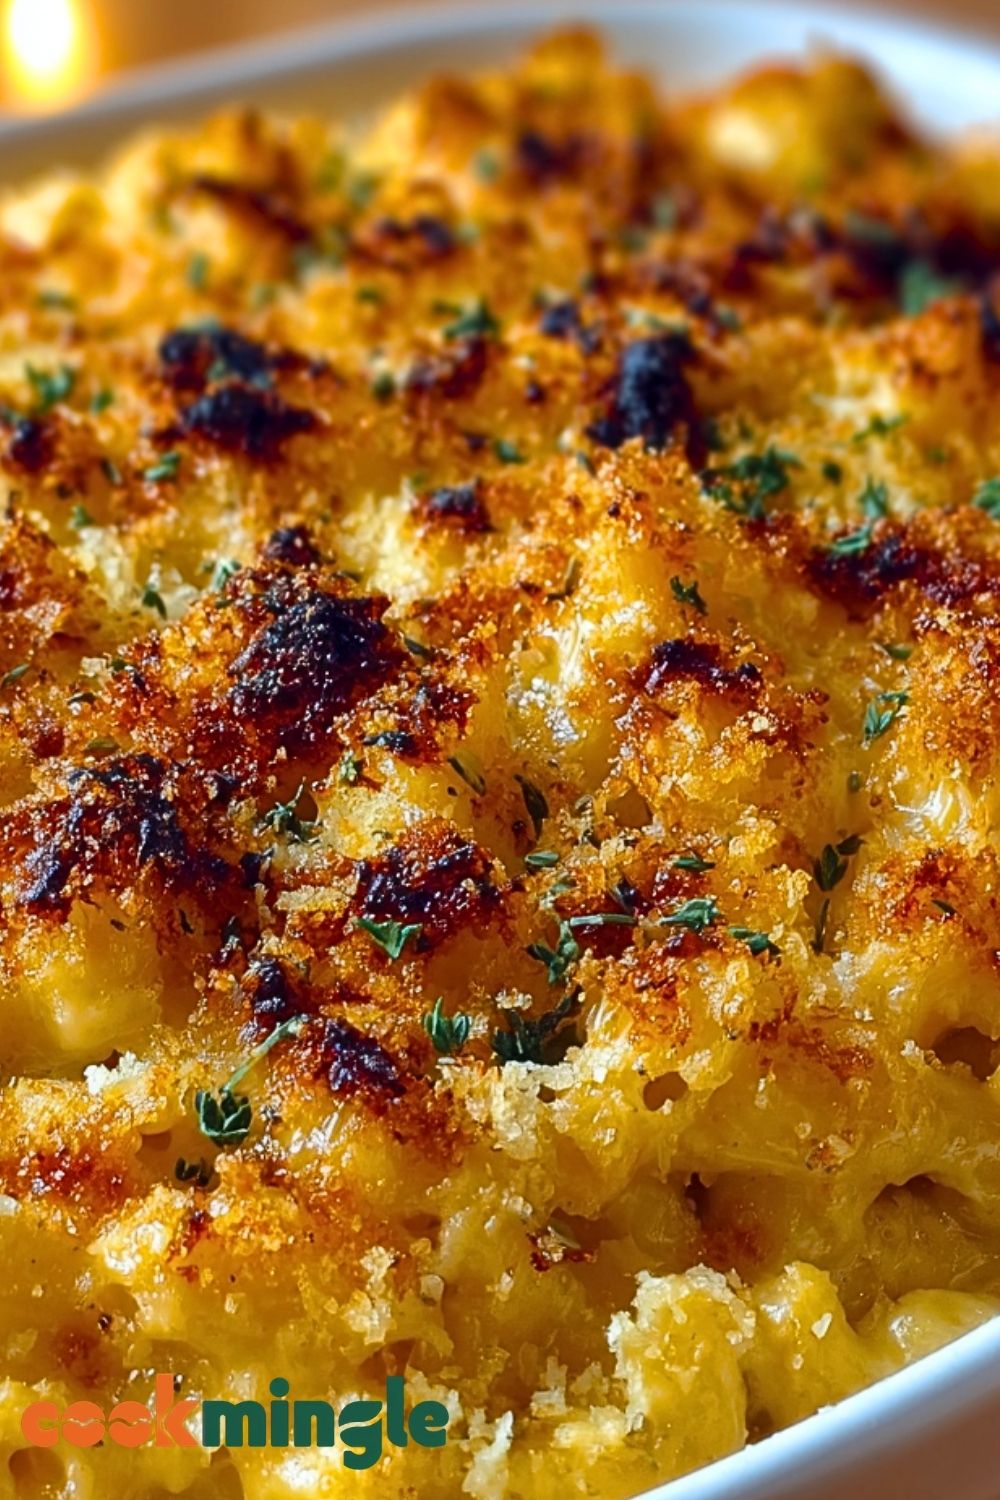
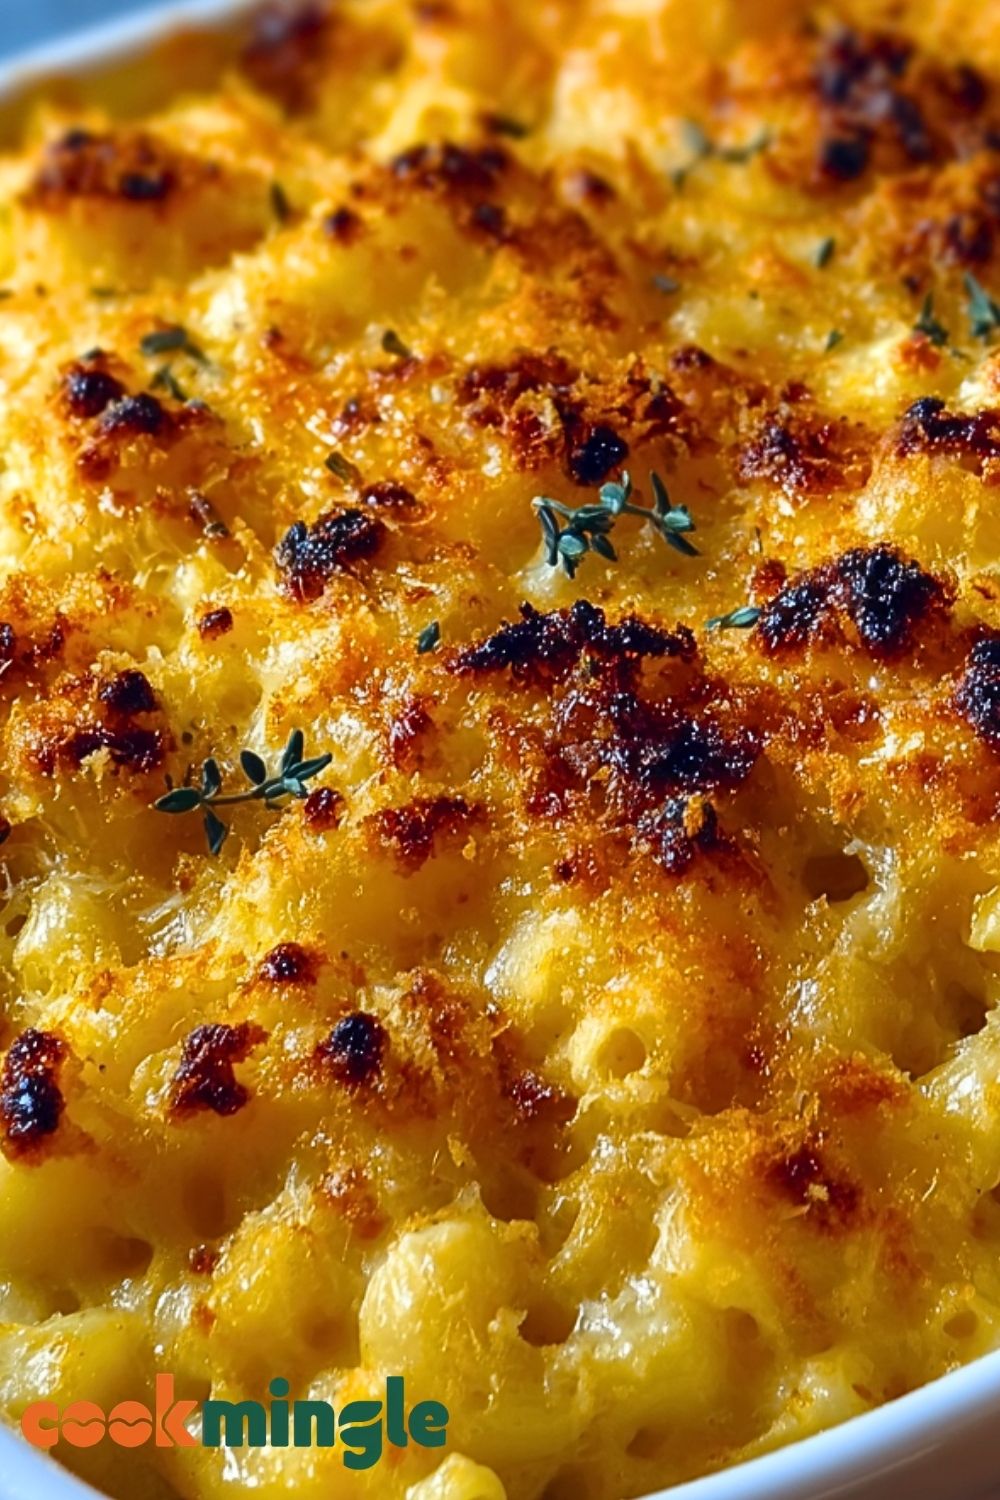
Breadcrumbs
Essential for the crispy topping, giving contrast to the creamy interior.
Fresh Parsley
Used as a garnish, it adds a pop of color and a light, fresh note to balance the richness.
Step 1: Cook the Pasta
Bring a large pot of salted water to a rolling boil. Add the elbow macaroni and cook until just al dente according to package instructions. Be careful not to overcook, as the pasta will continue to cook in the oven later.
Drain the pasta and set it aside. You can lightly toss it with a bit of butter to prevent sticking while you prepare the sauce.
Step 2: Prepare the Roux
In a large saucepan, melt the butter over medium heat. Once melted, whisk in the flour continuously to form a smooth paste.
Cook this mixture for about 1–2 minutes until it turns slightly golden and loses its raw flour taste. This step is crucial for a smooth, lump-free sauce.
Step 3: Build the Creamy Sauce
Gradually pour in the milk while whisking constantly to avoid lumps. Follow with the heavy cream and continue stirring until the mixture thickens.
Let it simmer gently for a few minutes until it reaches a creamy consistency that coats the back of a spoon.
Step 4: Add the Cheese
Reduce the heat to low and begin adding the cheeses one at a time. Start with cheddar, then mozzarella, followed by Gruyère and Parmesan.
Stir continuously until all the cheese is fully melted and the sauce becomes smooth and rich.
Step 5: Season the Sauce
Add salt, black pepper, garlic powder, and paprika. Taste and adjust seasoning as needed to suit your preference.
This step is where the flavor really comes together, so take a moment to get it just right.
Step 6: Combine Pasta and Sauce
Add the cooked macaroni to the cheese sauce and gently fold until every piece is evenly coated.
Make sure the sauce reaches into all the pasta shapes for consistent flavor throughout.
Step 7: Assemble for Baking
Preheat your oven to 375°F (190°C). Transfer the mac and cheese mixture into a greased baking dish.
Spread it evenly to ensure uniform cooking and a consistent texture.
Step 8: Add the Topping
In a small bowl, mix breadcrumbs with a bit of melted butter and Parmesan cheese. Sprinkle this mixture evenly over the top.
This layer will become golden and crispy, adding the perfect contrast to the creamy base.
Step 9: Bake to Perfection
Place the dish in the preheated oven and bake for 20–25 minutes, or until the top is golden brown and bubbling.
If you prefer an extra crispy topping, you can broil it for an additional 2–3 minutes at the end.
Step 10: Garnish and Serve
Remove from the oven and let it rest for a few minutes before serving. Sprinkle fresh parsley on top for color and freshness.
Serve warm and enjoy this rich, comforting Christmas Mac and Cheese with your favorite holiday dishes.
How Long to Prepare the Christmas Mac and Cheese
Preparing this dish is surprisingly manageable, even during the busy holiday season. The prep time typically takes about 20–25 minutes, which includes boiling the pasta, shredding cheese, and preparing the sauce. If you pre-measure your ingredients or use pre-shredded cheese, you can cut this time down even further.
Cooking and baking take an additional 25–30 minutes. The baking stage is where everything comes together—the sauce thickens, the flavors deepen, and that irresistible golden crust forms on top. Altogether, you’re looking at under an hour from start to finish, making it a very practical yet impressive holiday dish.
Tips for Perfect Christmas Mac and Cheese
Use freshly grated cheese whenever possible for smoother melting and better flavor. Pre-shredded cheese often contains anti-caking agents that can affect texture.
Cook the pasta just until al dente to prevent it from becoming mushy after baking. Slightly firm pasta holds up much better in the oven.
Warm your milk before adding it to the roux. This helps create a smoother sauce and reduces the chance of lumps.
Don’t rush the cheese melting process—add it gradually over low heat for the creamiest results.
Watch Out for These Mistakes While Cooking
Avoid overheating the cheese sauce, as high heat can cause it to become grainy or separate.
Skipping the roux step may lead to a thin and watery sauce that doesn’t cling well to the pasta.
Using too little seasoning can make the dish taste flat despite all the cheese, so always taste and adjust.
Overbaking can dry out the dish, so keep an eye on it once it turns golden on top.
What to Serve With Christmas Mac and Cheese?
Roasted Turkey
The classic holiday centerpiece pairs beautifully with the creamy richness of mac and cheese.
Honey-Glazed Ham
The sweet and savory flavors complement the cheesy, comforting base.
Garlic Green Beans
A fresh, slightly crisp vegetable side helps balance the richness of the dish.
Cranberry Sauce
Its tangy brightness cuts through the creamy texture and adds a festive touch.
Mixed Green Salad
A light salad with vinaigrette offers contrast and keeps the meal from feeling too heavy.
Storage Instructions
If you have leftovers, allow the mac and cheese to cool completely before storing. Transfer it to an airtight container and refrigerate for up to 3–4 days. The flavors often deepen overnight, making it just as delicious the next day.
For reheating, add a splash of milk before warming it in the oven or microwave to restore creaminess. Covering it while reheating helps prevent it from drying out.
This dish can also be frozen for longer storage. Wrap it tightly and freeze for up to 2 months. When ready to enjoy, thaw in the refrigerator overnight and reheat until warmed through.
Estimated Nutrition
Per serving (approximate values):
- Calories: 450–550
- Protein: 18–22g
- Carbohydrates: 40–50g
- Fat: 25–30g
- Saturated Fat: 15–18g
- Sodium: 600–800mg
These values may vary depending on the specific cheeses and quantities used.
Frequently Asked Questions
Can I make Christmas Mac and Cheese ahead of time?
Yes, you can assemble it a day in advance and store it in the refrigerator. Bake it just before serving for the best texture and flavor.
Can I freeze this dish after baking?
Absolutely. Let it cool completely, then freeze in portions. Reheat with a bit of milk to bring back its creamy consistency.
What’s the best cheese combination?
A mix of sharp cheddar, mozzarella, and Gruyère gives a perfect balance of flavor and texture.
How do I keep the sauce from becoming grainy?
Use low heat when melting cheese and avoid overcooking. Gradual melting is key.
Can I make it gluten-free?
Yes, simply use gluten-free pasta and substitute the flour with a gluten-free alternative for the roux.
Conclusion
Christmas Mac and Cheese is more than just a side dish—it’s a comforting, crowd-pleasing favorite that brings warmth and indulgence to any holiday table. With its creamy interior and crispy topping, it offers a perfect balance of textures and flavors.
Whether you’re making it for a festive gathering or a cozy family dinner, this recipe is reliable, adaptable, and always satisfying. Once you try it, it might just become a tradition in your own kitchen.
Christmas Mac and Cheese
- Total Time: 50 minutes
- Yield: 6 servings
- Diet: Vegetarian
Description
This Christmas Mac and Cheese is the ultimate comfort food that turns any holiday meal into something unforgettable. Creamy, cheesy pasta baked to golden perfection with a crispy topping makes this dish a standout among easy dinner ideas and festive food ideas. Whether you’re looking for a cozy family meal, a crowd-pleasing side, or a rich and satisfying holiday classic, this easy recipe delivers bold flavor, smooth texture, and irresistible appeal every time.
Ingredients
2 cups elbow macaroni
4 tbsp unsalted butter
1/4 cup all-purpose flour
3 cups whole milk
1 cup heavy cream
2 cups sharp cheddar cheese shredded
1 cup mozzarella cheese shredded
1 cup Gruyère cheese shredded
1/2 cup Parmesan cheese grated
1 tsp salt
1/2 tsp black pepper
1 tsp garlic powder
1/2 tsp paprika
1 cup breadcrumbs
2 tbsp butter melted
2 tbsp fresh parsley chopped
Instructions
1. Bring a large pot of salted water to a boil and cook the macaroni until al dente, then drain and set aside.
2. In a saucepan, melt butter over medium heat and whisk in flour to form a smooth roux, cooking for 1–2 minutes.
3. Gradually whisk in warm milk and heavy cream, stirring constantly until the mixture thickens.
4. Reduce heat and add cheddar, mozzarella, Gruyère, and Parmesan cheese, stirring until fully melted and smooth.
5. Season the sauce with salt, pepper, garlic powder, and paprika, adjusting to taste.
6. Combine the cooked pasta with the cheese sauce, mixing until evenly coated.
7. Preheat oven to 375°F (190°C) and transfer the mixture into a greased baking dish.
8. Mix breadcrumbs with melted butter and sprinkle evenly over the top.
9. Bake for 20–25 minutes until golden and bubbling, then broil briefly for extra crispiness if desired.
10. Remove from oven, garnish with parsley, and let rest slightly before serving.
Notes
Use freshly grated cheese for smoother melting and better flavor.
Do not overcook the pasta before baking to avoid a mushy texture.
Add a splash of milk when reheating to restore creaminess.
- Prep Time: 25 minutes
- Cook Time: 25 minutes
- Category: Dinner
- Method: Baking
- Cuisine: American
Nutrition
- Serving Size: 1 serving
- Calories: 500
- Sugar: 6g
- Sodium: 700mg
- Fat: 28g
- Saturated Fat: 16g
- Unsaturated Fat: 10g
- Trans Fat: 0.5g
- Carbohydrates: 45g
- Fiber: 2g
- Protein: 20g
- Cholesterol: 80mg