
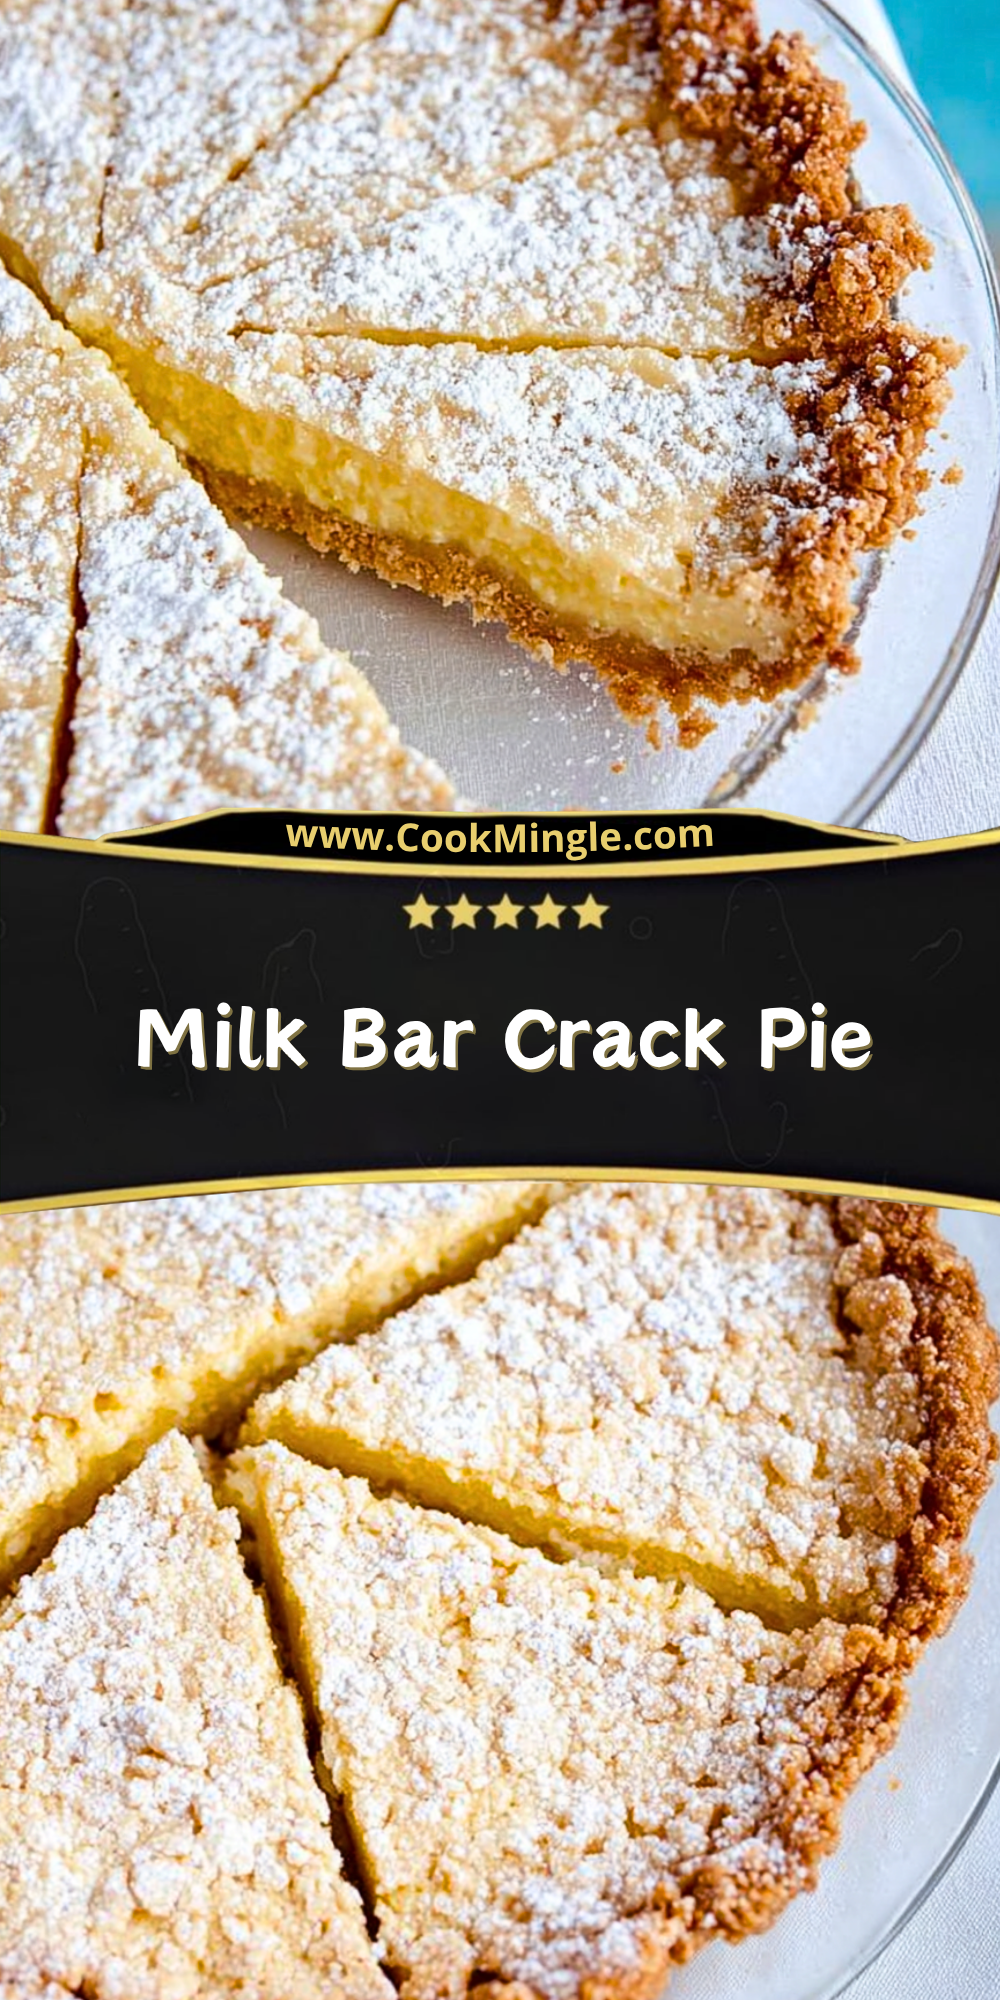
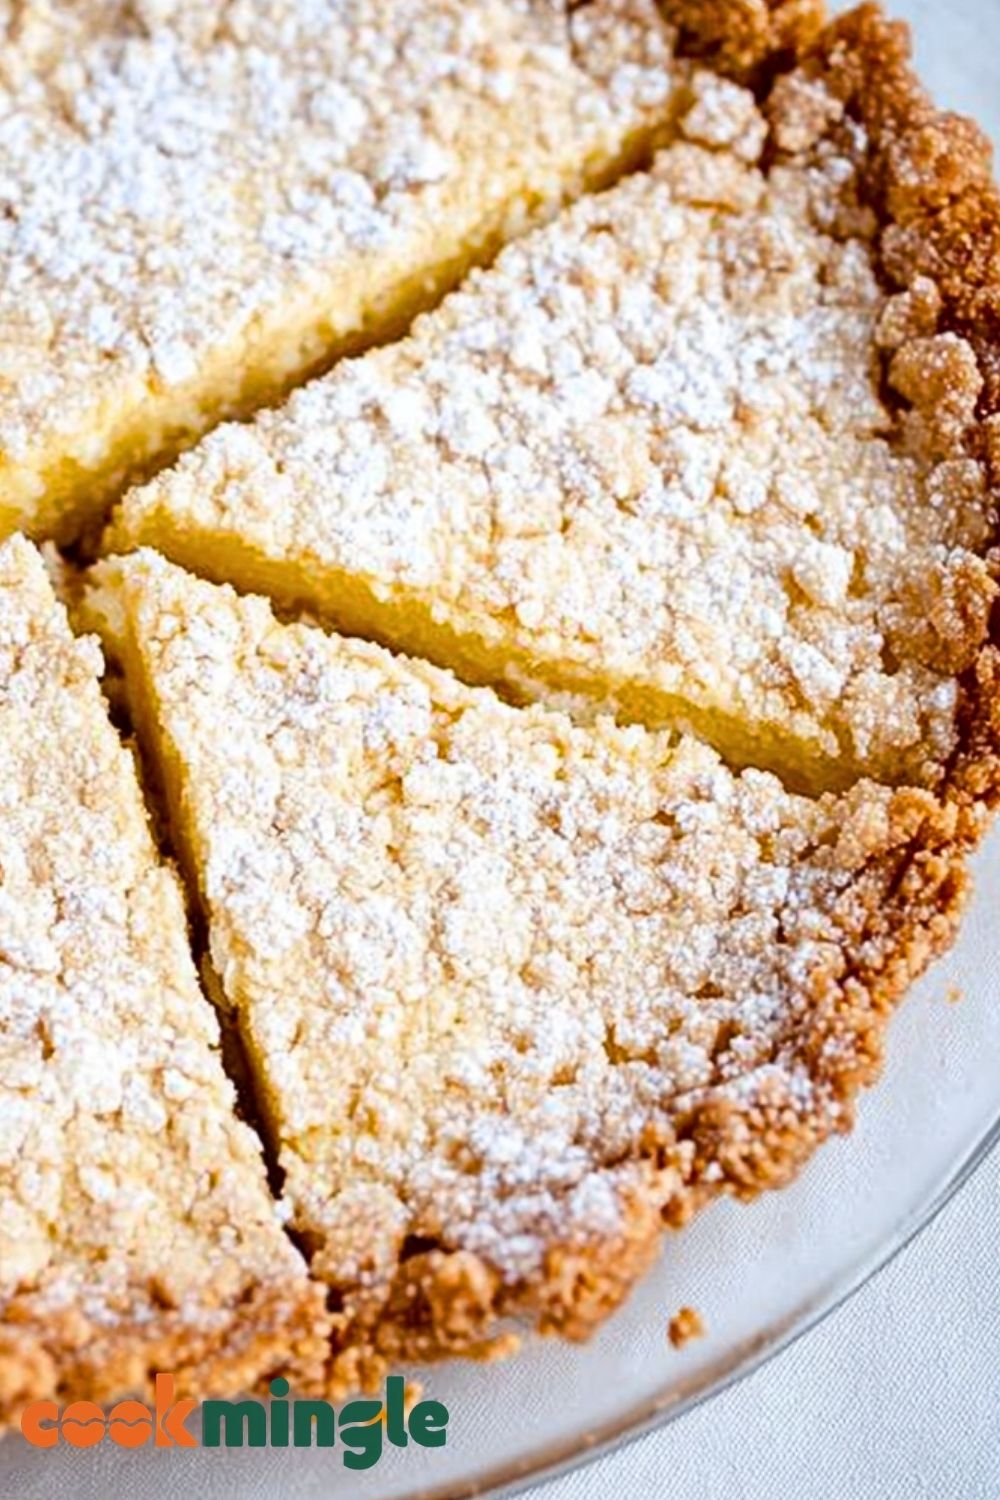
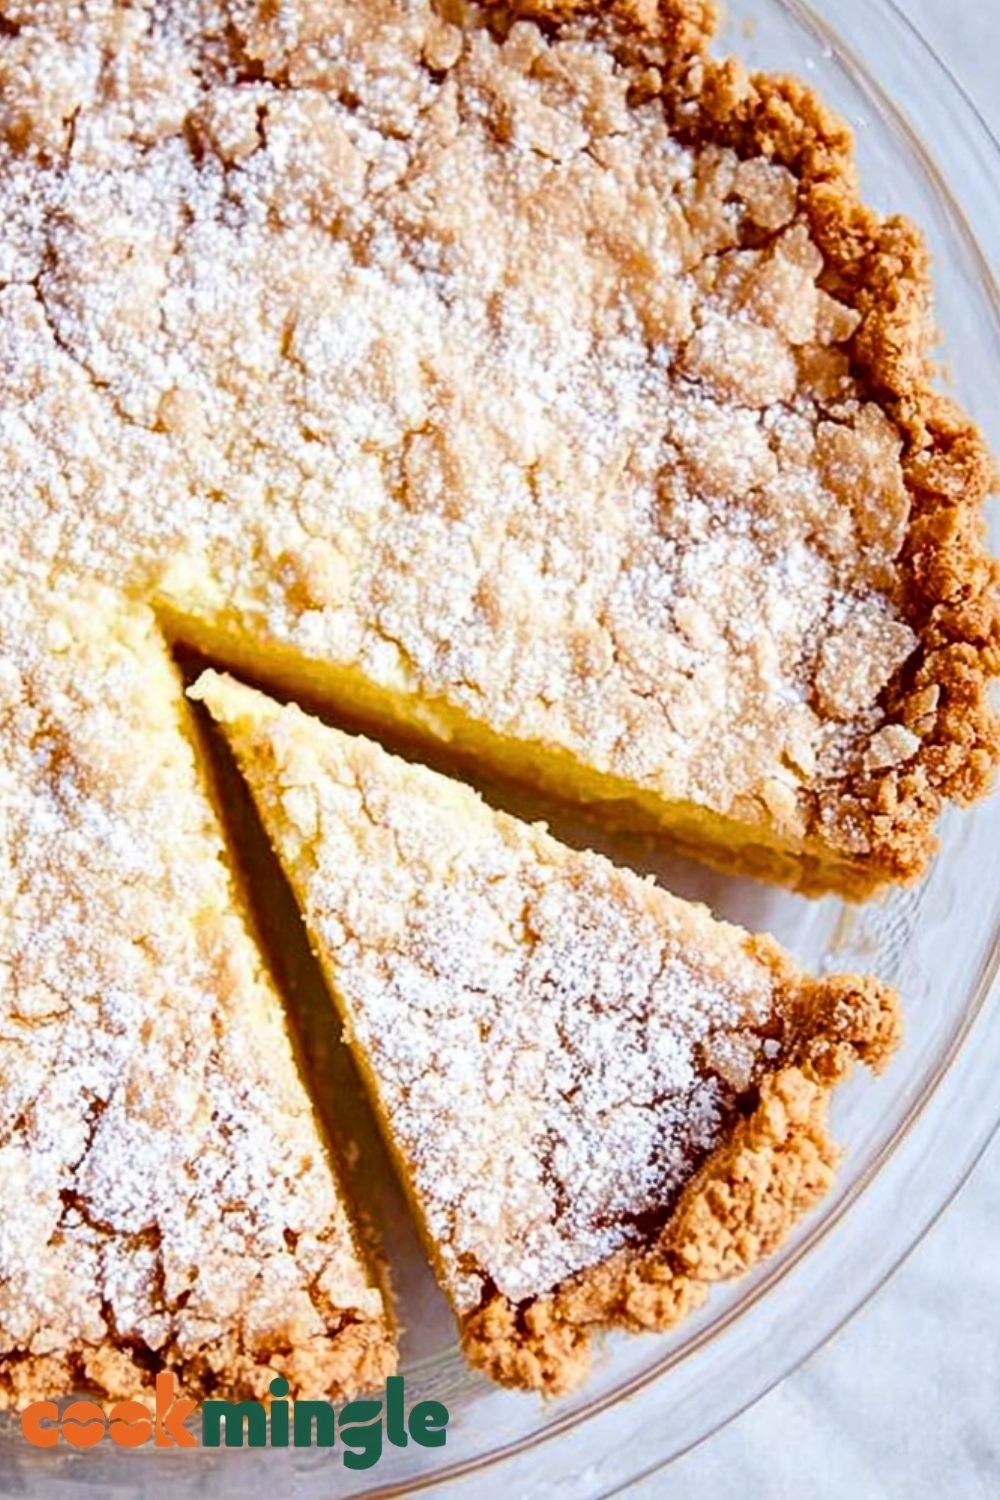
Milk Bar Crack Pie is the kind of dessert that instantly grabs attention with its rich, buttery filling and irresistibly crunchy oat cookie crust. Every bite melts into a silky caramel-like texture balanced by just the right amount of sweetness, making it one of those desserts people talk about long after the last slice is gone. Finished with a light dusting of powdered sugar, this pie delivers bakery-style indulgence with surprisingly simple ingredients.
What makes Milk Bar Crack Pie truly unforgettable is the contrast of textures and flavors. The crisp, toasted crust adds depth and crunch, while the creamy filling creates a smooth custard center that feels luxurious without being overly complicated. Whether you’re serving it for a holiday gathering, weekend dessert, or special celebration, this pie always feels impressive and comforting at the same time.
Why You’ll Love This Milk Bar Crack Pie
This Milk Bar Crack Pie stands out because it combines familiar pantry ingredients into a dessert that tastes completely unique. The sweet and salty balance keeps every bite satisfying, while the buttery oat crust gives the pie a homemade bakery-quality flavor. It’s rich enough for special occasions yet simple enough to prepare whenever you’re craving something decadent.
Another reason this pie has become so popular is its versatility. It works beautifully as a make-ahead dessert since the filling sets perfectly after chilling. The recipe also doesn’t require complicated decorating skills, making it approachable for beginner bakers while still impressive enough for experienced dessert lovers.
Preparation Phase & Tools to Use
Preparing Milk Bar Crack Pie successfully starts with having the right kitchen tools ready before baking. A standard 9-inch pie dish is essential because it allows the filling to bake evenly while supporting the thick oat cookie crust. Mixing bowls in multiple sizes help separate crust and filling preparation, keeping the process organized and efficient.
A food processor can make crushing the oat cookie mixture easier and quicker, helping create the perfect crumb texture for the crust. If you don’t have one, a rolling pin and zip-top bag work just as well. A stand mixer or hand mixer is important for blending the filling until smooth and creamy without overworking the ingredients.
Measuring cups and spoons are especially important for this dessert because the balance of butter, sugar, cream, and milk creates the signature texture. Using accurate measurements helps the pie bake evenly and prevents the filling from becoming too runny or too dense. Finally, parchment paper and a cooling rack make the finishing process easier by helping the crust cool properly before slicing.
Preparation Tips
For the best Milk Bar Crack Pie, allow all refrigerated ingredients to come to room temperature before mixing the filling. This helps create a smooth custard texture without lumps. When preparing the oat cookie crust, press it firmly into the pie dish so it holds together after baking and slicing. Avoid overbaking the filling; the center should still have a slight jiggle when removed from the oven because it will continue to set as it cools. Chilling the pie thoroughly before serving is another important step, as it develops the signature dense and creamy consistency that makes this dessert so memorable. A final dusting of powdered sugar right before serving adds the perfect bakery-style finish.
Ingredients for This Milk Bar Crack Pie
For the Oat Cookie Crust
- 2/3 cup all-purpose flour
- 1/8 teaspoon baking powder
- 1/8 teaspoon baking soda
- 1/4 teaspoon salt
- 1/2 cup unsalted butter, softened
- 1/3 cup light brown sugar, packed
- 3 tablespoons granulated sugar
- 1 egg yolk
- 1/2 cup rolled oats
For the Crust Assembly
- Prepared oat cookie crumbs
- 3 tablespoons unsalted butter, melted
- 1 tablespoon brown sugar
- Pinch of salt
For the Crack Pie Filling
- 1 1/2 cups granulated sugar
- 3/4 cup light brown sugar
- 1 tablespoon nonfat dry milk powder
- 1/4 cup corn powder (finely ground freeze-dried corn)
- 1 teaspoon salt
- 1/2 cup unsalted butter, melted
- 3/4 cup heavy cream
- 1/2 teaspoon vanilla extract
- 8 egg yolks
For Garnishing
- Powdered sugar for dusting
Step 1: Prepare the Oat Cookie Base
Preheat the oven to 350°F (175°C). Line a baking tray with parchment paper to prevent sticking and ensure even baking. In a medium mixing bowl, whisk together the flour, baking powder, baking soda, and salt until fully combined.
In a separate large bowl, cream the softened butter, brown sugar, and granulated sugar using a hand mixer or stand mixer until the mixture becomes light and fluffy. This process helps incorporate air into the dough, creating a better texture for the crust.
Add the egg yolk and mix until smooth. Gradually add the dry ingredients into the butter mixture, stirring just until combined. Fold in the rolled oats and mix gently to avoid overworking the dough.
Spread the dough evenly onto the prepared baking tray and bake for 15 to 18 minutes or until golden brown around the edges. The cookie should look slightly crisp but still soft in the center. Allow it to cool completely before breaking it into crumbs.
Step 2: Make the Oat Cookie Crust
Transfer the cooled oat cookies into a food processor and pulse until medium-fine crumbs form. If you prefer a rustic texture, leave a few larger crumbs for added crunch.
Place the crumbs into a bowl and stir in melted butter, brown sugar, and a pinch of salt. Mix until the crumbs resemble wet sand and can hold together when pressed between your fingers.
Press the crumb mixture firmly into a 9-inch pie dish, making sure the bottom and sides are evenly coated. Use the back of a measuring cup to compact the crust tightly so it holds its shape after baking.
Bake the crust for 5 minutes to help it set, then remove from the oven and allow it to cool slightly while preparing the filling.
Step 3: Prepare the Crack Pie Filling
Reduce the oven temperature to 325°F (163°C). In a large bowl, whisk together the granulated sugar, brown sugar, dry milk powder, corn powder, and salt until evenly combined.
Slowly pour in the melted butter while whisking continuously to create a smooth mixture. Add the heavy cream and vanilla extract, stirring until fully incorporated.
Add the egg yolks one at a time, whisking gently after each addition. Avoid vigorous mixing at this stage because too much air can create bubbles and affect the pie’s smooth texture.
Continue mixing until the filling becomes glossy and silky with no streaks remaining.
Step 4: Fill the Pie Shell
Pour the prepared filling into the partially baked oat cookie crust. Tap the pie dish lightly against the counter to release any trapped air bubbles and help the filling settle evenly.
The filling should reach close to the top of the crust without overflowing. If needed, smooth the surface gently using a spatula.
Step 5: Bake the Milk Bar Crack Pie
Place the pie on the center rack of the oven and bake for 30 minutes at 325°F (163°C). The filling will begin to puff slightly around the edges while the center remains soft.
After 30 minutes, reduce the oven temperature to 300°F (149°C) and continue baking for another 15 to 20 minutes. This lower temperature helps the custard finish cooking slowly without curdling.
The pie is ready when the edges appear set but the center still jiggles slightly when gently shaken. Avoid overbaking, as the filling will continue to firm up while cooling.
Step 6: Cool and Chill the Pie
Remove the pie from the oven and place it on a cooling rack for about 1 hour. Allowing the pie to cool gradually helps prevent cracks from forming on the surface.
Once cooled to room temperature, transfer the pie to the refrigerator and chill for at least 4 hours, preferably overnight. Chilling is essential because it gives the filling its signature dense, creamy texture.
Step 7: Slice and Serve
Before serving, dust the top generously with powdered sugar for the classic Milk Bar Crack Pie appearance.
Use a sharp knife dipped in warm water to cut clean slices. Serve chilled or slightly cold for the best texture and flavor.
This pie pairs beautifully with coffee, espresso, or lightly sweetened whipped cream. The sweet and salty caramel notes become even more pronounced after resting overnight, making leftovers just as delicious as the first slice.
Notes
Milk Bar Crack Pie is known for its rich texture and deep caramelized sweetness, but a few small details can make a major difference in the final result. Using high-quality butter creates a richer flavor throughout both the crust and filling. The oat cookie crust should be firmly packed to prevent crumbling when sliced, and allowing the pie enough chilling time is one of the most important steps in the entire process.
The filling may appear slightly underbaked when removed from the oven, but this is completely normal. As the pie cools and chills, the custard thickens into its signature dense and silky consistency. If you prefer a more balanced sweetness, serving the pie with unsweetened whipped cream or fresh berries can provide a refreshing contrast.
This dessert also develops deeper flavor after resting overnight in the refrigerator. Many bakers find the pie tastes even better the next day because the buttery caramel notes become more pronounced. For clean slices, always use a sharp knife wiped clean between cuts.
Watch Out for These Mistakes While Cooking
Overmixing the Filling
Whisking the filling too aggressively can incorporate excess air, leading to bubbles or cracks during baking. Mix gently and only until the ingredients are fully combined.
Overbaking the Pie
One of the most common mistakes is baking until the center looks fully firm. The pie should still jiggle slightly in the middle when removed from the oven because it continues setting while cooling.
Skipping the Chilling Time
Trying to slice the pie too early can result in a runny filling. Chilling for several hours allows the custard to fully stabilize and develop the correct texture.
Loose Crust Packing
If the oat cookie crust is not pressed firmly into the pie dish, it may crumble apart when slicing. Compacting the crust properly ensures clean and stable slices.
Incorrect Oven Temperature
An oven that runs too hot can overcook the edges before the center sets. Using an oven thermometer helps maintain consistent baking temperatures.
Using Cold Ingredients
Cold dairy or eggs can prevent the filling from blending smoothly. Room-temperature ingredients create a more even and creamy custard.
Not Letting the Pie Cool Gradually
Moving the pie directly from the oven to the refrigerator can create condensation and affect texture. Let the pie cool at room temperature before chilling.
Storage Instructions
Milk Bar Crack Pie stores exceptionally well, making it a convenient make-ahead dessert for holidays, gatherings, or busy weekends. Once fully chilled, cover the pie tightly with plastic wrap or transfer slices to an airtight container to maintain freshness.
The pie can be refrigerated for up to 5 days without losing its creamy texture. For the best flavor and consistency, serve it slightly chilled straight from the refrigerator.
If you want to store it longer, the pie freezes beautifully. Wrap the entire pie or individual slices tightly in plastic wrap followed by aluminum foil to prevent freezer burn. Freeze for up to 1 month. When ready to serve, thaw overnight in the refrigerator before dusting with fresh powdered sugar.
Avoid storing the pie uncovered, as the custard can absorb refrigerator odors and dry out over time.
Estimated Nutrition
Per Slice (Based on 8 Servings)
- Calories: 540
- Total Fat: 29g
- Saturated Fat: 17g
- Cholesterol: 180mg
- Sodium: 290mg
- Carbohydrates: 63g
- Fiber: 1g
- Sugars: 48g
- Protein: 6g
Nutritional values may vary depending on ingredient brands, portion sizes, and preparation methods.
Frequently Asked Questions
Can I make Milk Bar Crack Pie ahead of time?
Yes, this pie is actually ideal for making ahead. Chilling overnight improves both the texture and flavor, making it even more delicious the next day.
Why is the center of my pie still jiggly?
A slight jiggle is expected when the pie comes out of the oven. The filling continues to set as it cools and chills in the refrigerator.
Can I freeze Milk Bar Crack Pie?
Absolutely. Wrap it tightly and freeze for up to one month. Thaw overnight in the refrigerator before serving.
What can I use instead of corn powder?
Finely crushed freeze-dried corn works best, but some bakers substitute finely crushed cornflakes in smaller amounts for a similar flavor.
How do I get clean pie slices?
Use a sharp knife dipped in warm water and wipe the blade clean between cuts for smooth and neat slices.
Can I use a store-bought crust?
Yes, although the homemade oat cookie crust gives the pie its signature flavor and texture. A graham cracker crust can work as a substitute.
Why is it called Crack Pie?
The dessert became famous because of its highly addictive sweet and salty flavor combination. Many people now refer to it simply as Milk Bar Pie.
Can I reduce the sweetness?
You can slightly reduce the sugar, but doing so too much may alter the texture and consistency of the custard filling.
Conclusion
Milk Bar Crack Pie has earned its legendary reputation thanks to its rich caramelized filling, buttery oat cookie crust, and unforgettable sweet-and-salty balance. Despite its bakery-quality appearance and flavor, the recipe is surprisingly approachable for home bakers willing to follow a few key techniques.
From the crisp crust to the silky custard center, every element works together to create a dessert that feels both comforting and luxurious. Whether served for holidays, celebrations, dinner parties, or simple weekend cravings, this pie consistently delivers impressive results.
Once chilled and dusted with powdered sugar, Milk Bar Crack Pie becomes the kind of dessert people request again and again. Its make-ahead convenience, freezer-friendly storage, and crowd-pleasing flavor make it a recipe worth keeping in your dessert collection for years to come.
Milk Bar Crack Pie
- Total Time: 5 hours 25 minutes
- Yield: 8 servings
- Diet: Vegetarian
Description
Milk Bar Crack Pie is a rich and buttery dessert with a gooey caramel-like filling baked inside a crunchy oat cookie crust. This famous bakery-style pie delivers the perfect sweet and salty balance, making it one of the best easy dessert ideas for holidays, dinner parties, and weekend baking. With its creamy custard center and crisp golden crust, this easy recipe feels indulgent while still being simple enough for home bakers to master. Whether you are searching for unique dessert ideas, bakery-inspired treats, or crowd-pleasing food ideas, Milk Bar Crack Pie is guaranteed to impress. The silky filling develops deep caramel flavors as it bakes, while the oat crust adds irresistible texture in every bite. Served chilled with powdered sugar on top, this pie becomes a memorable dessert for every occasion.
Ingredients
2/3 cup all-purpose flour
1/8 teaspoon baking powder
1/8 teaspoon baking soda
1/4 teaspoon salt
1/2 cup unsalted butter, softened
1/3 cup light brown sugar
3 tablespoons granulated sugar
1 egg yolk
1/2 cup rolled oats
3 cups oat cookie crumbs
3 tablespoons unsalted butter, melted
1 tablespoon brown sugar
1 pinch salt
1 1/2 cups granulated sugar
3/4 cup light brown sugar
1 tablespoon nonfat dry milk powder
1/4 cup corn powder
1 teaspoon salt
1/2 cup unsalted butter, melted
3/4 cup heavy cream
1/2 teaspoon vanilla extract
8 egg yolks
2 tablespoons powdered sugar
Instructions
1. Preheat the oven to 350°F (175°C) and line a baking tray with parchment paper.
2. Whisk together flour, baking powder, baking soda, and salt in a bowl.
3. Cream the butter, brown sugar, and granulated sugar until light and fluffy.
4. Add the egg yolk and mix until smooth.
5. Stir the dry ingredients into the butter mixture and fold in the oats.
6. Spread the dough onto the baking tray and bake for 15 to 18 minutes until golden brown.
7. Cool the cookie completely before crushing into crumbs.
8. Reduce the oven temperature to 325°F (163°C).
9. Mix the oat cookie crumbs with melted butter, brown sugar, and salt.
10. Press the crust mixture firmly into a 9-inch pie dish.
11. Bake the crust for 5 minutes and cool slightly.
12. Whisk together granulated sugar, brown sugar, dry milk powder, corn powder, and salt.
13. Slowly whisk in melted butter until smooth.
14. Add heavy cream and vanilla extract.
15. Whisk in egg yolks one at a time until combined.
16. Pour the filling into the prepared crust.
17. Bake for 30 minutes at 325°F (163°C).
18. Reduce oven temperature to 300°F (149°C) and bake another 15 to 20 minutes.
19. Cool the pie for 1 hour at room temperature.
20. Refrigerate for at least 4 hours or overnight.
21. Dust with powdered sugar before serving.
Notes
Use room-temperature ingredients for the smoothest filling texture and even baking results.
Do not overbake the pie because the center continues setting while cooling and chilling.
For clean slices, chill the pie overnight and wipe the knife clean between each cut.
- Prep Time: 30 minutes
- Cook Time: 55 minutes
- Category: Dessert
- Method: Baking
- Cuisine: American
Nutrition
- Serving Size: 1 slice
- Calories: 540
- Sugar: 48g
- Sodium: 290mg
- Fat: 29g
- Saturated Fat: 17g
- Unsaturated Fat: 10g
- Trans Fat: 0.5g
- Carbohydrates: 63g
- Fiber: 1g
- Protein: 6g
- Cholesterol: 180mg