
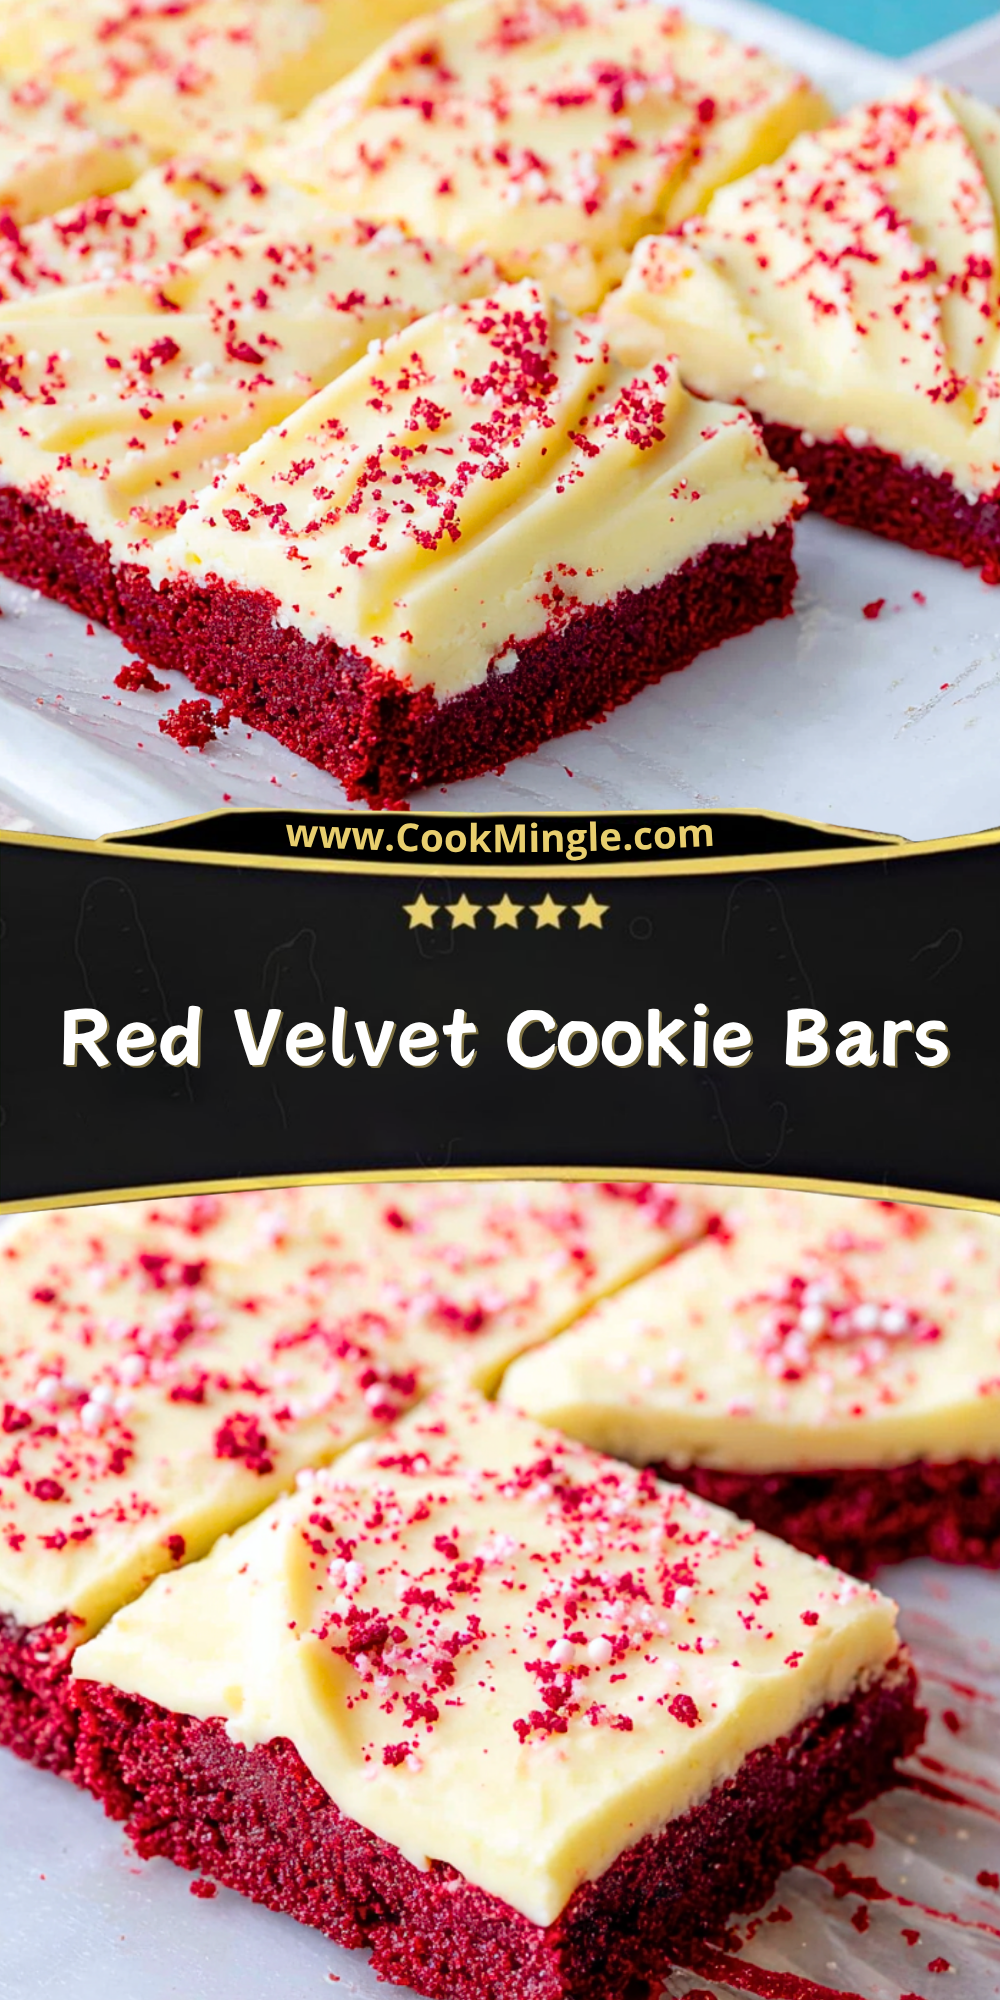
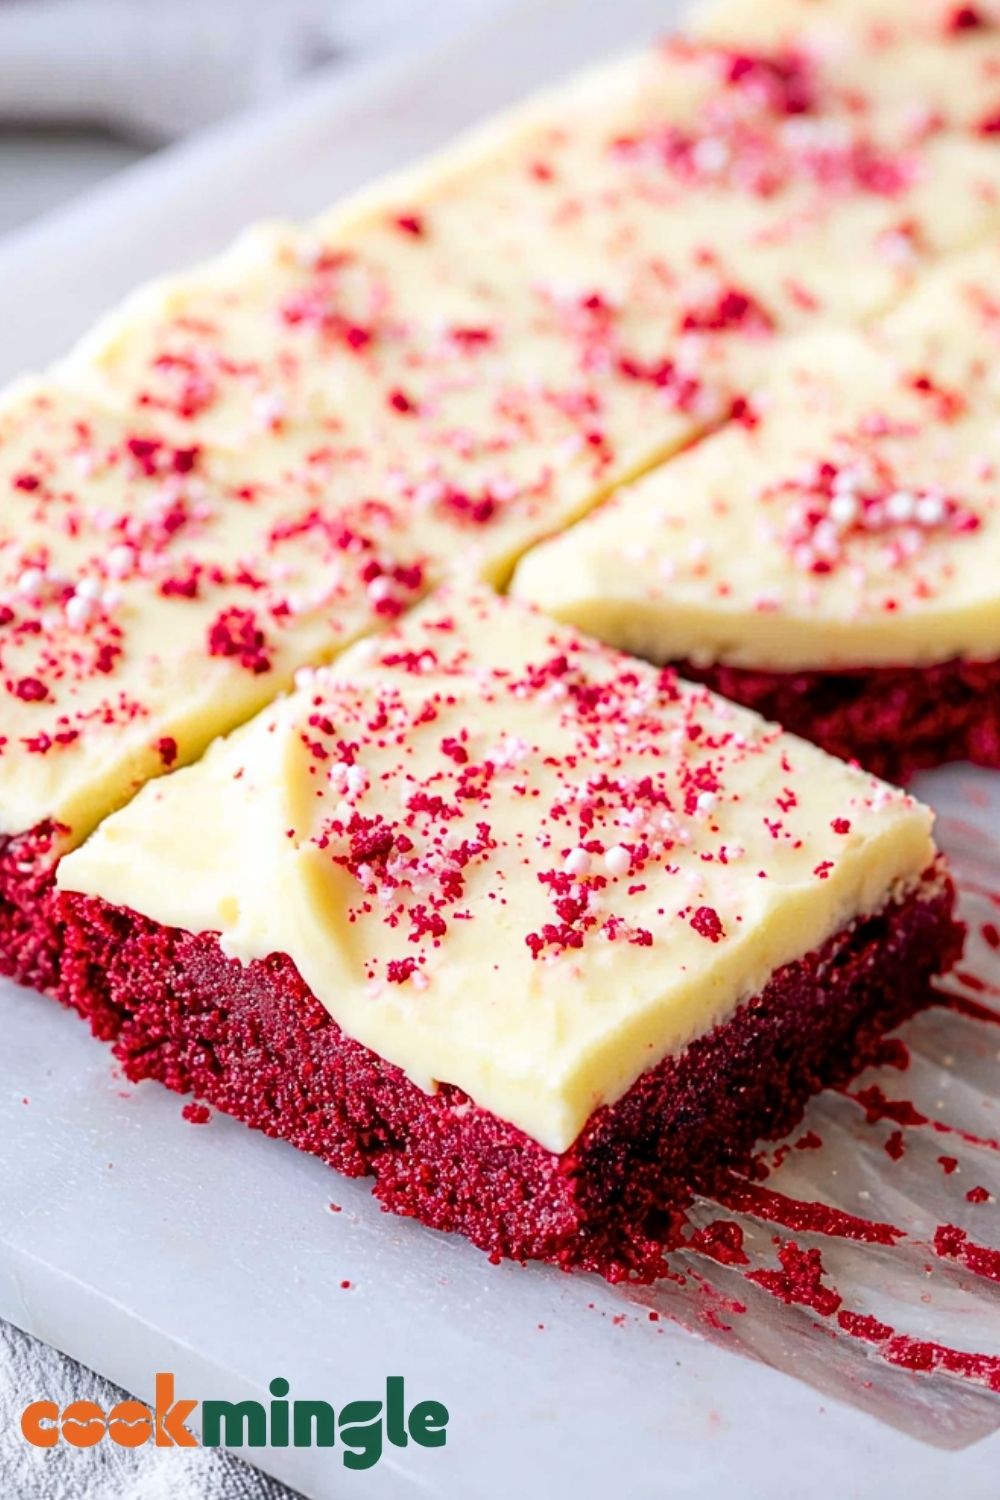
Red Velvet Cookie Bars bring together the rich cocoa flavor of classic red velvet cake with the soft, chewy texture of a bakery-style cookie bar. Every bite is packed with buttery sweetness, a hint of vanilla, and that signature vibrant red color that makes these dessert bars impossible to resist. Finished with a smooth cream cheese frosting and a sprinkle of festive decorations, they look just as stunning as they taste.
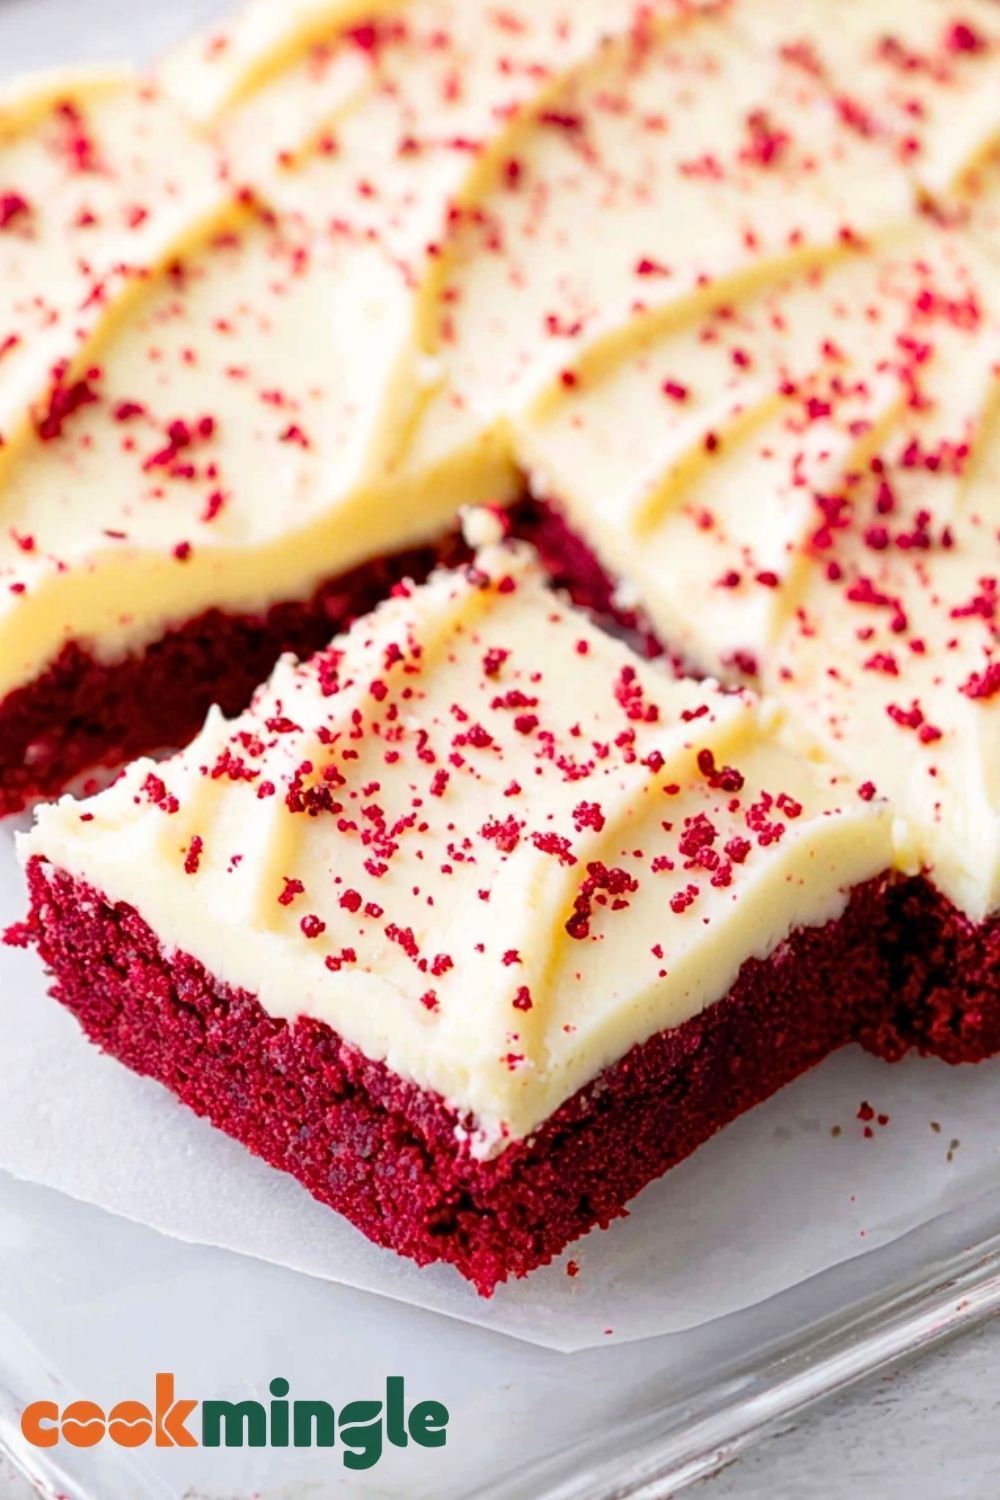
These bars are perfect for holidays, birthdays, Valentine’s Day, bake sales, or whenever you want an easy dessert that still feels special. Since everything bakes in one pan, you get all the flavor of homemade red velvet treats without the extra effort of shaping cookies individually. The result is a soft, fudgy dessert with creamy frosting layered on top for the ultimate indulgence.
Why You’ll Love This Red Velvet Cookie Bars Recipe
These Red Velvet Cookie Bars are easy to prepare, incredibly soft, and loaded with rich flavor. The chewy texture pairs beautifully with the creamy frosting, creating a dessert that feels both comforting and elegant. Because the bars are baked in a single pan, cleanup is simple and the recipe is beginner-friendly. They also slice neatly, making them ideal for parties, gifting, or storing for later treats. Whether you serve them chilled or at room temperature, they stay moist and delicious for days.
Preparation Phase & Tools to Use
Having the right tools ready before you begin will make the baking process smoother and help achieve perfect Red Velvet Cookie Bars every time. A 9×13-inch baking pan is essential for creating evenly baked bars with the ideal thickness. Mixing bowls are important for separating wet and dry ingredients, ensuring the batter blends evenly without overmixing. An electric mixer helps cream the butter and sugar properly, creating a soft and fluffy texture. Measuring cups and spoons guarantee accurate ingredient portions, which is especially important in baking. A silicone spatula is useful for scraping down the bowl and spreading the batter evenly into the pan. Finally, a cooling rack allows the bars to cool completely before frosting, preventing the cream cheese topping from melting.
Preparation Tips
For the best texture, make sure your butter and cream cheese are softened to room temperature before mixing. This helps create a smoother batter and frosting without lumps. Avoid overmixing once the flour is added, as this can make the cookie bars dense instead of soft and chewy. Line the baking pan with parchment paper for easy removal and cleaner slices. If you want bold red coloring, use gel food coloring rather than liquid food dye since it produces a richer color without thinning the batter. Allow the bars to cool completely before frosting so the topping stays thick, creamy, and beautifully spreadable.
Ingredients for This Red Velvet Cookie Bars Recipe
For the Cookie Bars
- 1 cup unsalted butter, softened
- 1 1/2 cups granulated sugar
- 2 large eggs, room temperature
- 2 teaspoons pure vanilla extract
- 1 tablespoon red gel food coloring
- 2 tablespoons unsweetened cocoa powder
- 2 1/2 cups all-purpose flour
- 1 teaspoon baking powder
- 1/2 teaspoon salt
- 1 tablespoon cornstarch
- 1/2 cup white chocolate chips (optional for extra sweetness)
For the Cream Cheese Frosting
- 8 ounces cream cheese, softened
- 1/2 cup unsalted butter, softened
- 3 cups powdered sugar
- 1 teaspoon vanilla extract
- Pinch of salt
Optional Toppings
- Red or pink sprinkles
- White chocolate shavings
- Crushed freeze-dried raspberries
- Mini chocolate chips
Step 1: Prepare the Baking Pan and Oven
Preheat your oven to 350°F (175°C). Grease a 9×13-inch baking pan lightly with butter or nonstick spray, then line it with parchment paper. Leave a little overhang on the sides so you can easily lift the bars out after baking. Preparing the pan correctly helps prevent sticking and ensures clean slices later.
Step 2: Cream the Butter and Sugar
In a large mixing bowl, use an electric mixer to beat the softened butter and granulated sugar together for 2 to 3 minutes until the mixture becomes light and fluffy. Proper creaming adds air to the batter, giving the bars a soft and tender texture instead of becoming dense.
Step 3: Add the Eggs and Flavorings
Add the eggs one at a time, mixing well after each addition. Stir in the vanilla extract and red gel food coloring until the color is evenly distributed throughout the batter. The rich red shade is what gives Red Velvet Cookie Bars their classic bakery-style appearance.
Step 4: Combine the Dry Ingredients
In a separate bowl, whisk together the flour, cocoa powder, baking powder, cornstarch, and salt. Mixing the dry ingredients separately ensures the cocoa and leavening agents distribute evenly throughout the dough.
Step 5: Mix the Dough
Gradually add the dry ingredients into the wet mixture while mixing on low speed. Stir only until combined. Overmixing can lead to tough cookie bars, so stop as soon as no streaks of flour remain. Fold in the white chocolate chips if using.
The dough will be thick, soft, and slightly sticky.
Step 6: Spread the Dough Into the Pan
Transfer the dough into the prepared baking pan. Use a silicone spatula or lightly greased hands to spread the dough evenly into all corners. Try to keep the surface level so the bars bake uniformly.
For an extra bakery-style finish, gently tap the pan on the counter a few times to remove air pockets.
Step 7: Bake the Red Velvet Cookie Bars
Place the pan in the preheated oven and bake for 20 to 25 minutes. The edges should look set while the center remains slightly soft. A toothpick inserted in the middle should come out with a few moist crumbs but not wet batter.
Be careful not to overbake, as the bars will continue to firm up while cooling.
Step 8: Cool Completely Before Frosting
Remove the pan from the oven and place it on a cooling rack. Let the bars cool completely inside the pan. Cooling fully is important because warm bars can melt the frosting and create a messy texture.
This resting time also helps the cookie bars develop a chewy consistency.
Step 9: Make the Cream Cheese Frosting
In a clean mixing bowl, beat the softened cream cheese and butter together until smooth and creamy. Gradually add the powdered sugar, one cup at a time, while mixing on low speed. Stir in the vanilla extract and a pinch of salt.
Continue mixing until the frosting becomes fluffy, silky, and easy to spread.
Step 10: Frost the Cookie Bars
Spread the cream cheese frosting evenly over the completely cooled cookie bars using an offset spatula or the back of a spoon. Create decorative swirls on top for a bakery-style presentation.
Add sprinkles, white chocolate shavings, or other toppings immediately before the frosting sets.
Step 11: Slice and Serve
Use the parchment paper overhang to lift the bars from the pan. Slice into squares or rectangles using a sharp knife. For extra clean cuts, wipe the knife between slices.
Serve chilled for a firmer texture or at room temperature for a softer, creamier bite.
These Red Velvet Cookie Bars pair perfectly with coffee, milk, hot chocolate, or vanilla ice cream.
Extra Flavor Variations
White Chocolate Red Velvet Bars
Fold extra white chocolate chips into the dough and drizzle melted white chocolate over the frosting for an even richer dessert.
Red Velvet Oreo Cookie Bars
Crush Oreo cookies and fold them into the dough before baking for added crunch and chocolate flavor.
Cheesecake Swirl Red Velvet Bars
Swirl sweetened cream cheese into the batter before baking to create a cheesecake-inspired version.
Holiday Red Velvet Bars
Decorate with seasonal sprinkles for Christmas, Valentine’s Day, birthdays, or baby showers.
Serving Suggestions
- Serve alongside fresh berries for a refreshing contrast.
- Pair with espresso or cappuccino for an elegant dessert pairing.
- Add a scoop of vanilla bean ice cream for a decadent dessert plate.
- Cut into bite-sized squares for dessert trays and parties.
- Wrap individual bars for gifting during holidays.
Notes
Red Velvet Cookie Bars are best when made with high-quality cocoa powder and full-fat cream cheese for the richest flavor and smoothest texture. Since this dessert relies on a soft and chewy consistency, slightly underbaking the bars is better than overbaking them. The centers should still look a little soft when removed from the oven because they will continue to set as they cool.
Using gel food coloring instead of liquid food dye creates a much deeper and more vibrant red shade without changing the consistency of the dough. If you prefer a more subtle color, you can reduce the amount of food coloring while still maintaining the classic red velvet flavor profile.
For cleaner slices, chill the frosted bars in the refrigerator for about 30 minutes before cutting. This helps the frosting firm up and gives the bars a polished bakery-style appearance. If serving for parties or special occasions, decorating with themed sprinkles instantly makes them look festive and eye-catching.
These cookie bars are versatile enough to customize with chocolate chips, chopped nuts, crushed cookies, or even a drizzle of melted chocolate. Whether you enjoy them chilled or at room temperature, they remain soft, creamy, and satisfying.
Watch Out for These Mistakes While Cooking
Overmixing the Dough
Mixing the dough too long after adding the flour can develop excess gluten, making the bars dense and tough instead of soft and chewy.
Overbaking the Bars
One of the most common mistakes is leaving the bars in the oven too long. The centers should still appear slightly soft when removed. Overbaking leads to dry, crumbly bars.
Frosting Warm Bars
Applying frosting before the bars have cooled completely will cause the cream cheese frosting to melt and slide around. Always wait until the bars are fully cooled.
Incorrect Measuring of Flour
Adding too much flour can make the dough dry and heavy. Spoon the flour into the measuring cup and level it off rather than scooping directly from the bag.
Using Cold Ingredients
Cold butter or cream cheese does not blend smoothly and can leave lumps in both the batter and frosting. Room temperature ingredients create a smoother texture.
Uneven Spreading in the Pan
If the dough is not spread evenly, some areas may bake faster than others. Use a spatula to level the dough carefully before baking.
Skipping the Parchment Paper
Without parchment paper, removing the bars from the pan becomes more difficult and can cause breakage.
Storage Instructions
Store Red Velvet Cookie Bars in an airtight container in the refrigerator for up to 5 days. Because of the cream cheese frosting, refrigeration helps maintain freshness and prevents the frosting from becoming too soft.
If stacking the bars, place parchment paper between layers to prevent sticking and smudging the frosting. Before serving, let the bars sit at room temperature for 10 to 15 minutes for the best texture and flavor.
For longer storage, freeze the unfrosted bars tightly wrapped in plastic wrap and aluminum foil for up to 2 months. Thaw overnight in the refrigerator before frosting and serving.
You can also freeze frosted bars individually by placing them on a baking sheet until firm, then transferring them to a freezer-safe container.
Estimated Nutrition
Per Serving (Based on 16 Bars)
- Calories: 320
- Carbohydrates: 42g
- Protein: 3g
- Fat: 16g
- Saturated Fat: 10g
- Cholesterol: 55mg
- Sodium: 180mg
- Sugar: 30g
- Fiber: 1g
Nutritional values may vary depending on ingredient brands, portion sizes, and optional mix-ins or toppings.
Frequently Asked Questions
Can I make Red Velvet Cookie Bars ahead of time?
Yes, these bars are excellent for making ahead. You can prepare them one or two days in advance and store them in the refrigerator until ready to serve.
Can I freeze Red Velvet Cookie Bars?
Absolutely. Both frosted and unfrosted bars freeze well when stored properly in airtight containers.
What makes red velvet different from chocolate desserts?
Red velvet has a lighter cocoa flavor compared to traditional chocolate desserts and is known for its subtle tanginess and vibrant red color.
Can I use liquid food coloring instead of gel?
Yes, but gel food coloring is recommended because it provides a deeper color without thinning the dough.
How do I know when the bars are done baking?
The edges should look set while the center remains slightly soft. A toothpick inserted into the center should come out with moist crumbs.
Can I use store-bought frosting?
Yes, store-bought cream cheese frosting works if you want a quicker option, though homemade frosting gives the best flavor and texture.
Can I make these bars without frosting?
Definitely. The bars are delicious on their own and still have a rich, buttery flavor even without frosting.
What toppings work best with Red Velvet Cookie Bars?
Sprinkles, white chocolate shavings, mini chocolate chips, crushed cookies, and fresh berries all pair beautifully with these bars.
Conclusion
Red Velvet Cookie Bars combine the rich flavor of classic red velvet cake with the convenience and chewy texture of cookie bars, creating a dessert that feels both elegant and effortless. Their vibrant color, creamy frosting, and soft center make them perfect for holidays, parties, bake sales, or everyday dessert cravings.
Because they are simple to prepare in one pan, these bars are ideal for beginner bakers while still impressive enough for special occasions. With endless topping and flavor variations, you can easily customize them to fit any celebration or personal preference.
Once you try these soft and decadent Red Velvet Cookie Bars, they are sure to become a favorite dessert everyone requests again and again.
Red Velvet Cookie Bars
- Total Time: 45 minutes
- Yield: 16 bars
- Diet: Vegetarian
Description
These Red Velvet Cookie Bars are soft, chewy, rich, and topped with a smooth cream cheese frosting that melts in every bite. They combine the classic flavor of red velvet cake with the convenience of easy cookie bars, making them perfect for holidays, Valentine’s Day desserts, birthday treats, bake sales, quick dessert ideas, and easy party recipes. With their vibrant red color, fudgy texture, and creamy topping, these bars are a crowd-pleasing dessert that looks bakery-worthy while being simple enough for beginner bakers.
Whether you need an easy dessert recipe, festive food ideas, or a make-ahead sweet treat, these Red Velvet Cookie Bars deliver incredible flavor with minimal effort. Everything bakes in one pan for easy cleanup and perfectly soft bars every time.
Ingredients
1 cup unsalted butter softened
1 1/2 cups granulated sugar
2 large eggs room temperature
2 teaspoons vanilla extract
1 tablespoon red gel food coloring
2 tablespoons unsweetened cocoa powder
2 1/2 cups all-purpose flour
1 teaspoon baking powder
1/2 teaspoon salt
1 tablespoon cornstarch
1/2 cup white chocolate chips optional
8 ounces cream cheese softened
1/2 cup unsalted butter softened
3 cups powdered sugar
1 teaspoon vanilla extract
Pinch of salt
Red sprinkles
White chocolate shavings
Mini chocolate chips
Crushed freeze-dried raspberries
Instructions
1. Preheat the oven to 350°F (175°C). Grease and line a 9×13-inch baking pan with parchment paper.
2. In a large mixing bowl, beat the softened butter and granulated sugar until light and fluffy.
3. Add the eggs one at a time, mixing well after each addition.
4. Mix in the vanilla extract and red food coloring until fully combined.
5. In a separate bowl, whisk together the flour, cocoa powder, baking powder, salt, and cornstarch.
6. Gradually add the dry ingredients into the wet ingredients and mix until just combined.
7. Fold in the white chocolate chips if using.
8. Spread the dough evenly into the prepared baking pan.
9. Bake for 20 to 25 minutes or until the edges are set and the center is slightly soft.
10. Remove from the oven and allow the bars to cool completely.
11. For the frosting, beat the cream cheese and butter together until smooth.
12. Add the powdered sugar gradually and mix until fluffy.
13. Stir in the vanilla extract and pinch of salt.
14. Spread the frosting evenly over the cooled cookie bars.
15. Decorate with sprinkles or toppings of choice.
16. Slice into bars and serve.
Notes
Do not overbake the bars because they continue setting while cooling and stay softer with a slightly underbaked center.
Use gel food coloring instead of liquid food coloring for a more vibrant red color without thinning the batter.
Allow the bars to cool completely before frosting to keep the cream cheese frosting thick and smooth.
- Prep Time: 20 minutes
- Cook Time: 25 minutes
- Category: Dessert
- Method: Baking
- Cuisine: American
Nutrition
- Serving Size: 1 bar
- Calories: 320
- Sugar: 30g
- Sodium: 180mg
- Fat: 16g
- Saturated Fat: 10g
- Unsaturated Fat: 5g
- Trans Fat: 0g
- Carbohydrates: 42g
- Fiber: 1g
- Protein: 3g
- Cholesterol: 55mg