

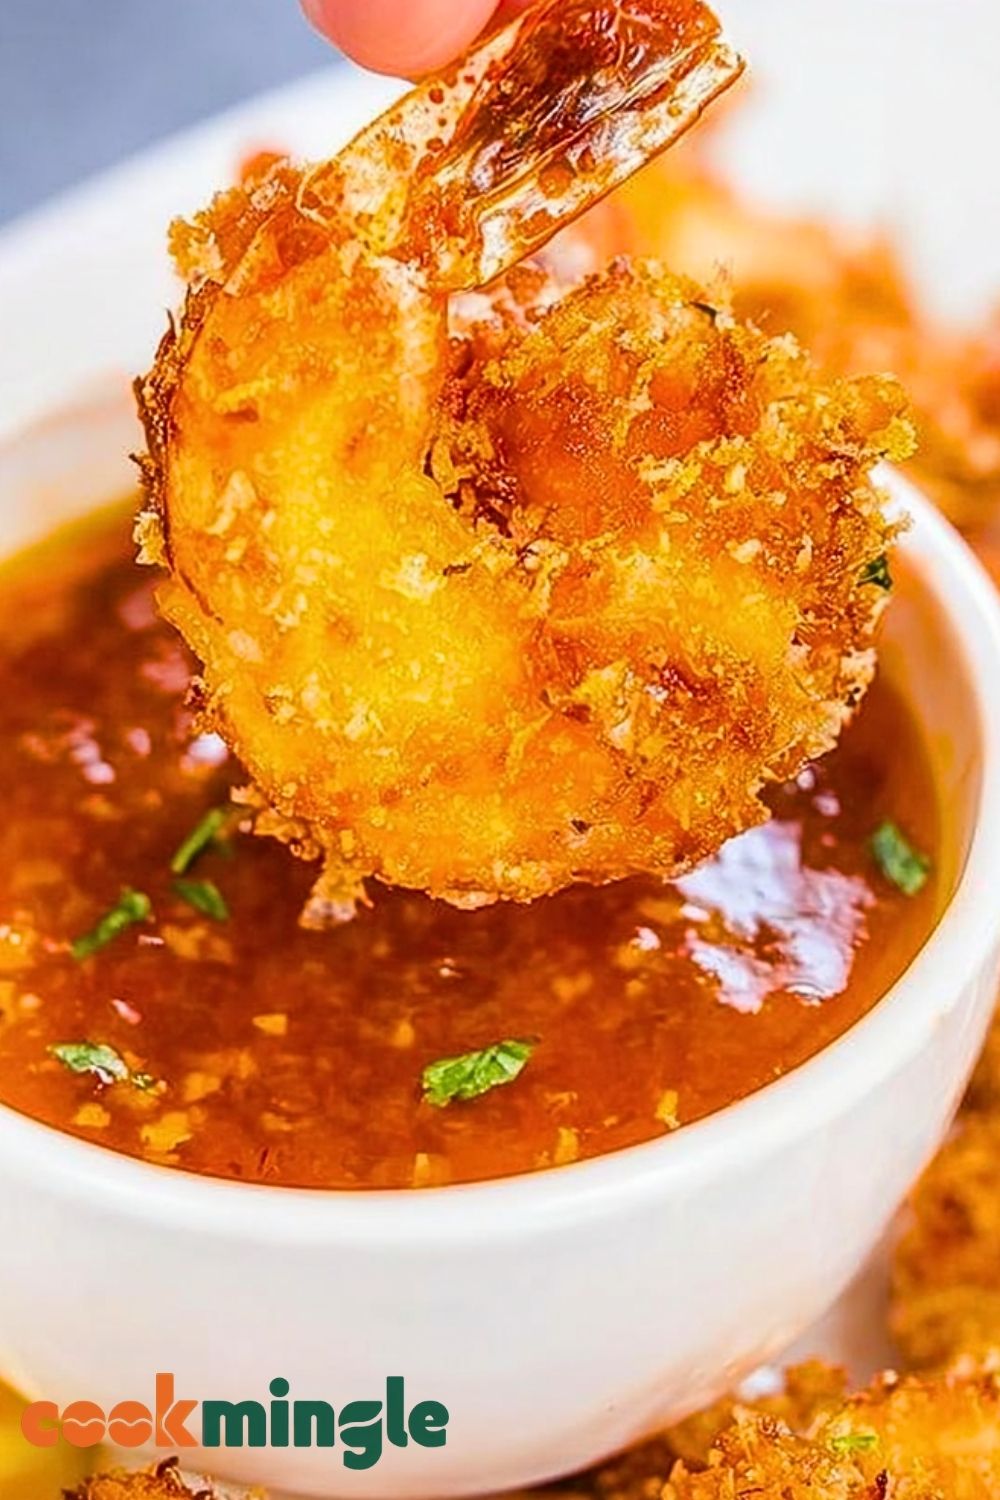
I still remember the first time I made Coconut Shrimp at home and realized just how easy it was to recreate that crispy restaurant-style texture in my own kitchen. The combination of crunchy coconut coating and juicy shrimp creates the kind of appetizer that disappears from the plate in minutes. Every bite has that perfect balance of sweetness, savoriness, and crunch that keeps everyone reaching for more.
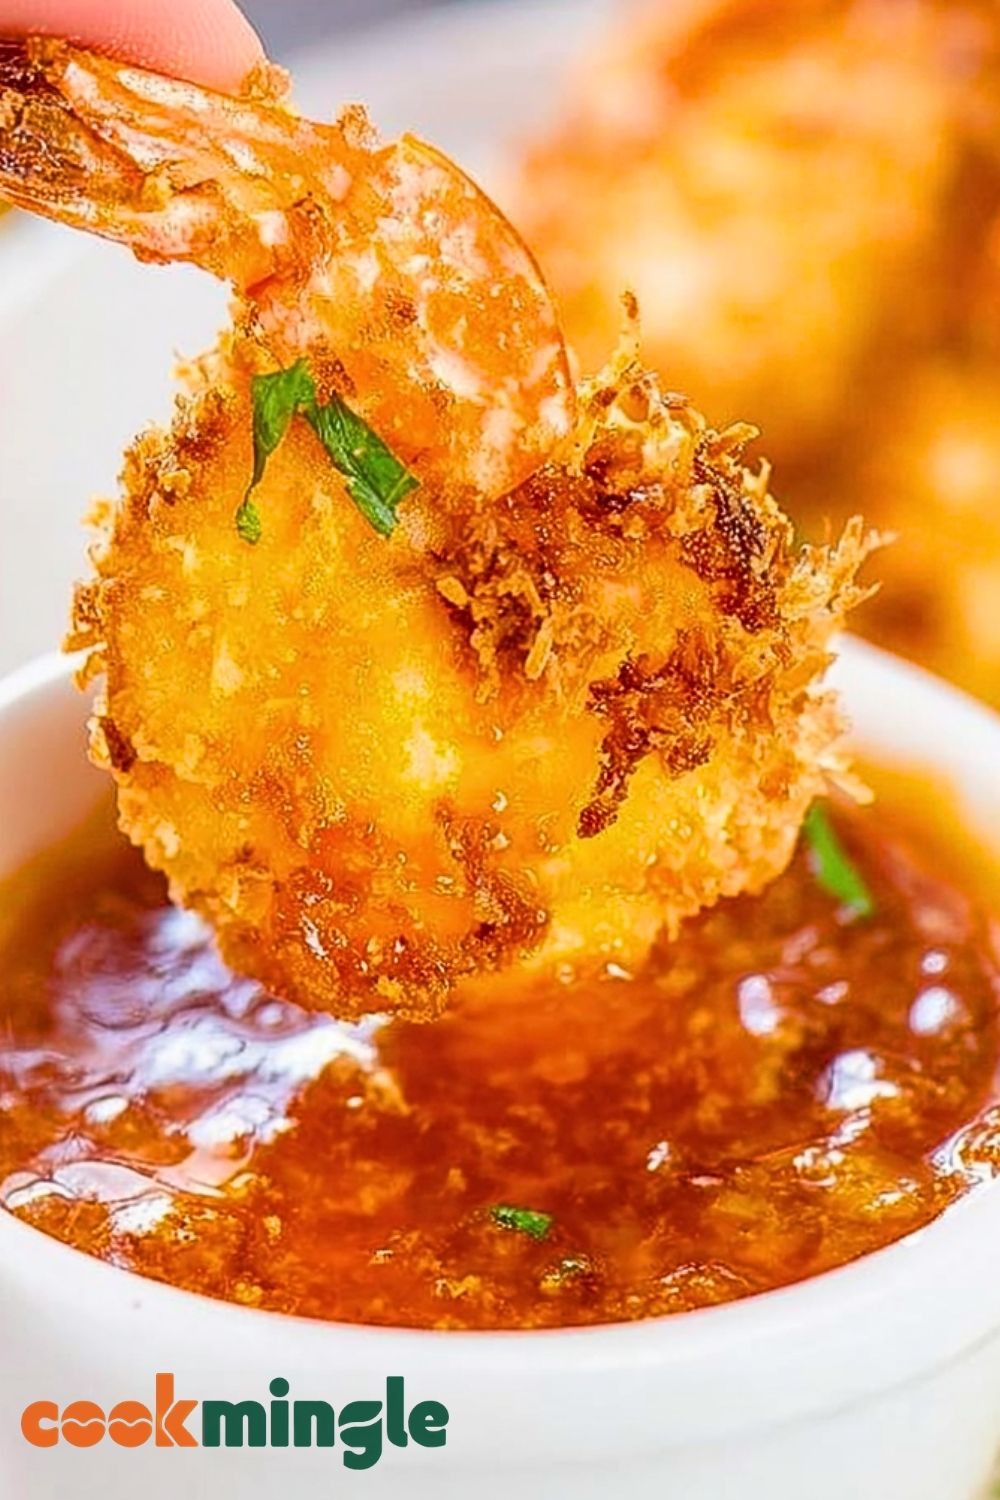
What I enjoy most about Coconut Shrimp is how versatile it can be. It works beautifully as a party appetizer, a fun dinner option, or even a weekend snack when I want something comforting and impressive without spending hours cooking. Pair it with a sweet chili sauce or a tropical dip, and it instantly feels like something served at a seaside restaurant.
Why You’ll Love This Coconut Shrimp
Coconut Shrimp delivers a crispy golden coating that stays crunchy while the shrimp inside remains tender and flavorful. The coconut adds a slightly sweet flavor that pairs perfectly with savory seasonings and dipping sauces.
Another reason this recipe stands out is how quickly it comes together. With just a few simple ingredients and easy preparation steps, you can create a dish that looks and tastes special without complicated techniques.
It is also incredibly flexible. You can fry, bake, or air fry the shrimp depending on your preference, making it suitable for different cooking styles while still delivering excellent texture and flavor.
What Kind of Shrimp Should I Use?
Large or jumbo shrimp work best for Coconut Shrimp because they stay juicy during cooking and provide the perfect balance between shrimp and crispy coating. Using shrimp that are already peeled and deveined can save preparation time, though keeping the tails on creates a more appealing presentation and makes dipping easier.
Fresh shrimp always offer wonderful flavor, but frozen shrimp are also a fantastic option when properly thawed. Just make sure to pat them dry before breading so the coating sticks evenly and crisps up beautifully.
If possible, choose shrimp with a firm texture and mild ocean scent. Avoid shrimp that smell overly fishy or appear slimy, as freshness plays an important role in the final flavor.
Options for Substitutions
If you do not have sweetened shredded coconut, unsweetened coconut can be used for a less sweet version while still providing excellent crunch and texture.
Panko breadcrumbs are commonly added for extra crispiness, but crushed crackers or regular breadcrumbs can work as substitutes if needed.
For a gluten-free variation, swap traditional flour and breadcrumbs with gluten-free alternatives. The shrimp will still turn out crisp and flavorful.
You can also replace the usual frying oil with an air fryer method for a lighter version that still offers satisfying crunch.
When it comes to dipping sauces, sweet chili sauce is a classic choice, but mango salsa, pineapple sauce, or spicy mayo can all bring a delicious twist to Coconut Shrimp.
Ingredients for This Coconut Shrimp
Shrimp
Large or jumbo shrimp are the heart of this recipe. They provide a juicy, tender center that contrasts beautifully with the crispy coconut coating. Keeping the tails on also makes the shrimp easier to hold while dipping.
Flour
Flour helps create the first layer of coating and allows the egg mixture to stick properly to the shrimp. It forms the base that helps all the crispy ingredients stay attached during cooking.
Eggs
Eggs act as the binding ingredient that keeps the coconut and breadcrumb coating firmly attached to the shrimp. They also contribute to the golden color once cooked.
Shredded Coconut
Sweetened shredded coconut gives Coconut Shrimp its signature flavor and crunchy texture. As it cooks, the coconut becomes beautifully toasted and adds a slightly sweet finish.
Panko Breadcrumbs
Panko breadcrumbs provide extra crispiness and help prevent the coating from becoming too dense. They create that light and airy crunch that makes Coconut Shrimp so satisfying.
Salt
Salt enhances all the flavors in the recipe and helps season both the shrimp and coating evenly.
Black Pepper
Black pepper adds a mild warmth that balances the sweetness of the coconut.
Garlic Powder
Garlic powder brings savory depth and prevents the coating from tasting flat.
Paprika
Paprika contributes subtle smoky flavor and helps create a richer golden color when frying.
Oil for Frying
A neutral oil with a high smoke point is ideal for frying Coconut Shrimp because it allows the coating to crisp without burning.
Sweet Chili Sauce
Sweet chili sauce is the perfect dipping companion because it complements the crispy coconut coating with a balance of sweetness and gentle heat.
Step 1: Prepare the Shrimp
Start by peeling and deveining the shrimp if they are not already cleaned. Leave the tails attached for a more attractive presentation and easier handling while dipping.
Pat the shrimp completely dry using paper towels. Removing excess moisture is very important because wet shrimp can prevent the coating from sticking properly.
Arrange the shrimp on a plate and lightly season them with salt and black pepper to build flavor from the inside out.
Step 2: Set Up the Breading Station
Prepare three separate bowls to create an organized breading station.
In the first bowl, add flour along with garlic powder, paprika, salt, and pepper.
In the second bowl, whisk the eggs until smooth and fully combined.
In the third bowl, mix shredded coconut with panko breadcrumbs. Combining the two creates a coating that is both crispy and flavorful.
Keeping the breading station organized makes the coating process faster and less messy.
Step 3: Coat the Shrimp
Take each shrimp and coat it lightly in the seasoned flour mixture. Shake off any excess flour before moving to the next step.
Dip the shrimp into the beaten eggs, making sure every surface is covered evenly.
Finally, press the shrimp into the coconut and breadcrumb mixture. Gently press the coating onto the shrimp so it adheres well and creates a thick crunchy crust.
Place the coated shrimp on a tray and repeat the process until all shrimp are fully breaded.
Step 4: Chill the Breaded Shrimp
For the crispiest results, place the breaded shrimp in the refrigerator for about 15 to 20 minutes before frying.
This short chilling time helps the coating firm up and reduces the chances of it falling off during cooking.
It also helps the coconut mixture stay evenly attached to the shrimp while creating a crispier final texture.
Step 5: Heat the Oil
Pour oil into a deep skillet or heavy-bottomed pan until it reaches a safe frying depth.
Heat the oil over medium-high heat until it reaches approximately 350°F. Proper oil temperature is important because oil that is too cool can make the shrimp greasy, while oil that is too hot can burn the coconut coating before the shrimp cook through.
To test the oil, drop in a small amount of breadcrumb mixture. If it sizzles immediately, the oil is ready.
Step 6: Fry the Coconut Shrimp
Carefully place a few shrimp into the hot oil without overcrowding the pan. Cooking in small batches helps maintain the oil temperature and ensures even crispiness.
Fry the shrimp for about 2 to 3 minutes per side or until the coating becomes deep golden brown and crispy.
The shrimp should curl slightly and become opaque once fully cooked.
Use a slotted spoon or tongs to transfer the cooked shrimp to a paper towel-lined plate to drain excess oil.
Step 7: Prepare an Air Fryer Version
If you prefer a lighter option, arrange the breaded shrimp in a single layer inside an air fryer basket.
Lightly spray the shrimp with cooking spray to help the coating crisp up.
Cook at 400°F for approximately 8 to 10 minutes, flipping halfway through cooking for even browning.
The air fryer method creates wonderfully crispy Coconut Shrimp with less oil while still maintaining excellent flavor.
Step 8: Bake the Coconut Shrimp
For an oven-baked version, place the shrimp on a parchment-lined baking sheet.
Lightly spray or drizzle the shrimp with oil to encourage browning.
Bake at 425°F for about 12 to 15 minutes, turning once halfway through cooking.
Baking creates a slightly lighter texture while still delivering delicious crunch and toasted coconut flavor.
Step 9: Make the Dipping Sauce
While the shrimp cook, prepare your preferred dipping sauce.
Sweet chili sauce is a classic option because it balances sweetness with gentle heat.
You can also combine mayonnaise with sriracha for a creamy spicy dip or mix pineapple preserves with lime juice for a tropical twist.
Fresh dipping sauces add brightness and extra flavor to the finished dish.
Step 10: Serve the Coconut Shrimp
Arrange the hot Coconut Shrimp on a serving platter with dipping sauces on the side.
Garnish with chopped parsley, sliced green onions, or fresh lime wedges for extra color and freshness.
Serve immediately while the coating is hot and crispy for the best texture and flavor.
Coconut Shrimp pairs beautifully with rice, fresh salads, tropical fruit, or even crispy fries for a complete meal.
How Long to Prepare Coconut Shrimp
Coconut Shrimp is one of those recipes that feels impressive without requiring an entire afternoon in the kitchen. Most of the preparation time goes into coating the shrimp properly, but once the breading station is set up, the process becomes quick and easy. If the shrimp are already peeled and deveined, preparation moves even faster.
For most home cooks, preparing the shrimp, setting up the coating mixtures, and breading everything usually takes around 20 to 25 minutes. Chilling the breaded shrimp for a short time before cooking can add another 15 to 20 minutes, but this step helps the coating stay crisp and attached during frying.
The actual cooking time is surprisingly fast. Shrimp cook very quickly, often requiring only 2 to 3 minutes per side when frying. Air fryer and oven methods may take slightly longer, but they still remain convenient options for busy days.
Preparation Time
- Cleaning and drying shrimp: 10 minutes
- Preparing coating ingredients: 5 minutes
- Breading shrimp: 10 minutes
- Optional chilling time: 15 to 20 minutes
Cooking Time
- Frying: 4 to 6 minutes total
- Air frying: 8 to 10 minutes
- Baking: 12 to 15 minutes
Total Estimated Time
Depending on the cooking method, Coconut Shrimp can usually be completed in about 35 to 50 minutes from start to finish.
Tips for Perfect Coconut Shrimp
Dry the Shrimp Thoroughly
Moisture is one of the biggest reasons coatings fail to stick properly. Patting the shrimp dry before breading helps the flour and egg adhere evenly.
Use Large Shrimp
Larger shrimp stay juicy during cooking and are less likely to overcook before the coating becomes crispy.
Combine Coconut with Panko
Using only coconut can sometimes create a dense texture. Mixing coconut with panko breadcrumbs gives the shrimp a lighter and crunchier coating.
Chill Before Cooking
Allowing the coated shrimp to rest in the refrigerator for a short time helps the breading firm up and reduces coating loss while frying.
Maintain Proper Oil Temperature
Keeping the oil around 350°F creates the ideal balance between crispy coating and properly cooked shrimp. Too much heat burns the coconut quickly, while low heat causes soggy shrimp.
Avoid Overcrowding the Pan
Cooking too many shrimp at once lowers the oil temperature and prevents even browning. Frying in smaller batches creates a crispier result.
Serve Immediately
Coconut Shrimp tastes best when served fresh and hot. The coating stays at its crispiest right after cooking.
Watch Out for These Mistakes While Cooking
Skipping the Drying Step
Wet shrimp can make the coating slide off during frying. Always dry the shrimp thoroughly before breading.
Burning the Coconut
Coconut browns faster than regular breadcrumbs because of its natural sugars. Cooking over excessively high heat can quickly burn the coating before the shrimp finish cooking.
Overcooking the Shrimp
Shrimp cook very fast. Leaving them in the oil or oven too long can turn them rubbery instead of tender and juicy.
Using Too Much Coating
A coating that is too thick may not cook evenly and can become heavy instead of crisp.
Not Pressing the Coating Firmly
Gently pressing the coconut mixture onto the shrimp helps it stay attached during cooking.
Frying in Cool Oil
Oil that is not hot enough causes the shrimp to absorb excess oil, resulting in a greasy texture.
Forgetting to Season the Layers
Seasoning only the outside can lead to bland shrimp. Light seasoning throughout the breading process creates more balanced flavor.
What to Serve With Coconut Shrimp?
Tropical Mango Salsa
Fresh mango salsa adds sweetness and brightness that pairs beautifully with the crispy coconut coating. The juicy fruit balances the savory fried shrimp while adding refreshing flavor.
Coconut Rice
Creamy coconut rice creates a tropical-inspired side dish that complements the sweet coconut flavor in the shrimp. The soft texture also contrasts nicely with the crunchy coating.
Fresh Garden Salad
A crisp green salad with citrus dressing helps lighten the meal and adds freshness to the plate.
Sweet Potato Fries
Sweet potato fries create a delicious balance of crispy textures and subtle sweetness that works perfectly alongside Coconut Shrimp.
Pineapple Coleslaw
Pineapple coleslaw brings crunch, creaminess, and fruity flavor that matches the tropical feel of the dish.
Storage Instructions
Storing Leftover Coconut Shrimp
Allow the shrimp to cool completely before storing them. Place them in an airtight container lined with paper towels to absorb excess moisture and help preserve crispiness.
Stored properly in the refrigerator, Coconut Shrimp can last for up to 3 days.
Reheating for Best Texture
The best way to reheat Coconut Shrimp is in an oven or air fryer. This helps restore the crispy coating without making the shrimp soggy.
Reheat at 375°F for about 5 to 7 minutes or until heated through.
Avoid microwaving whenever possible because it softens the crispy coating.
Freezing Instructions
Breaded uncooked shrimp can be frozen before frying. Arrange them on a tray until frozen solid, then transfer them to a freezer-safe container.
Frozen breaded shrimp can be stored for up to 2 months.
Cook directly from frozen by adding a few extra minutes to the cooking time.
Estimated Nutrition
The nutritional values can vary depending on the size of the shrimp, type of coconut used, and cooking method.
Approximate Nutrition Per Serving
- Calories: 420
- Protein: 24g
- Carbohydrates: 28g
- Fat: 22g
- Saturated Fat: 12g
- Cholesterol: 190mg
- Sodium: 620mg
- Fiber: 3g
- Sugar: 7g
Air frying or baking the shrimp may reduce the overall fat content while still keeping the dish flavorful and crispy.
Frequently Asked Questions
Can I use frozen shrimp for Coconut Shrimp?
Yes, frozen shrimp work very well for this recipe. Make sure they are fully thawed and thoroughly dried before breading.
Can I make Coconut Shrimp ahead of time?
Yes, you can bread the shrimp several hours ahead and refrigerate them until ready to cook.
What oil is best for frying Coconut Shrimp?
Neutral oils with high smoke points such as vegetable oil, canola oil, or peanut oil are excellent choices.
Can I bake Coconut Shrimp instead of frying?
Absolutely. Baking creates a lighter version while still providing a crispy texture when lightly sprayed with oil.
Why is my coating falling off?
This usually happens when the shrimp are too wet, the coating is not pressed firmly enough, or the shrimp were moved too much during cooking.
Conclusion
Coconut Shrimp combines juicy seafood with a crispy golden coating that feels both comforting and impressive. The sweet coconut flavor paired with crunchy breadcrumbs creates a dish that works beautifully as an appetizer, party snack, or complete meal.
One of the best things about Coconut Shrimp is how customizable it can be. Whether you choose to fry, bake, or air fry the shrimp, the result is still packed with flavor and texture. Pair it with tropical sides and your favorite dipping sauce, and you have a recipe that instantly feels special.
With the right techniques, fresh ingredients, and a little attention to detail, homemade Coconut Shrimp can rival any restaurant version while being surprisingly simple to prepare in your own kitchen.
Coconut Shrimp
- Total Time: 35 minutes
- Yield: 4 servings
Description
Crispy, golden, and packed with tropical flavor, Coconut Shrimp is the perfect combination of crunchy coconut coating and juicy shrimp. This easy recipe creates restaurant-style shrimp at home with simple ingredients and a perfectly crispy texture. Whether you need a quick appetizer, easy dinner idea, party snack, or seafood recipe for special occasions, this Coconut Shrimp delivers incredible flavor in every bite.
The lightly sweet coconut pairs beautifully with savory seasonings and tender shrimp, while the crispy coating makes each bite irresistibly crunchy. Serve it with sweet chili sauce, spicy mayo, or tropical fruit salsa for a crowd-pleasing dish that works for family dinners, game days, summer gatherings, and seafood lovers looking for easy food ideas.
Ingredients
1 lb jumbo shrimp, peeled and deveined with tails on
1/2 cup all-purpose flour
2 large eggs
1 cup sweetened shredded coconut
1 cup panko breadcrumbs
1 tsp salt
1/2 tsp black pepper
1 tsp garlic powder
1/2 tsp paprika
2 cups vegetable oil for frying
1/2 cup sweet chili sauce for serving
1 tbsp chopped parsley for garnish
1 lime, cut into wedges
Instructions
1. Pat the shrimp completely dry using paper towels and lightly season with salt and black pepper.
2. Prepare three bowls for breading. Add flour, garlic powder, paprika, salt, and pepper to the first bowl.
3. Whisk the eggs in the second bowl until smooth.
4. Combine shredded coconut and panko breadcrumbs in the third bowl.
5. Coat each shrimp first in the flour mixture, then dip into the eggs, and finally press into the coconut mixture until fully coated.
6. Arrange the breaded shrimp on a tray and refrigerate for 15 to 20 minutes to help the coating stick better.
7. Heat vegetable oil in a deep skillet to 350°F.
8. Fry the shrimp in small batches for 2 to 3 minutes per side until golden brown and crispy.
9. Transfer cooked shrimp to a paper towel-lined plate to remove excess oil.
10. Garnish with parsley and serve immediately with sweet chili sauce and lime wedges.
Notes
Use jumbo shrimp for the juiciest texture and best presentation.
Chilling the breaded shrimp before frying helps the coating stay attached and crisp during cooking.
Maintain the oil temperature around 350°F to avoid greasy shrimp or burned coconut coating.
- Prep Time: 25 minutes
- Cook Time: 10 minutes
- Category: Appetizer
- Method: Frying
- Cuisine: American Seafood
Nutrition
- Serving Size: 1 serving
- Calories: 420
- Sugar: 7g
- Sodium: 620mg
- Fat: 22g
- Saturated Fat: 12g
- Unsaturated Fat: 8g
- Trans Fat: 0g
- Carbohydrates: 28g
- Fiber: 3g
- Protein: 24g
- Cholesterol: 190mg